October 09, 2013
Adapting a block pattern into something else pt. 1 : Noting changes for the new style
A block pattern is a sewing pattern that has been proven. It is a pattern that has been trued, perfected and finished with seam allowances. The pattern has been sewn up and tested for fit. In other words, a block pattern just works. A block pattern becomes a part of a pattern file which can be used to make other patterns.
In the industry we rarely draft from scratch. Instead we modify existing patterns (or blocks) into something else. Some pattern making gurus talk about using slopers. Slopers are basic patterns drafted from body measurements and do not have seam allowances. Industry level pattern makers use block patterns, with seam allowances on, to make patterns for new styles*. It saves time.
It's easier than you might think to do this and this is just one example. I'm sure other pattern makers have their own procedures. My own procedures adapt to whatever it is I'm working on and whether I'm using CAD or traditional methods.
The problem:
I have this much loved cashmere sweater jacket. I snagged it off a sales rack a couple of years ago and I absolutely love the cut and fit. You know, the perfect layering piece, warm and soft for those cool days. I usually clean it by running it through the dryer using a Dryel kit. This last time was a disaster as I had left a piece of chocolate in a pocket. Chocolate ended up all over the sweater and everything else. So, I decided to run it through the hand wash cycle on my washer. That was a mistake. While the chocolate did come out, the sweater shrank. It shrunk just enough that I'm not sure I can wear it anymore. It made me very sad. And yes, I know better. I should have hand washed it.
The solution:
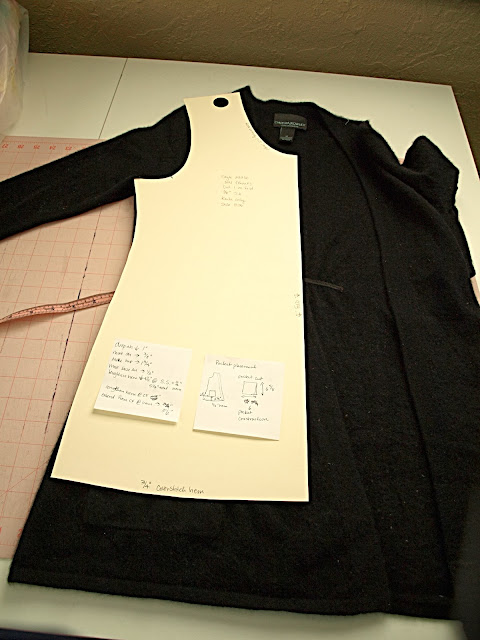
I always said that once this sweater was in pieces, I would make up a pattern to make a new one. So here it is. I recently finished up my t-shirt pattern, a block pattern ready to go. I began by carefully laying out the sweater and positioning the front t-shirt pattern on top. I then used scraps of paper to note the differences between the sweater and the pattern. You can see my notes in the picture above.
The notes** usually say something like: Move SH pt out 1/2" (left arrow) ; or Extend hem (down arrow) 3 inches. These notes are sometimes accompanied with drawings as needed. If I was working in CAD, I would just mentally note the differences and make the changes as as I went along. Since I'm drafting with pencil and paper, the notes are essential.
The next step is to trace off the t-shirt pattern and start applying the changes. More on that later.
*There are a lot of pattern making myths out there. I'm trying to keep this blog entry very focused but I'm happy to answer pattern making questions and myths in future posts. Please leave your question or comment below.
**These notes eventually find their way to my pattern piece catalog. I assign a pattern piece number, note the style/pattern piece that the new piece came from, and then tell what changes were applied and any other relevant details. Blank forms for managing patterns are available in my Pattern Making bundle or in the book with complete instructions.
Subscribe to:
Post Comments (Atom)


No comments:
Post a Comment