Showing posts with label Personal Projects. Show all posts

November 11, 2019

Follow-up on free motion quilting on a Singer Rocketeer

After leaving this project sitting for months, I could not convince myself to actually use my Singer 503A to machine quilt one of my quilts.

Results of free motion quilting on a Singer 503A

None of my samples were really satisfactory. The effort to push this small sample under the foot in an all-over swirl pattern was much more work than it should be. I actually had to push and pull the sample with some effort, which is not normal. I had a hard time visualizing myself doing this for a queen size quilt. With a proper foot or machine, it would be easier and probably fun.

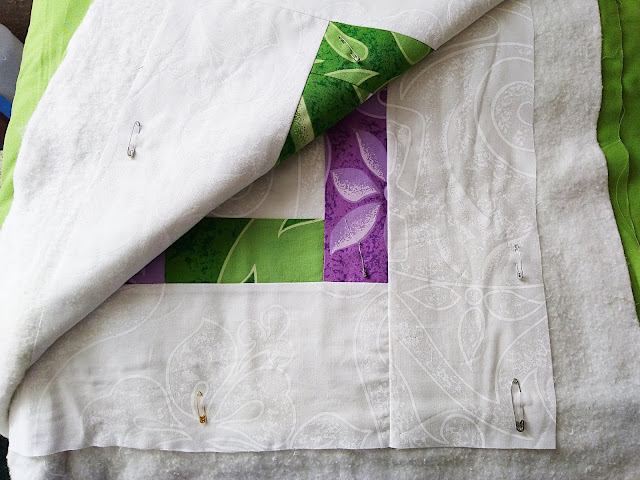
So the decision is made and I will likely be hand quilting my Hawaiian quilt instead. I used safety pins to baste it together.

Basted Hawaiian quilt ready for quilting


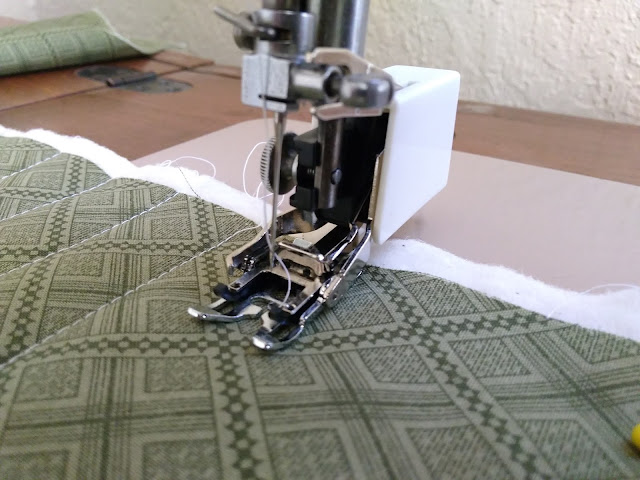
As an alternative, I also purchased a walking foot attachment. This attachment actually works well. It does have a cheap feel, so I'm not sure about long term durability. If I choose to quilt in straight lines, then, this is a possibility I may use this attachment on my next quilt.

Singer slant walking foot attachment

*Amazon links are affiliate links.

January 07, 2019

Free motion quilting on a Singer 503a Rocketeer

**This tutorial is a work in progress and will be updated as I practice more.

After finishing up the piecing of the Patches and Pinwheels quilt, I began debating on how to quilt it. Do I quilt it myself on my Singer Rocketeer? Do I handquilt? Do I pay someone to do it for me? I am still debating on this quilt because it is so big but I do have my smaller Hawaiian quilt that I may try.

I did buy an aftermarket free motion/embroidery foot from Amazon. The Singer Rocketeer has a slant shank and there are two versions of a free motion foot. The first is a spring design and the second use a curved piece of metal as the spring. The second version has technically been discontinued but you can pick it up on ebay. The spring design is available from various sources.

Free motion quilting foot on a Singer 503A

Free motion quilting foot on a Singer 503A

This version is made by Honeysew and is available on Amazon for about $9.00. My understanding is that as the needle bar moves, the bar at the top of the spring lifts the foot so it hops as you sew. Having never used something like this, I don't know if that is true. In this case that little bar is at least a 1/2" above the needle bar and does not ever touch. In other words, it doesn't work the way I think it is supposed to work.

I had to refer to the machine manual and Amazon review comments to figure out how to make this work. The interesting thing about this Singer and many older models is that the instructions for free motion embroidery and darning instruct you to remove the presser foot and use a bare needle!

Singer 503 manual on Darning

This setup requires the use of a hoop, which is not practical for a quilt. Also, it exposes your fingers to the needle much more easily if you are not paying attention! So after a bit of trial and error, I eventually figured out the best setup. The manual has instruction on a few different pages, so I missed a few key steps at first.

1. Set the pressure to the "D" setting. This dial is on the inside of the machine and the "D" and is for Darning. This setting removes all pressure off the foot. This will allow you to move the fabric under the needle.

The D or Darning setting on a Singer 503 Rocketeer

2. Lift the feed dog plate.

Lift the feed dog plate for darning on a Singer 503A

3. Tension settings may need to be adjusted. I loosened it a bit only to turn it back to my normal setting. This may depend on your machine, thread, etc.

4. Bring the bobbin thread to the top and sew a little slower at first. It will take practice to determine the ideal speed for you. Also, I ended up wearing garden gloves with that nylon coating to help move the fabric under the needle.

My initial results are not pretty, but I think with a bit more practice I may be able to do free motion quilting on this machine.

Free motion quilting on a Singer 503 Rocketeer

If you have done free motion quilting on your sewing machine, please leave a comment on what machine you used and how it went.

*Links to Amazon are affiliate links.

January 01, 2019

Patches and Pinwheels pt. 4

I love making serious progress on a long term project on New Year's Eve and Day. This year is no exception. I have finished the piecing and borders on the Patches and Pinwheels quilt. (More pictures will come after the quilting is finished). The quilt measures about 96 x 96 inches.

Patches and pinwheels quilt top

I had enough yardage of the green border fabric to also use it for the backing. If I were to buy "quilt" shop quality fabric, the backing alone would have been at least $100. I did not spend anywhere near that amount. The green fabric was left over from a purchase made several years ago and I can't remember what I paid for it. I'm glad I found a project for it because the fabric had been sitting all those years. The majority of the fabrics for the pieced blocks came from DH's shirts that were worn through in the collars and cuffs, but still had good fabric in the body. I supplemented with a few shirts from the thrift store and a few white fat quarters. All told I spent about $15 for the fabric (plus whatever the green cost several years ago). All that's left is to buy a batting and then decide on the quilting. Do I pay someone to quilt it or do it myself? I am undecided there.

Which brings me to the cost of quilting fabric today. I know for many this is a fun hobby, but the cost of quilting fabric is just so crazy high right now. $12-$15/yard for fabric! I know there are some alternatives and I can shop sales, but yikes! This is why I have turned to the thrift store and scrappy quilts. I don't have a problem using clothing for quilting fabric. It's what our mothers and grandmothers did years ago out of necessity. Now, I wonder if it is wasteful just to toss our old clothes? Sure, some are suitable for donation (and I do donate a lot). But there are some things that could be useful for something like this. This quilt project has definitely made me look at thrift stores as a new source for supplies.

This is a Bonnie Hunter design. I chose to try one of Bonnie's designs to better understand her process. I think she designs quilts in two different ways. I do think many of her designs are created using eQuilter. While she does incorporate scraps into her designs, the overall visual affect can only be achieved by using a design tool like eQuilter (She has dropped hints that she does use the software). Her method of using standard piece sizes also makes a difference in efficiency and utilization of both time and fabric. Other quilt designs are a bit more freeform. In other words, she doesn't start in eQuilter, but rather puts pieces together (such as leader and ender piecing) that eventually are put together into blocks and then quilts. Because she uses standard sizes, everything eventually finds its way into a finished quilt top. It is a very smart way of utilizing scraps.

This design is one of Bonnie's free quilt patterns at her website. The instructions are more of a tutorial without specific piece counts and yardage requirements. I think it could be a bit of challenge for a beginner. The small piece sizes and precision sewing is also a challenge. I had a fair bit of fixing to do because of either cutting and/or sewing errors. The patterns published on Bonnie's website, while I know they are free, could use a bit of editing. I do appreciate the effort and work it takes to put something like this together. I wonder if her published books/patterns are more polished. She does take her mystery projects down and provides them for sale after the mystery is over. I hope the "sale" versions are better edited and presented over the free-form versions given on the website.

I don't know if I will make another Bonnie Hunter quilt. I am pleased with how this quilt came out and I am glad I made it. Now that I understand the process, I think I can design my own scrappy quilts. That should be a fun challenge.

December 03, 2018

Knitting : Ragg Socks


I recently finished up a new pair of socks. The yarn was gifted to me and it was fun to knit with. The yarn is Trekking (XXL) in colorway 100. I love Trekking sock yarn but I have had a hard time finding it near me. One 100 gm ball has generous yardage that may be enough for a pair of men's socks. I had yarn left over that will migrate to some scrap yarn socks at some point. With this color way, do not expect to be able to knit symmetrical socks. The color changes are random throughout the whole ball. With this yarn it is fun to watch the color changes as you knit. You can see how each sock came out below. Some comments on Ravelry has a few negative comments about this yarn brand, but I found this colorway to be soft, with no knots or tangles.

I knit my usual vanilla socks using the basic sock pattern from Ann Budd in the Knitter's Handy Book of Patterns. I have knit a few things using this book and it is a worthwhile investment. Another nice thing about Ann Budd is she is on Ravelry. If you link your socks to her pattern, she will leave a nice comment. I believe she looks at any project made from one of her patterns.

October 22, 2018

Knitting with Chronic Fatigue


I know it has been a while. Some of the recent comments here have even suggested this is a dead blog, like so many. It's true I have not posted in a while. My Chronic Fatigue flared up pretty bad in January and it continued through to about August. I've always self-diagnosed my fatigue as functional chronic fatigue. In other words I have always been able to work through the fatigue and just deal with it. This last time was different. I still worked, but I started to wonder if I really could continue working. Besides the fatigue, the brain fog was overwhelming. And then it was waking up each day stiff and sore as though I hadn't slept at all.

I have been dealing with fatigue for over 10 years. The fatigue has varied in intensity but rarely interfered with my ability to do what I wanted. I did get tired of being tired all the time though. Just over a year ago I felt like I hit a wall. I needed help because my fatigue was starting to interfere with my enjoyment in life. I won't go into all the details, but it was enough for me to start looking for an open-minded doctor. Thankfully, I found an integrative medicine doctor who believed me. That was key. She started me on a supplement routine and one prescribed medication. I started to feel good and my energy level came back. So good that I felt like picking up my knitting needles again. I was ready to knit something challenging.

I started these socks in August of 2017. I picked the Celtic Denim Sock pattern because I had always wanted to knit socks with cables. Many ravelers mentioned the socks were a bit small in circumference, so to add to the challenge, I adapted the pattern. I did a 72 stitch cast-on instead of 64, distributing the extra stitches into the pattern. I also added a 1x1 rib for about 1 inch at the cuff. It was too difficult to jump into the cables without having some kind of stabilizing rows where you didn't feel like your needles would fly off the stitches. The cables really slowed down my sock knitting until I got the hang of it. After finishing the leg on sock #1, it was actually pretty easy.

So, I started the socks in August. I was feeling so good that I started to reduce some of my supplements (big mistake!). In September we started on a major renovation project for our house. As these things go, there were problems every step of the way. My focus and attention was not on these socks, but I picked them up now and then and managed to finish the first sock by January. Our house project finally, sort of wrapped up in December, so in theory I should have been able dig in to sock #2 and finish this project up. Instead, my body collapsed from the stress of the renovation project and my fatigue was the worst it had ever been.

It took me 8 months to finish sock #2. The brain fog and fatigue really zapped my knitting mojo. I had to let go of a lot of things, which only added to my frustration. Thankfully, after a couple of appointments with my doctor over several months, she got me back on track with a new regimen. I can't say I'm 100% yet, but I'm doing much better.  These socks literally took a year of my life and represent a story of what it takes to deal with chronic fatigue.

So these are my tips of dealing with fatigue and knitting (or any other hobby, project, or life plan):

  1. Don't give up!
  2. Find a doctor that believes you. I highly recommend an integrative or functional medicine doctor.
  3. Don't stop taking your meds, supplements included, without talking to your doctor first.
  4. Work on a project gradually. A few rows at a time is great! Don't give up!
  5. It's ok to let a project languish for a while.
This blog is not really a health blog. It started with my posts on pattern making and fashion design and then evolved to whatever project I was currently working on. I will probably be getting back to that in time. One problem came to my attention. My contact form was supposed to send me notifications but it wasn't working properly. I will be working through those questions and comments over the next few months as I write new posts. I will also provide updates on current projects as time (and energy) allows.

January 08, 2018

Patches and Pinwheels pt. 3

16 patch quilt blocks

Three fourths of the blocks are finished. I've made some progress on the remaining 16-patch blocks but have a ways to go. It has been slow going now since I am taking the time to measure the piecing and blocks before starting the next one. I am fairly certain that my difficulty is from inaccurate cutting. Placing the ruler inconsistently can cause some pieces to be just a bit smaller or larger than other pieces. Bonnie Hunter loves piecing quilts with lots of small pieces. I'm curious as to how she really maintains accuracy. With as careful as I thought I was, I still ended up with difficulties. This is something that I will have to revisit as I go forward with other quilt projects.

December 27, 2017

Patches and pinwheels pt. 2

Cut quilt squares from mens shirts

After fixing all of the 16-patch blocks, I assumed that I had all the blocks I needed for the top. But once I started laying out the blocks, I realized I only had half the number of blocks needed. I went back to the pattern. In Bonnie Hunter's free patterns, she does not necessarily give you piece or block counts. The free patterns are a bit more of a free-form tutorial style. In this pattern she tells you how she laid out her quilt and you have to do the math to figure out what that means. There are pluses and minuses to this approach. In my case, I just did the math wrong.

You can see how many 4-inch squares I was able to cut out of the upcycled shirts. A large or extra large shirt can yield quite a lot. I will definitely have left over squares for another project. I do take the time to square up my half-square triangle blocks because it does make it easier for matching the points in the final pinwheel blocks.

I made a visit to the local thrift store because I was out of white/light colored fabric. I managed to score some XXL white cotton dress shirts. I should have enough fabric to finish up these blocks!

There is some debate in the quilting community. Some people seem to think that fabric from clothing is not great for quilting. I tend disagree. Upcycling old clothes hearkens back to yesteryear when our grandmothers did not waste anything useable. Producing a quilt from otherwise useless clothing is the ultimate in recycling and economy.

December 11, 2017

A new quilt project : Patches and Pinwheels

Patches and pinwheels quilt blocks

I have been following Bonnie Hunter for a few years and I finally decided to try one of her quilt patterns. I selected Patches and Pinwheels, one of her free patterns at her website. I wanted to try one of her quilt patterns because I wanted a feel for how she designs her quilts. I admire Bonnie's ability to sit down at a machine and sew scraps together to create a quilt - though I suspect she uses eQuilter design software more than we know. On the surface, this method of using fabric scraps in ready to go sizes seemed very relaxing. I also want to migrate into designing my own quilts. I know I can, but I get stuck at the planning stages. I needed to loosen up in my expectations of color and fabric and just play.

The fabric for this quilt comes mostly from upcycled men's shirts, but I threw a few of mine in there as well. With my first attempt, I did not pay attention to the fiber content of the shirts and some of them were more polyester then cotton. I ended up not liking the fabric from those shirts, so they ended up in the garbage - minus their buttons. After that I primarily used only cotton shirts. I supplemented with some shirts from the thrift store which yielded a surprising amount of fabric and a few fat quarters from the fabric store.

My first few attempts at cutting apart a man's shirt to harvest the fabric took me much longer than I expected. There is this little bit of fear about potentially ruining an otherwise good shirt. An irrational fear because several of these shirts had worn collars and cuffs and were not suitable for donation. After cutting down several, I developed a system and they went pretty fast.

The cutting and sewing went pretty well until I was ready to square up my blocks. The pinwheel blocks are fine for the most part. The 16 patch blocks were not. Bonnie Hunter recommends checking the piecing periodically to ensure everything measures as it should. I did not check very often. I figure my machine was set properly after the first few blocks and away I went. Come to find out that most of my 16-patch blocks all measured 1/4-3/8" too small. If the sewing or cutting is off just a little bit on a few of those 2 inch squares, the problem is quickly multiplied across the entire block.

So yes, I am going back through the 16-patch block and redoing them. This is a good lesson on precise cutting and sewing and checking measurements.

November 30, 2016

Hawaiian quilt pt. 2 and where I am now

Hawaiian quilt

On January 1, 2016, I finished piecing the Hawaiian quilt, complete with borders. It was an all day sewing marathon while I watched a Justice Network marathon (one of the few antenna based channels that comes in clear). Next up is to figure out the backing and then quilting. I plan on having a local quilter do the quilting, which is why this is still sitting here. Overall I am very happy with how this came together and when I finish it, I will post more pictures.

The thing I learned from this project was precision sewing. That crucial 1/4" seam allowance. I've read about it in many quilting books and tutorials and thought that I understood it. And then I discovered that my blocks did not measure up or match corresponding blocks. It wasn't terrible, but it was enough to bother me. I took the time to carefully square up each block, which included trimming the blocks down about an 1/8" so they were all the same size. The blocks are rotated 90 degrees, so there was really no need for the seams to match on corresponding blocks. Next time, I will pay more attention and check measurements as I go.

So why the long blog absence? It was really quite simple. I started working as a pattern maker again. It was a bit of a surprise opportunity to go back. At the same time I was dealing with a severe bout of chronic fatigue. So between the two jobs and the chronic fatigue, I had nothing left. I've been feeling better recently, though every now and then I'm reminded this is something I will have to deal with for a long time. I have a lot to say about how doctors treated me and what it took for me to recover, somewhat. But that is for another day and another blog.

In the meantime, I do want to get back to blogging. I will probably focus on whatever projects I am currently working on rather than pattern making and design. I have finished a few projects over the last year and a half, so there is more to come.

June 08, 2015

Hawaiian quilt pt. 1

Quilt design plan

I started a quilt. The idea for this quilt has been floating around my head for a few years. I had some Hawaiian printed cottons left over from other projects and I wanted to use them in a modern style quilt. I have only three colors to work with, purple, green, and white. I had a hard time visualizing the overall look of the quilt, so I drew up a version using Inkscape*. I could have taken this a step further and scanned the fabric into the drawing, but this was close enough. I still have not decided on the final borders. It partially depends on how much of each color I have left after piecing the blocks. I'm fairly certain I will not be using green on the outside border. I may go for white instead with green bias binding.

Cut Quilt block pieces

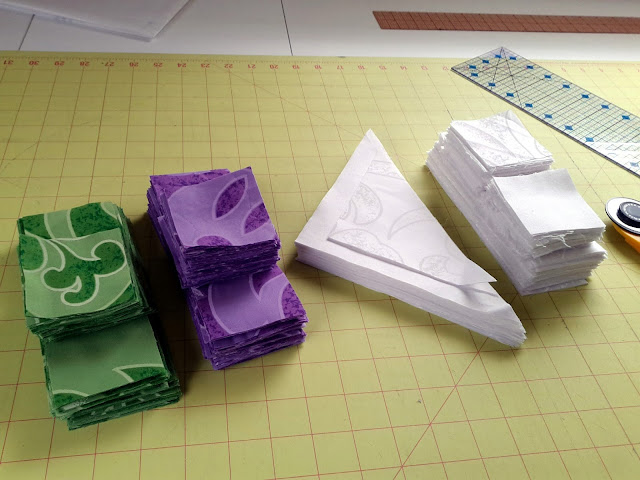
Here are the actual fabrics, cut and ready to go.


The pattern came from Fat Quarter Fun by Karen Snyder and is called Summer Fun. I really liked this quilting book. Most of the patterns are simple, using primarily fat quarters for the tops. This particular quilt is a bit small, IMO, so I've added some additional blocks to bump it up to a full size. I'm also using yardage instead of fat quarters. Because of that, I think I should have cut and sewn things a little bit differently. More on that later. I'm excited to finally have started this project.

*Inkscape has some nifty drawing tools, including cloning. I did not use that feature here, but it would have been a perfect opportunity to use it.

February 03, 2015

Bullet journal follow-up

Pocket size bullet journal

On December 1st I started bullet journaling. I started with this pocket size journal because this is what I had on hand. I like the size because it does fit in my purse, but it is almost too small. I feel cramped when writing in the journal. I have acquired two new hardcover journals in just a bit larger size, so perhaps a follow-up is in order when I transition over. In the meantime, I'll use up this one.

I made the mistake of not leaving enough space for my index. I probably should have left 2-3 pages in the front of the journal for the index. Others have mentioned that it is hard to do forward planning in a bullet journal. It can be. I will often write the date for a future event in my daily task list as a note. As I review the past month when setting up the next, that note carries forward or is placed on the new month's calendar. Others have figured out ways of creating a spread with monthly calendars, but this journal is too small for that. Another difficulty is finding the monthly calendars. You can look at the index, but a long index takes time to look through. So I jumped on the bandwagon and purchased some washi tape. Just a little bit of washi tape on the edge of the paper for the month spread makes it easy to find it again. This one roll of tape should last a really long time. I found some inexpensive rolls at Walmart, but Amazon has some pretty tapes too (below).

Pocket size bullet journal

I've learned that a really good pen makes a big difference. I'm loving the Pilot G-2 pens. They write super smooth and have nice dark ink. I never realized how much harder regular ballpoint pens were to use. They require more pressure to write and the ink is just not that dark. The pens do last a long time but I find that I can never find one when I need it. You'll want several to stash all over the house.

I spend a little time at the beginning and end of each day to write and review my many tasks. I am using this journal to keep track of tasks for my two part-time jobs, my small business, and personal tasks. I imagine if one of my jobs became much more involved, I would add a separate journal. For now I only have one journal to keep track of.

This style of journal is great because I really do use it as a mini-brain dump. Any sticky notes that get handed to me are immediately copied into my journal so I don't lose the information. Who hasn't lost a sticky note that became unstuck and floated away? Ideas that float around in my head are written down. I don't have to exert energy in the effort to try and remember something.

I'm staying more on task. Tasks are carried forward until done or until they become irrelevant. That "to-read" list has finally been collected and I'll know what books to get next. That project that I've wanted to start, now has a place to go. It really has helped reduce my stress. If you haven't tried bullet journaling, give it a look. It may work for you too.

January 29, 2015

The Myrtle Cardigan Finished!

Myrtle Cardigan front

Myrtle Cardigan back
I started this knitting project April 2013 and I finally finished it December 2014, about a week before Christmas. I would work on the sweater in the evenings in front of mindless television. I could only manage about 2 rows per evening before I had to set it down. Towards the end I was finally comfortable enough with the lace pattern that I could pick up some speed.

I did modify the pattern for me. I lengthened the body of the sweater by two repeats and raised the neckline by two repeats. The sleeves have lace down the center of the sleeve and stockinette for the rest. The sleeve mod was a good choice because I couldn't figure out the pattern instructions for an allover lace pattern. I think it looks just fine with the stockinette. There is still some remaining funkiness on the sleeve cap decreases, but I made it work. I was a little concerned the sweater would be too small, but it blocked out to the right size just fine.

A lot of the reviewers on Ravelry rated this pattern with medium difficulty. I rated it as difficult, just below advanced. This is because the knitter has to really pay attention to the pattern instructions, which are not typical. Some knitters have complained about that. I think for a lace design, it would be difficult to design a pattern that works in multiple sizes. The designer came up with a really interesting approach by using blocks of lace and building the size. I'm not sure every size works equally well. For example, the lace pattern for the sleeve as written in the medium size just didn't work for me. I'm not sure if it was me or not, but it was not clear. Overall the pattern needed some refinement and further editing. For experienced knitters this is a minor problem. For beginners, or advanced beginners, this pattern would be difficult. I'm so grateful for the helpful hints by other knitters posted on Ravelry. I spent quit a lot of time looking at other people's projects so I could see what other people experienced. I was able to mark several projects as helpful, and refer back to them.

Specs
Yarn: Knit Picks Stroll in Sapphire Heather
Needle size: US 5 and US 6

November 17, 2014

Book Review : Better Homes and Gardens Quilting pieces of the past


I've had quilting on the brain lately. I don't really have time for it right now, but I do have plans. Who doesn't when they have other more pressing projects? When I'm in the zone for some other crafty venture, I usually waste time on Pinterest or borrow books from the library. In this case I came home with Quilting Pieces of the Past (Better Homes & Gardens).

This book was published back in 2004, which doesn't seem all that long ago. The book traces the last 175 years of quilting with 54 quilting projects and full size pattern pieces in an attached insert in the back of the book. The book is divided up into distinct historical periods followed by quilts that are reproductions of that time or inspired by that time. Many of the quilts in the book are drawn from previously published Better Homes and Gardens quilting patterns.

The historical information is very interesting but not nearly as in depth as I would have liked. But it does contain full color pictures throughout with fabric swatches representing the color and style of fabric used in quilts for each time period. The biographical information on the early quilt designers was interesting. Each section contains a historical time period showing the major events of the day so that the reader can understand what influenced some of the quilt designs.

Some of the reviewers on Amazon gave the book poor reviews because many of the projects were not updated with contemporary styling or colors. This did not bother me so much because the quilts were meant to be reproductions of older quilts anyway. It would be easy to update the quilts with newer, fresher color schemes and fabrics. The instructions are where the book struggles a bit. Most of the instructions rely on traditional cutting and piecing techniques. This means that some of the quilt blocks are more difficult to put together because of inset seams. This is particular true with the Lemoyne star block, Bride's bouquet, and a few others. More modern techniques have broken down these blocks to make them easier to piece using strips and special rulers. Some of the quilt blocks are quite intricate and would require very precise cutting and sewing. Several of the quilts are applique quilts and the book contains no instructions on applique.

Despite those deficiencies, I still really liked the book. I loved reading the historical sections and seeing the quilts that came from each time period. I do like many of the quilts in the book and I could see myself making some of them one day. If nothing else, the book could be used as a source of inspiration. It would be easy to take some of the more traditional blocks and up date them. This book is not really for beginners because of several difficult to make quilts  and the sketchy instructions. Still, there are a few projects a beginner could probably attempt without too much difficulty.

Book Rating: 4 stars

November 05, 2014

Cutting dimensions for quilting pre-cuts

I've been spending too much time looking at quilting projects on Pinterest and YouTube lately. Perhaps an act of avoidance for other things. Quilters throw around terms like fat quarter and jelly roll, but it took me a bit of time to know what those things mean in terms of actual cutting dimensions. I trolled around Pinterest looking for a printable that explained those terms for me. I found lots of pretty full-color infographics, but I wanted a one page, black & white piece of paper to hang next to my cutting table. I couldn't find anything suitable, so I opened up Inkscape and made exactly what I wanted. I prettied it up with different fonts and a border.

Click on the image below for the full size. It should easily fit onto an 8.5" x 11" piece of paper.

Quilting pre-cuts cutting dimensions printable

I slipped it into a page protector and now it lives with my cutting tools next to my cutting table.

Printable hanging in my sewing room
Spending all this time thinking about quilts and quilting means that I do have plans for projects.

November 03, 2014

Grading rulers and how-to drawings

The set-up for grading a pattern piece
I've been hard at work on my grading book. The first half of the book explains children's sizing. The second half is a how-to manual on grading. I've been stuck on the how-to section for quite a while. I could not decide on whether I should do step-by-step photos or illustrations. I fiddled around in Inkscape and managed to pull together some pretty good how-to drawings. The drawing above is a sneak peak.

Photographs would be great but I didn't think I could pull off photographs that were good enough for print. There are some practical matters too. An eBook filled with as many photographs as I need would be enormous. Too big of a file size to process for print (fingers-crossed they turn out ok) and too big to download easily. There are photos in the book, but just a few. So yes, I am planning on an eBook version, though probably not for Kindle.

So the how-to section will be step-by-step drawings. The drawing above is the set-up for hand grading. It shows the guidelines and grading ruler placement. The shaded area represents tag board. The pattern piece is cut in tag board too, but is white for clarity.

The gridded area represents the grading ruler. My grading ruler is the rectangular gridded ruler in the middle below. I was lucky enough to find it at a thrift store stuck in the book below.

Grading ruler options

This style of hinged grading ruler is no longer available. Never fear, there are options. You can grade with any clear ruler that has 1/16" gradations like the 18 inch ruler in the picture above. You can also buy a grading ruler from Connie Crawford. The price can't be beat! I've been looking at special quilting rulers and those are tremendously over-priced in comparison.

The grading how-to section will cover hand grading in depth and a general overview of grading for CAD. CAD grading depends on the CAD software, so in depth instructions would be difficult to cover for each major system.

Because things can be lost in translation - meaning my drawings and photographs may not convey the best for everyone - there will be at least one how-to video. I'm not sure what I'm setting myself up for, but I'll give it a try.

August 11, 2014

Knitting: Myrtle Cardigan pt. 6

I previously wrote:
I'm not sure if it is an error in the pattern or my interpretation. I just joined the sleeves by knitting across the row and following the lace pattern. At this point I think the pattern is telling me I should be on row 2 of the lace repeat where I start the armhole decreases. I'm on row 3. I did not know how to join the sleeves into the work without knitting across. This means I will work row 3 and begin sleeve decreases on row 4 (decreases are supposed to occur on the pattern rows). I don't think it will make much difference but the instructions left me a bit perplexed. I read through everything twice more and I followed everything right up until the join sleeves instruction.
And then I had a head slapping moment. You CAN do decreases on the same row as joining sleeves to the body. So I ripped back - thank goodness for that lifeline that I put in just prior to adding the sleeves - and followed the instructions in the pattern on joining the sleeves. And then because it had been so long since I had worked on this, I worked the lace charts in the wrong order. I had to rip back again and start over.

I can safely say that I am on my way. I can also confirm that working only one repeat of the lace up the middle of the sleeves was also the right move. It makes doing the sleeve decreases so much easier. I have worked far enough that I have one extra repeat of the lace in the body. Now to do one more before decreasing for the neck. Fingers-crossed that I have enough yarn.

After working on this for over a year, I think I can see myself actually finishing this.

June 02, 2014

Knitting: Myrtle Cardigan pt. 5 - joining the sleeves

I have officially surpassed the 1 year mark on knitting this sweater. I've learned a lot about knitting and my personal knitting preferences.

I do like knitting lace. I like the challenge. I enjoy the effort of figuring it out. I like the results. I will knit lace again in the future (probably something simpler!).

This project has been dragging because I don't have the mental or physical energy to work on it in the evenings. Evenings are my knitting time that I use to relax in front of the tv.

You can't watch much television and work on this at the same time. At least I can't. I'm knitting each repeat faster, but each row is taking longer now that the sleeves are attached.

I am now at the most difficult part of the sweater. I am raising the neckline by two repeats. This is the part where I will be doing the decreases for the neck and armholes at the same time. I definitely made the right call to knit the underarms in plain stockinette - a little bit less lace.

I'm not sure if it is an error in the pattern or my interpretation. I just joined the sleeves by knitting across the row and following the lace pattern. At this point I think the pattern is telling me I should be on row 2 of the lace repeat where I start the armhole decreases. I'm on row 3. I did not know how to join the sleeves into the work without knitting across. This means I will work row 3 and begin sleeve decreases on row 4 (decreases are supposed to occur on the pattern rows). I don't think it will make much difference but the instructions left me a bit perplexed. I read through everything twice more and I followed everything right up until the join sleeves instruction.

March 17, 2014

Vintage pattern reivew : Simplicity 5040


It's rare that I find a vintage pattern in my size, or close to my size, at the thrift store. I can't help looking through them anyway. I have yet to make up any of the styles that I've acquired over the years because I would need to grade them up or down in order for them to fit. I was happy when I found this one, Simplicity 5040, in my size and in a style that I like.

I initially assumed this style would have a side zipper and that the skirt was gathered. How else would one get it on? There is no back zipper and only the button front closure that ends at the waist. I was a little surprised to find that the skirt has a placket hidden under a pleat below the front button closure. A pleated skirt is, in many ways, more flattering than a gathered skirt - at least on me..

The suggested fabrics run quite a range: cottons, synthetics, blends, silk, linen, chiffon, brocade, lightweight wools, wool-crepe, wool jersey, and corduroy. While I'm sure any of those fabrics might work, they would all give an entirely different look and require different handling. I don't have a fabric picked out for this yet, but I'm leaning toward cotton. I'll have to look at my stash and see what might work. I'll also need to make a petticoat slip.

Even though the pattern has all the appearances of being my size, the measurements on the back envelope indicate I will have to make adjustments. This is looking more and more like a lot of work. Hmm... I do plan to make this up, just not sure when.

February 03, 2014

Pattern drafting in LibreCAD

At the start of the new year I commented about trying to figure out what to do next. I described my feelings as reaching the end of one road and trying to decide which road to take next. You might assume there were only a few options, but in reality there are many. One option was to look at languishing projects to pick back up. I have two rather large projects. One will take me many years, the other is about half done.

The really large project is sodaCAD. I started a software project back in 2010, but let it drop because I lacked the skills to work on it. SodaCAD is my attempt at an open source pattern making software. Most commercial or enterprise level pattern making software packages are very expensive and have onerous maintenance fees and licensing. I've always wanted to provide an alternative.

sodacad logo and icon


After much research and a few different attempts, I stumbled upon LibreCAD. LibreCAD is a free alternative to AutoCAD. Commercial pattern making packages have AutoCAD at its core. LibreCAD contains many essential CAD drawing functions already, so it is a perfect foundation to build on. I actually learned how to draft patterns using AutoCAD in college. What I lack is programming skills, but that is slowly coming.

Before I can work on optimizing LibreCAD, I had to test it out and actually try drafting a pattern to test its capabilities. It took a bit of time, but I managed to draft a bodice front.*

A bodice front pattern drafted in Librecad
LibreCAD is by no means the ideal solution (not yet!) for this kind of work. It is, in many ways better than Adobe Illustrator or Inkscape. Illustrator and Inkscape lack precision and efficiency. Inkscape in particular, tends to be fuzzy when it comes to numbers. Say you draw a square that is 25 x 25, but you move one side out 1 inch. Now you have a rectangle that is 25 x 25.95. LibreCAD has no issues with precision. It does lack efficiency for pattern making, so I made many mental notes for improvement.

LibreCAD is available for use now on Windows, Mac, and Linux. If you do decide to try it out, I would recommend watching some video tutorials on YouTube. The interface and drawing functions take some learning. I have no idea how long it will take to get SodaCAD ready for use.

*This pattern piece is available in sodaCAD source files for demonstration and testing purposes.

January 21, 2014

Adapting a block pattern into something else pt. 8 : the final pattern alterations and a finished design

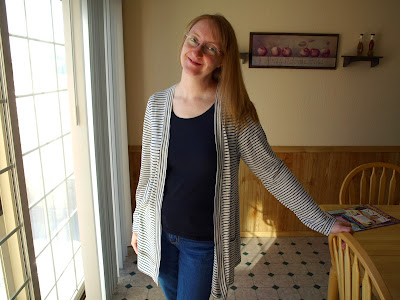
Modeling the final version of the cardigan
It took me quite a while to finish up the pattern modifications for this style. I would try on the first sample and look in the mirror, then go back to the pattern many times. There were a few things that were not right. Each time I would try it on, I would pull the jacket forward so the back neck rested higher. This would throw off the shoulder line. Finally, I realized I needed to raise the back neck and raise the shoulder at the neck point on the front bodice. This situated everything nicely. The first jacket is definitely a wearable first muslin, but the second sample turned out great.

Final pattern alterations:
  1. Remove extra wearing ease. I noticed that many similar cardigans are not really that much bigger than the average t-shirt, so keep this in mind when adapting your t-shirt pattern.
  2. Raise the back neck 3/4". I had left the original neckline of the t-shirt, which ended up being lower than I wanted for the cardigan.
  3. Raise the shoulder at the neckpoint 3/8" on front bodice to correct shoulder slope problem. I need to apply this correction to my t-shirt pattern too.
  4. Shorten sleeve length.
Cardigan with scarf


All that's left is to double check the seams to make sure they match and cut the pattern out of tagboard. This jacket is now ready for further iterations. Maybe a shorter or slimmer version. A waist line with darts. It's all possible.

If I wanted to take this cardigan into production, I already have some of the information needed and recorded in my blank forms:
  1. Style and cutting sheet lists all the pattern pieces with spec drawing.
  2. Sewing spec lists each step of construction.
  3. Fabric swatch cards with content information.
  4. Recorded the pieces in the pattern catalog.
To turn this into a more complete spec package, I just need to add:
  1. Finished pattern measurements for quality control
  2. Grading spec
  3. Cost analysis
I've also added a wash testing data form, which is not yet available (soon!) and not included in the book. This form records shrinkage information which is critical for knit fabrics.