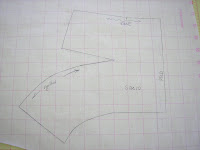
 This is a basic skirt block for a girl's size 10. A style line is drawn on the pattern where the gather detail is to be placed.
 Lines are drawn from the dart point and the style line until they intersect. The skirt is slashed along those lines to the point of intersection. The dart is partially rotated closed. The original style had some fullness in the waist. The dart equivalent fullness only adds about a 1/2" to the waist front. I suspect the original style had more. The original style was probably for an older teenager rather than a young girl. Anyway, slash lines are drawn from the lower dart leg to the hip line (On a full length skirt, the slash lines would go to the hem. For ease, I am only working to the hip line).
 Slash the skirt along the new slash lines to the hip and spread to the desired fullness. In this case, I spread for a 2:1 gather ratio. The finished pattern would look something like the one to the left. Like I said, I forget to add seam allowances to the dart opening. If you try this yourself, don't forget to add them.
Fabric samples will have to wait until later - too many pressing projects.

