Showing posts with label Inkscape. Show all posts

January 22, 2020

Do professional Fashion Designers use Adobe Illustrator?

Drawing tablet for graphic design

In order to be considered a professional in some occupations, you must demonstrate mastery of certain tools. A good example would be a doctor's stethoscope which demonstrates experience and knowledge in their profession. In the fashion business you will see many job postings requiring experience with Adobe Illustrator and Photoshop among other requirements. Does knowing these two software programs really demonstrate the knowledge and experience of a fashion designer (or any type of designer really), and thus their professionalism?

Design School


Design school usually includes training for Adobe Illustrator and Photoshop. This is because many designers of all types use these two software programs. It is expected that a fashion designer will need to know how to use graphic design tools in our current tech savvy world. Designing is a visual medium and being able to communicate through media is an important skill. This is especially true when working with overseas factories. Being able to demonstrate an idea with a drawing or photograph is sometimes the best and only way to communicate. A design student should definitely take advantage of this training. Designers who did not go to design school can find opportunities for learning from several platforms including Skillshare or Udemy.

Software Cost


Not long ago Adobe switched from outright license purchase to a subscription based model. There are different price tiers depending on which software and features needed. The monthly subscription fees are not entirely unreasonable, but it creates an ongoing financial commitment to using the software. This can present a financial barrier to a needed tool for some. There are advantages and disadvantages to this system, but keep in mind there are options out there. Illustrator and Photoshop also need computers with a certain level of memory and processing power to work well. That may be an additional cost.

Is it necessary?


Yes and no. Your job and responsibilities may not actually require use of Illustrator or Photoshop. Fashion designers are idea creators and often entrepreneurs. They may have some experience in a lot of areas but at the end of the day, some tasks are assigned to employees or outsourced to people with more focused skills. I have worked with a variety of designers over the years. You may be surprised to know that few fashion designers can draw or use Illustrator and Photoshop. I have seen some pretty poorly drawn ideas that later were translated into some very nice final products. Technical designers, artists, graphic designers or illustrators can create any artwork that might be needed. So while it may be nice to have access to Illustrator and Photoshop, it isn't absolutely necessary for fashion designers who are starting their own lines.

Options


While Illustrator and Photoshop are the two software applications mentioned most often, there are other options. The truth is there are other drawing and photo editing applications that can accomplish the same task at varying costs. The tool that you need is the tool that will do the job.

Procreate - an Adobe drawing program available for tablets
CorelDraw
Inkscape
Gimp

Among so many others.

Inkscape and Gimp


I have been in the fashion industry for a long time now and I only used Illustrator for a short time. I didn't like it at the time because the software was bloated with a lot of features I never used. It took a long time for the software to load and the extra tools and palettes got in the way. The current versions are much more streamlined and efficient. I also used CorelDraw, which worked well enough. In any event, as soon as I found Inkscape, I switched and haven't looked back. The same with Gimp over Photoshop. I have used Inkscape as a professional designer for at least 10 years and no one has been the wiser.

Illustrator will open and use Inkscape file formats (SVG) and vice versa for Illustrator (AI) files. Photoshop will open common image file formats like PNG and JPG. Gimp will open PSD files. Compatibility between different programs is so much better than it used to be. There are ways to provide Illustrator or Photoshop file formats if using Inkscape or Gimp. There are some workarounds including online file conversion sites that do a pretty good job.

Professionalism?


At the end of the day you can choose your tool of choice. If you prefer Illustrator, then that is your choice. Definitely take advantage of any training you can and test out all the different options. If your goal is to be an employee, then training on Illustrator and Photoshop may advantageous. If you are a freelancer or starting your own business, you can choose what works for you.

Professionalism is another matter. In my mind knowing specific software packages shows experience or knowledge, but it doesn't imply professionalism. Professionalism is to complete a task well, on time, and on budget. It includes good communication. The tool of choice is less relevant. What do you think? Please leave comments below.

January 13, 2015

What size is your pixel? Precision drawing in Inkscape and Adobe Illustrator

Last September I began to follow a discussion on pixels in the Inkscape Developer's mailing list. The concern was centered around units and how they are used in Inkscape. In the early days of graphical drawing it was assumed the user would want to see their drawing full scale. In other words if you drew a box that was 1 inch square, you would want to see that displayed on the screen. In order for that to happen, a definition had to be created to tell the computer how many pixels were equivalent to one inch.

In digital imaging, a pixel, pel,[1] or picture element[2] is a physical point in a raster image, or the smallest addressable element in an all points addressable display device; so it is the smallest controllable element of a picture represented on the screen. The address of a pixel corresponds to its physical coordinates. LCD pixels are manufactured in a two-dimensional grid, and are often represented using dots or squares, but CRT pixels correspond to their timing mechanisms and sweep rates.  (Wikipedia)
Over the years pixel sizes, and screen resolutions, have changed. We have far superior displays on our desktops then those early developers did. We can fit more pixels into that one inch than was ever thought possible. The whole discussion about pixel sizes and resolutions, gets rather complicated. Generally speaking, what a user sees on screen is what they want to get in print. How to achieve that is rather difficult.

Inkscape and Adobe Illustrator are vector drawing programs. This means that drawing lines and objects are stored on the computer as mathematical equations. Vector drawing programs are known for their precision, accuracy, and scalability. Programs like Gimp and Photoshop are raster-based drawing programs, programs that allow you to manipulate individual pixels. You cannot scale images up, only down, because the computer cannot fill in the holes. Lines are fuzzy because they are built of individual pixels. Both pieces of software have their advantages for different uses. The differences have begun to blur in the last few years. Inkscape and AI can now do things that were exclusively in the domain of Photoshop, and yet store the drawing as a vector drawing. Of course, Inkscape and AI are used in an environment in which the vector drawing is displayed via Pixels.


There is one reason to bring this topic up, as complex and boring as it may be. There is an increasing trend among indie pattern makers in the use of Inkscape and Adobe Illustrator for pattern making. In fact, you can take classes on the subject from various sources. These software programs do work - to a point. I've noticed with Inkscape a tendency for a certain fuzziness. I've created precise drawings where I've entered the dimensions and printed them. The measurements of the printed drawing were always a little off. Inkscape is not entirely at fault, though the developers have worked on improving this in the up coming release. There are a lot of variables that we have to contend with. Your display, drawing, and printer all play a factor in the accuracy of the measurements used.

The best way to test your current setup is to draw a square in your program, such as 1 inch x 1 inch. Print it out and measure it. Be sure to look at the print quality and width of your lines. Are the lines cleanly and clearly defined? Does your square measure as expected? Do you have to measure to the outside or inside of the line to achieve the desired measurement?

I took some time to test Inkscape with my current display and printer. First, I'll show you the printed results.

Measuring a 2 inch square for accuracy
The print out is pretty good. I drew a 2 inch square and it printed out as a 2 inch square. BTW, this was a square with a 1px stroke and no fill. You would think with these results, there would be no problem.

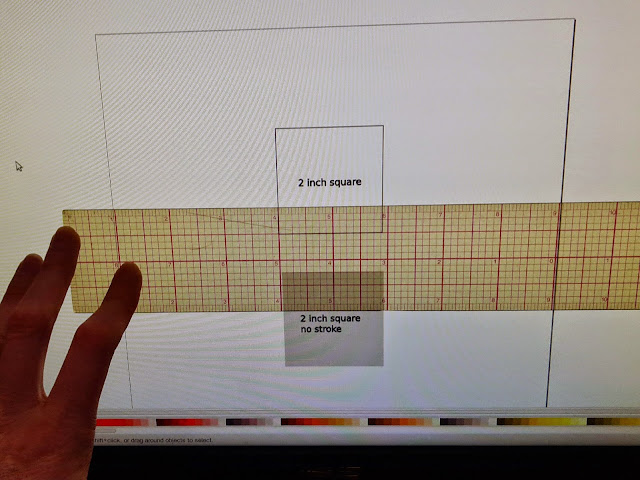
Measuring the screen version of a 2 inch square
But next, I measured what I saw on the screen. The 2 inch square actually measures 1.875" x 1.875".  If this were an actual pattern piece, an 1/8" can make a difference, especially in grading. This kind of error would become magnified with each grade step. Also, the placement of critical components such as pockets, drill holes, buttonholes, seam allowances, darts, and notches could all be off by just a little bit. This is part of the problem that the Inkscape developers were concerned about.

And here is where the fuzzy math comes in.

Dimensional anomalies in precision drawing in Inkscape

I drew a square and entered in the exact dimensions for width and height of 2.000. Clicking off the square and then reselecting it shows that the square now measures 2.011 x 2.011 inches. Not a big deal if creating a drawing for the web or a poster. But it is a big deal when creating a precise drawing. As a user, until I print something out, I have no idea if the drawing will measure as expected. If I make adjustments, I have to take into account what I see on the screen and what Inkscape reports back to me. Fuzzy, much?

I don't know if this is a bug specific to Inkscape (0.48) or my hardware. I also don't know if this will be true in the next release (0.91). I don't know how Adobe Illustrator tests out. I do know that Inkscape and AI are not the greatest tools for pattern making and grading.

Perhaps you are thinking this is much to do about nothing. If it mostly works, then why worry about it? Specialized apparel CAD systems are optimized to not only create high precision drawings, but to do it efficiently. Sure Inkscape and AI have their place, maybe they will work for you. But if you really want to get to the next level, you need the right tools.

January 02, 2013

Creating fabric repeats with Gimp

This tutorial, such as it is, could easily be called How to create seamless tile repeats with Gimp. If you do a google search for Gimp seamless, you will find lots of tutorials. Because of that, I won't do a detailed tutorial. This is a follow-up of my review of A Field Guide to Fabric Design.

The main difficulty I had with Gimp and creating a seamless repeat is a problem filter*.

Don't use this filter:

Filters - Map - Make Seamless

The resulting image doesn't make an attractive repeat. It overlaps the repeat with transparencies.

Instead the offset tool, which is similar to Photoshop, is located:

Layers - Transform - Offset

Finding this tool made all the difference. Conversely, I played around with the select tool and moving layers around to accomplish the same thing. The offset tool works best with the design repeat located far from the image borders and in the center of your image. For more complex repeats, manually selecting parts of the image, copy-paste into a new image and moving them in layers works better.**

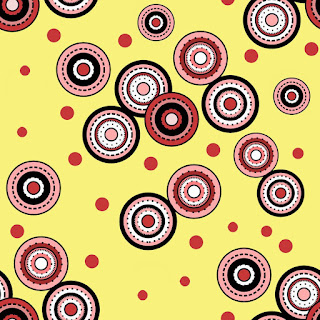
I started my experiment with a vector line drawing made in Inkscape and exported as a PNG file.

A vector line drawing of circles created with Inkscape
Next I pulled the line drawing into Gimp, added a background color, and then applied the offset tool. After that, I filled in the blank areas. Again, detailed instructions in the book for a simple repeat and more complex repeats.

A repeat pattern design created with Gimp

Gimp has a handy tool that allows you to test your repeat located here.

Filters - Map - Small tiles

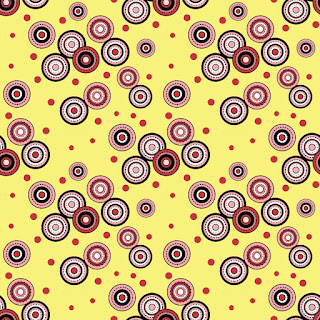
This is how my repeat looks now.

Testing a pattern repeat with Gimp


The repeat could use a bit more work, but I think you get the idea. A Field Guide to Fabric Design has information on how to improve your repeat and also how to create a whole collection around this one design.


Of course, the real challenge is matching up the colors with Pantone.

* I tried to take screenshots of all of this but my print screen button wasn't cooperating.

** One of these days I may create a tutorial for this, but it is a bit more involved. My trial video demo took about 20 minutes.

July 13, 2009

Printing your own fabric pt. 1

Fabric prints

This may be a future series. I recently talked with someone who has been custom printing his own fabric for a few years now. There are several steps involved with printing your own fabric but it isn't as hard you might think. I am talking about having your designs professionally printed by a fabric converter. There are options that have become available to home hobbyists to print their own fabric, but it is extremely expensive. If you were to take this up as a business, you would need a printer who can print hundreds of yards at an affordable price or you would never make any money.

I have to say I admire some of the up and coming print designers. I admire their skill and ability to create a cohesive collection 1-2x/year. Many of these designers have training in the arts, either the fine arts or graphic design. On top of that, they have some experience working with cloth as seamstresses and pattern makers. I wish I was more skilled at designing prints. I think I could do it but I would need to dedicate a great deal more time to it. Maybe someday I will get up enough gumption to try it and print my own designs.

Traditionally, a textile designer creates their artwork using traditional media - paint and a brush, markers, pastels. At the very least then and now, an artist carries a sketchbook around with them everywhere. They are able to capture patterns and designs in the world around them and translate them into a fabric. They can pick colors suitable for apparel or interior fabrics.

I think most modern textile designers today create their artwork using computer aided design (CAD). Adobe Illustrator and Photoshop are the primary tools. (Free versions include Paint or Gimp, Inkscape). Artwork created in Illustrator or Photoshop is not immediately ready for printing. The artwork must be made into a repeat, created by a special filter or plug-in. The idea is to offset the image 50% horizontally and vertically and fill in with the offset parts. Look for a tiling filter or tool in your program to do it automatically. Once this step is taken, the artwork is ready to be printed by some methods (Spoonflower, for example).

For mass production, the artwork goes through some additional steps though I am sure the technology has changed since I was last exposed to it. There are specialized CAD packages in the industry that some artists use directly or through a trained technician. Artwork is brought into the software and the design is fine tuned through color reduction, recoloring, etc. The design is made into a repeat. The process is rather involved because digital artwork has to be translated into the chosen printing method. And there are several methods out there - heat transfer, roller printing, block, screen printing and digital. The method chosen depends on the converter's ability and/or appropriateness for the print.

If you want to be a textile designer, there are two main approaches. You can create artwork and shop it around to existing fabric manufacturers/printers/converters. Michael Miller, Westminster, and others buy the rights or license artwork from designers. Other designers print and sell their own fabrics. In either case you don't necessarily have to understand all the ins and outs of textile manufacturing and printing. Fabric converters/printers can take your artwork and prepare it for printing (their may be an up-charge or setup fee).

Anyway, more to come as I find this to be an interesting topic....