Showing posts with label Quality. Show all posts

March 19, 2015

Production Systems, Sizing, and Quality Control

Having worked in the apparel industry for a while now, I sometimes have to take a step back to see how much goes into the design, production and selling of just one item. The goal is to work out all of the bugs before an item goes into production. Still, things can and do go wrong and those things can affect the size of an item. Where can things go wrong?

1. Pattern making and grading


A poor pattern or poor grading certainly affects the size. Inadequate seam allowances, missing notches. There are a lot of little things that can go wrong, though if you read the rest of the list, you can see there are a lot of other areas that can cause problems.

2. Marking


Marking is the process of laying pieces out in preparation for cutting. Many markers are now made by computer, some automatically. There are various setting that allow the marker maker to bump pieces closer together, tilt, or rotate pieces. Each of these options can affect the final outcome, so they must be used rarely.

3. Spreading


Spreading is the process of laying fabric on a cutting table in layers. Certain fabrics stretch during this process and need a certain amount of time to relax. If the style is cut without the fabric being allowed to relax, then the pieces will relax after being cut and the item will end up too small. Layers can also shift and move.

4. Cutting


Accurate cutting is the only way to ensure the item ends up as intended.

5. Sewing


Taking too big or too small of a seam allowance affects a size. Seam allowances should allow a cut off allowance because nearly all operators trim off a little bit.

6. Finishing


Finishing includes steaming or ironing. Too hot a temperature can shrink an item.

These problems can be minimized by implementing systems and policies during each phase of development and production. One company I worked for had a quality audit system that checked each step of production. Anything that had finally made it to production had been perfected, for the most part. There was that one style that shared patterns with another style. A problem came up in production where the obvious solution was to make a new pattern for the new fabric, but that never happened. Production just had to deal with it. But those situations are rare.

In any event, systems (procedures/policies) have to be implemented for development, production, and finishing to catch problems before the item is shipped to the customer..

This blog entry was inspired by the article Production systems, garment specifications, and sizing by S. P. Ashdown, L. M. Lyman-Clark, J. Smith, and S. Loker in the book Sizing in Clothing.

February 10, 2015

Size standardization for clothing

In academic circles there is the idea that we need one measurement and sizing standard to solve all our fitting problems. A top down approach with no allowance for variation. Customers often complain that manufacturers have no idea what they are doing because nothing ever fits. Manufacturers face an enormous challenge in trying to interpret size specifications while at the same time meeting the needs of their customers. The more I read about sizing the more chaotic it seems. At the end of the day there is more than one way to look at size standardization, and I think only one battle to fight.

One standard to rule them all

Yes, the idea that one standard can be established for everyone. By forcing compliance we will have peace on earth, and yes, our clothes will fit! Considering the variety of shapes and sizes in the United States alone, the idea is really a fantasy.

  • One standard guarantees that some of the population will not have any clothes that fit. One could argue this situation exists today, so why not try one standard. With no allowance to adapt to fit the wide range of shapes and sizes, then outliers will never have clothes that fit.
  • Our population is constantly changing. The most recent sizing study revealed that we are taller and weigh more than we did in the past. One standard would quickly become outdated.
  • Sizing studies are very expensive and labor intensive. Studies are not done frequently, so manufacturers will always be behind what is happening in the real world.

Loosely conforming to a standard while yet adapting to meet a customer's need.

Even if one standard to rule them all is unrealistic, we still need a standard. ASTM and the latest Sizing USA study have provided us with a standard that any manufacturer can use (for a price, of course). These measurement and sizing specs can act as a guide, a place to start. As a manufacturer develops their customer profile, they can adapt these standards to meet the needs of their customer.

Over the years, it's important to compare your product against these standards. I've seen patterns and sizing drift from these standards naturally through errors. These errors are not intentional, they just happen and can easily pass from one style to the next. So a careful study and comparison can bring things back. This includes measuring fit models and comparing them against the standard and analyzing customer returns due to fit issues. 

In-house size standardization

Once a sizing standard is established for a brand, it is important to adhere to that standard during product development. As an example, all new pants styles have the same finished length and waist sizes as specified. Variations in fit can come from multiple sources due to fabric variations (or problems), construction issues (taking too big/small a seam allowance, cutting errors), or variations in a pattern. You have to be careful not to draft a pattern from scratch every time. Pattern makers in the industry will use the patterns from an already proven style to develop the new style. This practice ensures consistent fit across styles. A quality control process through each step of development and production is necessary to find problems before they become big ones.

A few words on vanity sizing

Vanity sizing implies that a manufacturer wilfully chooses to ignore a size standard and relabel a size smaller than it actually is. I do not believe there is a vast conspiracy to do this intentionally. Instead I think manufacturers are trying to meet the needs of their customers while trying to conform to a standard.

*This blog entry was inspired from my reading in the book Sizing in Clothing and more specifically the article Sizing Standardization by K. L. LaBat. I made very few notes on this article and don't remember much of what I read. I did make a note that LaBat tried to prove the existence of vanity sizing by studying children's age-based sizing. I thought the argument was rather weak.

October 13, 2014

What makes a second a second in apparel quality standards?

In the fashion industry a second is an item with a few defects that can still be worn or used. If there are seconds, then there are firsts though we don't call them that. We may call them first quality, though I rarely hear that term either. The word quality, all by itself, is a controversial term with various meanings attached to it. If there are firsts and seconds, then there are also thirds.

The goal of any company is to produce goods without any defects for the least amount of money possible. But as we all live in the real world, defects happen. I've worked for three different companies and how each handled defects were roughly the same. Each company came up with a ranking system to evaluate product during production and as it came off the line. Each ranking was called something a little different though they conveyed the same meaning. The qualification for each ranking varied and the product that fell into each ranking was handled differently. Here is a brief break down.

First - top quality goods with no obvious defects

Second - goods with X number of defects that may or may not be repaired, but still wearable or usable and can be sold on a secondary market.

Third - goods with sufficient number of serious defects to render the item unwearable or usable. These goods may be sold for scrap and may be called rejects.

Quality can be subjective and that can cause problems not only in production but in the retail sector. A first quality item can be rendered second or third after it's first wearing and washing. In that case, was the item truly a first quality item? Perhaps not. Likewise, a second can be repaired sufficiently to make it a first quality item. But is it financially feasible to repair a second to make it a first? These are all questions that individual companies must deal with as they develop and sell product. In order to not get too long-winded on this subject, let's look at something I recently purchased at the thrift store.

A shirt with defects that are not obvious
This is a cute knit top that I found at a thrift store for a few dollars. It looked pretty good when I tried it on in the dressing room, but as usual the lighting was bad and I missed some obvious problems. Once home I tried it on again and immediately saw a problem with the gathers on the neckband. I also noticed the brand label and content tag were off center. Also the elastic on one of the sleeve hems was pulling away. It is true that most thrift store clothes are previously worn and I have no doubt this shirt fit that category. But because of the defects, I think this shirt started life as a second and was likely sold at an outlet store or other secondary market.

Defect along the neckline band seam
A closer look reveals the problem on the neckline. There is some fabric caught in the seam. Unfortunately, I did not take any pictures of the problem from the other side, but the fabric caught in the stitching is more obvious. 

This style of neckline would be difficult to sew, especially in a factory. First, each gathered area was pre-gathered by applying 1/4 inch clear elastic - stretched between notches. Next, the operator prepares the neck band. The tie and neckband are one piece. The tie portion is sewn and turned out and the rest of the neckband is folded in half. Hopefully there were notches to help the operator position the neck band on the neck, otherwise it would be easy to skew the neckband. Anyway, the operator matches up the neckband to the neckline, starting the sewing on the left side neck. The neckband would be on top and the neckline on bottom. The operator has to match the pre-gathered section from underneath to meet a match point on the band, catch enough of the seam under the foot securely and then stitch the pre-gathered section to the neckband. Hopefully there is another notch to indicate where the pre-gathered section should end. The sewing continues around the neck to the right side, where there is hopefully another notch to indicate where the next pre-gathered section should start. The neckline is then finished off, overedging the center front neck which is left unattached from the neckband. This small section is later topstitched down. Finally, the next operator would place the brand and size label to the back neck with a single needle machine within the seam allowance of the neckband/neckline.


The most difficult part of this whole sequence of steps would be where the operator starts attaching the neckband on the left side. The pre-gathered section is not stable and will move around as the pieces are placed under the foot. This is what happened here. Some additional fabric worked its way under the foot as the sewing began. The label placement would be difficult because the operator would have to guess where center back is and place the labels on a knit top that likes to move around.

This type of defect would have been difficult to repair in a factory. The elastic and two rows of stitching would be time consuming to undo and redo and look good. The poor placement of the brand labels would have been a second strike. The top was still wearable though and likely sold as a second or at a steep discount. I imagine there were quite a few seconds on this style....

Anyway, I was able to repair this top. I carefully unpicked the band with my fingers crossed that none of the shirt was cut when it was stitched. Luckily it wasn't. I removed some of the elastic in the affected area (it wasn't worth redoing the whole gathered area with the elastic), and regathered the neckline with a needle and thread. I then basted the neckband and neckline together to double check it was all right and stitched it back together. Almost as good as new - at least you can't tell there had ever been a problem.

Repair of the neckband seam


January 07, 2009

Accounting for shrinkage and/or stretch in sewing patterns

Leggings and pants

Just a few comments I made in the Fashion Incubator forum when making patterns to accommodate stretch (knits, stretch wovens) and/or shrinkage.

Have to be careful when scaling patterns in CAD. Shrinkage/stretch is not proportionally the same in both directions. Many pattern making books advise to add the same amount of change to the length as the width. Don't do this. The only way to know is to know the fabric. Things shrink more in length than width. I am so sick of washing pants and long sleeve shirts and having them end up too short. If anything, remove width ease and add length on knits. It sounds counter-intuitive but prevents high-waters. Not sure on stretch denims, so test, test, test.
In my Etsy shop I have a simple tech pack kit that includes a wash testing form. The wash testing form includes instructions and formulas to figure out shrinkage in both the length and width of a fabric. It is well worth the investment of time and money to test your fabrics for shrinkage, particularly knit fabrics. Once you know the approximate shrinkage of a knit fabric, I recommend adding the extra width and length needed to accommodate expected shrinkage.

Adding a shrinkage allowance to a pattern piece may cause the finished garment to look proportionally wrong. If you do not pre-wash the finished item before shipping to the retailer, the item may look wrong on the hanger and the customer may decline purchasing the item because it does not appear to fit. So there is a limit to the amount of shrinkage you can include in a pattern before proportions, fit, and hanger appeal are impacted. Generally, you can include about 3-5% shrinkage in a pattern without too much of an impact. If your wash testing results return a shrinkage greater than 5%, then you either need to reject the fabric or pre-shrink the fabric before cutting and sewing.

Knits in particular add an added layer to product development because they are more likely to shrink. There are various types of knit fabrics with different types of finishing. Some knits are pre-shrunk at the factory and some are not depending on whether the fabric will be printed or dyed at a later date. When sourcing knits it is important to ask about shrinkage.

Accounting for stretch in knit fabrics is also another added layer. Stretch influences fit. Should the item fit close to the body? If so, the pattern needs to be reduced in width and length. This is another area where the amount to reduce will be different for the length and width. As an item is stretched in one direction, the other direction also changes. You may notice this when you stretch a knit t-shirt in the width direction - the length of the t-shirt will shorten. This is a complex topic and the answers depend entirely on the style and chosen fabric.

July 03, 2007

A boy's shirt pattern fix for Butterick 6030 pt. 3

A boy's shirt pattern fix for Butterick 6030 pt. 1 is here
A boy's shirt pattern fix for Butterick 6030 pt. 2 is here
 
A continuation of my boy's shirt pattern fix....

4. Finish collar. Clip neck seam allowances near shoulder seams. Turn seam allowance of top collar under and push the remaining neck seam allowances into collar. Topstitch. Tack facing down along shoulder seams. Notice I included my care/content tag when I topstitched the collar closed.

Neckline finish for a shirt
5. Hem the sleeve. Attach sleeve to armhole flat. Close the side seam and sleeve. At this point I noticed the sleeve cap didn't match up to the armscye. So one more pattern fix to make - I made do for the sample.

Attach sleeve to shirt
At this point I decided not finish up the sample. Instead I put the shirt on the form to look at the overall proportions. The collar area looks nice and right on target.

Checking a shirt for fit
The overall proportion of the shirt still looks too big for a size 24 months. I didn't make any changes to the original pattern in body width or length and I should have. I will double check those measurements on my pattern and make adjustments. At this point, there is little of the original pattern left and I really should have just drafted my own pattern. The original Butterick 6030 pattern is heading to the trash. BTW, anyone like my two tone work room? I desperately need to repaint it.

Hawaiian boys shirt

June 28, 2007

A boy's shirt pattern fix for Butterick 6030 pt. 2

A boy's shirt pattern fix for Butterick 6030 pt.1 is here

Well I spent a few hours working on this pattern and sewed up a sample. I decided to go ahead and do a style similar to the original. My sample is a basic shirt with a convertible collar. Once the patterns are completely worked out, endless style variations can be developed. So far I have corrected:
  • Neckline smaller
  • Reduced and reshaped front self-facing
  • Reduced seam allowances. 1/4" s.a. for the neckline, 3/8" everywhere else.
  • Drafted a new collar - a one piece collar that folds in half.
I thought it might be useful for my readers to see how I construct a simple, casual shirt. This is not a finely tailored shirt, by any means - just the basics to test the pattern. These steps are production-style but allow for use of home sewing machines. At this point, I assume the pieces have been cut and markings and notches have been transferred. BTW, I reduced the number of notches and only used two drill holes (could use chalk) for the pocket placement. Also, you'll notice I did not use any interfacing. Interfacing is often eliminated in children's clothing from budget to high-end clothing. Firmly woven fabrics may not need any stiffening. During product development test and see if you really need it.

1. Prep work - edge finish the the pocket edges and long edges of facing. Fold collar in half and stitch collar ends (called "close" in the industry). Sew shoulder seams.
Edge finish a pocket before attaching to front
Sew collar ends
2. Details. Turn and press collar. Use a pocket template and press pocket. Stitch pocket hem. Topstitch pocket to left shirt front. Edgestitch collar. I think collars look best edgestitched 1/8" from edge. Further away can look homemade - but depends on style.

Edgestitch collar
3. Attach collar. This looks more complex than it is. This fabric is hard to see but there are three notches on the collar. Two match up with the shoulder seam and one for the center back neck match-up points. Sandwich the collar between the front facing and neck (notches on shirt front indicate center front neck where collar starts and and another for the fold back of facing). Clip the top collar at the shoulder seam point a little less than the seam allowance depth 1/4". Stitch the collar on using a 1/4" seam allowance, flip the seam allowance of the top collar out of the way. Notice there is no grading and clipping (my least favorite thing to do).

Attaching the collar to the neck edge
Tomorrow I'll show how to finish the collar, attach sleeves and give a review of the results.

December 26, 2006

Fixing the neckline on Butterick 6030 sewing pattern

Sewing pattern shoulder alignment
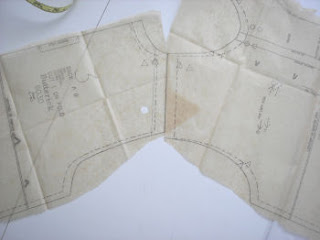
I started to deconstruct the Butterick 6030 pattern for my boy's shirt pattern fix. At this point, I am thinking it would be so much easier to start from scratch. More glaring problems showed up after looking closer. In the picture on the right, I lined up the shoulders of the shirt. I know, I did not align the pattern pieces along their true seam lines. In production sewing, though, the pieces are lined up along their cut edges, not sewing lines. If I did this, the sewing operator would bring this back to me as a mistake. Those edges should meet.

Also, look closely at the armhole shaping. The front armhole has a nice curve and the back is rather straight and flat. This was how I was formally trained in classic pattern making for adults. Adults require more shaping in front than in back around the arm. In children's pattern making, the patterns are made the same front to back, except for the neckline. This means the side seams, shoulders, and armhole shapings are exactly the same. Children do not require the extra shaping front to back. This is a typical industry method for children's patternmaking, especially infant and toddler. It is called the flat method by Aldrich.

Another problem not shown in the picture above are the side seams. The side seams swing out at the hem. I am guessing the patternmaker did this to accomodate an infant's protuding belly. Many babies have a belly until they get older. The assumption is that width must be added to accomodate the extra girth. The problem with Butterick's pattern is that it creates an a-line shirt. The photo on the pattern cover shows a plaid shirt. The side seams should be straight in order to match stripes and plaids. A basic shirt block already has extra wearing ease at the chest and waist. There is no reason to add even more room at the waist. I drew my side seams straight.

Here is my modified neckline. You can see the v-shaping more clearly. I rounded the neck, raised it at center-front, and made it smaller (my changes are in red). Corrected neckline shaping in sewing patternA 24 month old's neck measures about 10.125 inches. Butterick's neck measurement for a 24M is 15" - my modified neck is 14". I am thinking it is still too large. This is just my first rough pattern - I have a long way to go. Later, I will trace these off, with seam allowances. You can see I removed the cumbersome facing and created a double fold facing. Also, my back pattern is going to be exactly the same as my front, except for the neckline. You can see my back neckline above my front (red) neckline. I am going to double check neck measurements by measuring some necklines on some RTW shirts. When all else fails, see what your competition is doing.

December 20, 2006

A boy's shirt pattern fix for Butterick 6030


About a year ago I was asked to make a a white shirt for an infant boy's christening. I didn't have the time to draft the pattern myself, so I turned to a ready-made pattern. Out of the big 4 pattern companies only one had a "traditional" woven shirt pattern. I could have saved myself a lot of stress by drafting the pattern anyway. I didn't really have time to fix the problems in the pattern either and I was disappointed by the results. Here is a picture of the pattern envelope. Maybe you can spot the problems too.

The first obvious problem is the collar and neck. The collar points splay apart too far. The collars don't meet at the center front neck and the front neck seems too low. On top of that the collar looks proportionally too large. Compare the drawings with the actual pictures. The drawings show a convertible collar with a stand in the back.

The problems become more obvious when you study the pattern pieces (sorry the pictures are fuzzy - tissue paper is hard to photograph).


1. On the front bodice piece the front neck is a V-shape and the neck is too low at center front. The front neck is just too big. To correct this problem the neck needs to be raised at center front and the front neck needs more curve.

2. Notice the large, built-in front facing. It is at least 2" wide, way too large for an infant shirt. This should have had a traditional built-in, double fold facing found in adult shirts. I will illustrate this later.

3. The collar is too wide. Of course, this piece has the obligatory 5/8" seam allowances. The collar has little shaping, except for a slight narrowing at the back neck. It is essentially a rectangle.

4. When I sewed the sleeves in the first time - there was too much ease. The shirt has dropped sleeves. There should be no ease in this style of sleeve at all. Also notice the strange jog on the right side seam. I have no idea why the sleeve turn back would be extended longer on one side than the other. I drew a red arrow down to indicate that the sleeve cap needs to be flatter.

5. The other major issue is the sizing used by the pattern company. The infant patterns are sized S-M-L-XL, divided up by height and weight. To me, those size labels are almost meaningless. I had to pull out my size charts to figure out what size matched up with the appropriate ages, heights, and weights. The sizing doesn't break-down very well because their height-weight measurements didn't match up with any of my industry charts. This is my best guess on Butterick's sizing:

Small=3-6M
Medium=6-9M
Large=12-18M
X-Large=24M

I have wanted a basic infant shirt pattern for a while, so I am going to take this pattern and fix it. The first step is to trace off the pattern pieces, minus the seam allowances. Normally, I do my pattern drafting with the seam allowances on - typical of the industry. In this case, I want to redo the seam allowances so they are appropriate for the seam. I will add 1/4" seam allowances for the neck and collars and 3/8" for everything else. The hem will have a 1/4" rolled hem - 1/2" hem allowance. I will fix the neckline and correct the sleeve. Finally, I will redraft the collar completely - the original is useless.

Once the pattern is fixed, I will re-sew it up. The hope is, it will look better and be easier to sew.