Showing posts with label Product development. Show all posts

July 20, 2022

The Essential Guide to Children's Clothing Sizes and How to Grade Them

I am excited to announce my new book, The Essential Guide to Children's Clothing Sizes and How to Grade Them. This book explains children's clothing sizes in the United States, how they came about, and what sizes are used today. This book includes many things that have never been included in books on children's clothing design in the past.

  • A break down and explanation of children's clothing sizes from Preemie to size 16, including boys sizes.
  • A brief overview of difficulties in the industry, including obesity, and sleepwear
  • An explanation of how create your own grade rules.
  • Step-by-step instructions on how to grade basic styles, including grade rule charts.
  • Body measurement charts for infants to size 14, including slim and plus sizes for older children.
  • The infant measurement chart includes head circumference, neck circumference, hand length and width, foot length and width -- measurements that are hard to find.
  • Extra grade rule charts that include Newborn and size 9 months.
  • CAD grade rule charts
  • Complete measurement studies with additional body measurements, grade rules and references for infants, toddlers, 4-6x, girls (7-14), boys, and young men.
I will be doing a series over the coming weeks highlighting the above list with sneak peaks at what is in the book. This book is essential for anyone that designs and manufactures children's clothing. The book is currently available for purchase on Amazon or as an ebook on Payhip.

January 06, 2020

Bullet Journaling in the New Year for Fashion Designers

Journal or planner

Like many, I have had my ups and downs with keeping a journal or planner. The New Year starts off with a lot of motivation which runs out in a few months. I have purchased or been given planners with pretty pre-printed calendars and spreads and I have gone months without using it. Sometimes those journals are hard to use because the pre-printed spreads do not fit my productivity style or they are to rigid in their approach. Other times the planners are too big and bulky to carry with me despite how beautiful they are designed. The Bullet Journal has been the method or style I have stuck with the longest. I have been bullet journaling for four years, which is a record. There are several things I like about this method.

Customization


You can do whatever you want with your bullet journal. If you browse Youtube, there are a lot of artists and people in the planner community who like to make pretty planners. They spend a lot of time illustrating and drawing out their planners. They love certain pens, pens with special ink and, of course, stickers. You can do this if you want but it does take a lot of time.

I am a bullet journal purist. I create lists and check things off. There is absolutely no need to decorate or illustrate your pages unless you want to do it. You can use any type of journal -- lined, dot, or grid. Discount stores, including Walmart, carry these types of journals and you can get started at a very low cost.

A catch-all place


I really like the idea of my bullet journal being a catch-all. I really dislike posting sticky notes on my desk and around my computer monitor. It's messy and cluttered. I also get sticky note blindness. I just don't see them because I focus on the task that is top of mind. So notes, reminders, phone numbers to add to my contacts list, all get added to the journal to deal with later.

I use my bullet journal for project planning. I create an outline of the idea with individual tasks for each step. As a task is completed, I flip back to the project page and check off each task. Sometimes the project idea tasks migrate across my daily to-do's, but I always have that original reference. This type of project planning is perfect for designers as they start a new season.

I use my bullet journal for note taking during meetings and conferences. No need to bring a separate notebook, it all goes in one place. Later, as I review my notes I can create new tasks based on areas of inspiration or goal setting. I attended a conference back in October and several work-related tasks evolved from my notes. It also helped reinforce ideas that I thought were important.

Bullet journaling as a Fashion Designer


You can use one bullet journal for both personal and work related tasks. It is easier to keep track of one journal versus two, but it would be easy to overwhelm your personal tasks with design work tasks. Designing a collection comes with making hundreds of decisions with dozens of things to keep track of at the same time.

If you are a freelancer or employee, I do recommend keeping a work journal. It's important to keep track of client work and what is accomplished so you can determine your billable hours. It also adds a layer of protection so you can prove what you did. You can keep this journal in the style of a bullet journal or however you choose.

If you own a fashion business, a bullet journal can absolutely help keep you on track to meet deadlines. A work journal that is separate from a personal journal will help keep the two things separate so that neither space is overwhelmed. I keep my work journal at work so I am unable to look at it home. This sets a healthy boundary so that I truly get a break. I do carry my personal bullet journal with me most places so that anything truly important can be recorded. For truly in the middle of the night work or design ideas, I send a simple email to myself that I will read in the morning.

Either way, you can figure out a method that works best for you. One or two journals, personal and/or work related. The system is flexible enough to experiment until you find the method that is the most useful.

Productivity hacks


A bullet journal is definitely an analog approach to planning and organizing. This method helps me to mentally retain my tasks and ideas for far longer by physically writing them down. It gives me mental space and breathing room by brain dumping tasks and ideas onto paper so that the stress of having to remember it is removed

A bullet journal can be combined with digital calendaring, reminders, and contact lists. The method is flexible enough that you do not have to feel like you are doing double work. If you like to setup a calendar with reminders, then you can certainly do it. Planning out on paper first can help with laying things out digitally. You can use productivity tools like Asana or Monday.com and still use a bullet journal. As project tasks were assigned to me in Asana, they were transferred to my bullet journal. A journal seemed easier to refer back to whereas the digital tools were helpful for future reminders. Either way, you can incorporate both ideas or methods.

The productivity hack that I have recently implemented is to create your to-do lists at the end of the day in preparation for the next day. I always had this vision that I would wake up early and have time to myself to plan my day and do a bit of reading. With my chronic fatigue and busy days, it never happened. I could never remember from one day to the next what tasks needed to be done. So now I spend maybe 15 minutes in the evening reviewing my tasks and creating tomorrow's to-do list. The next morning a simple review of my to-do list gets me started in the right direction.


If you are interested in learning more about bullet journaling, you can read about the Bullet Journal Method by Ryder Carroll. There are also lots of journals available on Amazon including fineliner pens.

December 07, 2019

Battling Burnout in the Fashion Industry

Battling burnout


There has been a lot of discussion among fashion industry types of burnout. With many years in the fashion industry, I can confirm burnout is a real experience. I designed or worked on the same basic product for nearly 20 years. I reached a point in which there was not much left in the well to draw from creatively. It was at my least creative moments that I did some of my best work because my employer threw me some projects that kept me motivated. After that opportunity closed, I just did not have it in me to go after freelancing jobs in the same market segment. I was burned out.

Designers new to the business quickly burn out for various reasons. Fashion production has a much smaller time scale than in years past. Producing three to four new lines a year is extremely difficult. There are fast turn times on samples and sourcing. The sales cycles are short. Designers are under constant pressure to produce something new, fresh, exciting and on budget. This means long hours for days and weeks on end.

Some trade groups have taken notice and start to advocate for better pay and hours. I don't know if anything will change, but these are some of the things I did to help battle burnout.

Schedule time off


This may be difficult depending on your job situation. But we all need time away from the grind. I had at least one day off a week to focus on other things. Attending church and focusing on family provided a weekly boost that kept me going. Plan vacations. The point is to be intentional with your time off and do something else other than work.

Turn off social media


Social Media

It is tempting to troll Pinterest or Instagram for new ideas all the time. Facebook, Twitter, and any other social media platform can bombard you and your mental health with unrealistic expectations. It is as true in the fashion industry as anywhere, but there is an expectation to stay on top of trends by following trendsetters. Designers not only have to create a new look, they are expected to also live it. Save your mental health by not looking at social media outside of work time or responsibilities so you can be yourself.

Explore new hobbies or interests


Oil painting

As a designer, many of my hobbies and interests were related to my occupation. This meant I was surrounded by work related supplies and tools at work and at home. Try to find a hobby that is different to help re-energize you mentally and physically.

Take care of yourself


Take care of your self by getting some sleep


One of the primary causes of burnout is a lack of rest, either mentally or physically. There are only so many 12 hour days you can do before you just don't perform well on the job or at home. Prioritize sleep, healthy eating, and exercise. If there are health issues, then address them. If these things are allowed to persist, your job performance and over-all well-being will suffer. This can be difficult in certain job situations, but do the best you can.

Learn to say no


If you are a freelancer there are some things you can do to improve high pressure situations. The first is to have clear policies about job completion and deadlines. This means you can add a few extra days for job completion even if you don't necessarily need it. The client may pressure you for fast deadlines, but if you can't meet the deadline or don't want to, you can decline the job. It's better to be honest up front about the work you can and cannot do so that the pressure to complete is balanced with reality.

This is more difficult as an employee but sometimes employers have unrealistic expectations. If it is impossible to complete a project on time, do your best to communicate with your employer. Try to have a plan or new timeline for project completion. This may mean asking for help from other employees. I once had an impossible deadline and after I explained the situation to my employer, he generously gave me more time. He just didn't know the work involved.

Start a side hustle, plan a transition or exit


Plan transitions


We can put a lot of pressure on ourselves to perform when we feel like we don't have a choice. This is why I always suggest having a side hustle or plan in place in case of a layoff or exit. A choice frees us to make a job transition if the current situation becomes intolerable. Knowing we can do something else without meeting financial ruin can relieve a lot of stress. A side hustle does not have to take much of our time as long as you have a smart plan in place. It could be something as small as monetizing a blog or creating some small gigs on Fiverr.

Job transitions and layoffs happen frequently in the fashion industry. Have a plan in place with where you might go or do next if this happens. This may include having an emergency fund to pay rent while you sort things out and paying off debt.
February 11, 2019

Frequently Asked Questions about Tech Packs

With the release of my Tech Pack, there are a lot of questions on how to use it.

Q: Is there an industry standard for Tech Packs?


No, but there is industry expected information. There are several tech pack templates and forms available for purchase on the Internet, and they are all a bit different in presentation. Generally, those tech packs seek the same information. A Tech Pack contains any and all information needed to manufacture your product. This information includes a cover page, technical drawings, cutting specs, labels, etc. The forms included in my Tech Pack allow for a lot of flexibility so it doesn't matter if you are manufacturing clothing, bags or tents.

Q: Does a Tech Pack include a cutting spec?


I have seen some statements that imply a cutting spec is usually not included in a tech pack. That has not been my experience. If a cutting spec is needed to make your product, then it should be included in a tech pack.

Q: What forms do I send to a contractor?


Only the forms that are needed for the work contracted. It is possible to hire a contractor that can do everything from product development to cutting, sewing, finishing and shipping. Usually, a sewing contractor is hired to do cutting and sewing. In that case they only need a cover sheet, style sheet/cutting spec, bill of materials, colorways (if needed), labels, swatches, and anything else needed to complete the work. Forms that contain proprietary info are for your own in-house use, such as a cost analysis.

Q: What is the difference between a Cost Analysis and a Bill of Materials?


A Bill of Materials contains a list of every input (fabric, trim, supplies) needed to manufacture your product. It does not contain pricing. This form can be used for ordering and inventory.

A Cost Analysis also contains a list of every input but also includes pricing and quantity. This form is used to figure the cost of manufacturing, sale price, and gross profit. This information is kept confidential.

Q: What else should my Tech Pack include?


A tech pack is usually just the paper work involved in product development. But if you are sending a tech pack to a sewing contractor, you should include a perfectly sewn sample and fabric and trim swatches. This is especially important if you are manufacturing overseas where there may be a language barrier. The sample will help clarify what you want when the contractor may not understand or read the tech pack. Swatches are also helpful if the contractor is also buying materials overseas.

Q: I don't draw well, do I have to include technical drawings?


Any drawing is better than no drawing. It is the primary way you will communicate with a technical designer and/or pattern maker. You can also hire people to create the drawings for you at reasonable cost.

Q: Can I customize The Simple Tech Pack?


Yes. Included in your purchase is a spreadsheet workbook version (Excel and LibreOffice Calc). You can add your company info and logo. You can also rearrange, rename information if you choose. The only caveat is that the forms are copyrighted and cannot be resold.

Q: I'm an indie pattern designer. Will this tech pack help me?


Yes. An indie pattern designer is very similar to a fashion designer. You will still need to develop a style, cutting spec, measurements, sewing instructions and grade rules. The cost analysis will help you price your product. The Simple Tech Pack can help you organize the information needed for your final product.

Q: Why does your Tech Pack have a Style Sheet instead of a simple cutting spec?


I created a combination form called a Style Sheet. This form contains both a technical drawing and a cutting spec. I have found it very useful in product development to include a technical drawing with the cutting spec as it travels through sampling. That way every person along the way has the same point of reference. It reduces both paperwork and questions.

Do you have any other questions? Please leave a comment and I'll answer your question in an upcoming blog post.

April 29, 2014

Grading vocabulary - Nest and stack point

As I have attempted to learn how to code (computer programming), I have been stymied by one simple problem. Vocabulary. Most programming manuals or tutorials assume the learner has some basic knowledge about programming and skip explaining essential skills or words. This is even true of the manuals designed for complete idiots and absolute beginners. One good example in the programming world is the word compiler. I understand it on a basic level as a set of instructions that tells the computer how to link various files to create the executable software program.* There are various ways to deal with compilers depending on the programming language and platform used.  I didn't know what compilers there were, which to use, how to write the instructions, etc. All I could find was some pretty lousy examples that I could copy and paste and they magically (or not) worked. I could present dozens of examples of this disconnect as I've stumbled my way through working on SodaCAD.

Grading manuals are similar, at least the ones I have used. They lack sufficient or clear explanations of the most basic of terms. Often times the manual writers skip sizing theory and jump to demonstrating their preferred grading method. This includes the much revered Jack Handford grading manual, the manual I still use and recommend today. Handford's book was the first that helped me understand grading but I recently reviewed the book and noticed the notations I made where I was confused.

One of my goals in writing my grading manual is to include a Grading 101 section. The above drawing is the illustration for two terms.

Nest - pattern pieces within a size range that are stacked along a common point or line. Indicated here by the horizontal line and star.

Stack point - the point at which pattern pieces are aligned, generally located in the middle of the piece but may be located elsewhere (indicated by the star). In CAD grading, the stack point may also be called the point of origin and can be easily moved as needed.

I'm still working on my vocabulary list and guide. If there is a term you have heard and would like explained, please leave a comment below

*I realize I probably just used some vocabulary that the readers of this blog might not know. In any event, it illustrates the problem.

January 23, 2014

Shoulder slope pattern correction

LisaB asked me to explain:

Raise the shoulder at the neckpoint 3/8" on front bodice to correct shoulder slope problem. I need to apply this correction to my t-shirt pattern too.
I tried my first cardigan sample on several times and noticed the shoulder seam was not pointing in the right direction. The seam at the neck point was pointing toward the front rather than laying right on top of my shoulder. I also looked at my t-shirt pattern and observed the same problem. This indicates a possible shoulder slope problem or shoulder to hem length problem on either the front or the back bodice or both. To figure this out, I ran a basting thread in my cardigan shoulder seam area and looked in the mirror to see where I needed to make the adjustment (no fitting buddy or dressform at my house, unfortunately). I also pulled out my blouse pattern and compared the shoulder seam. In the end, I needed to move the shoulder up at the neckpoint 3/8" on the front bodice. This increased the shoulder to hem length on the front just enough to allow the back bodice to relax backward and position the shoulder seam right on top of the shoulder.

Raising the shoulder point at the neck 3/8"

Not everyone will need to make this adjustment. This was a problem inherent in my own patterns to fit me. The drawing below, I hope more clearly shows how the shoulder seam was laying.
View of the correct shoulder point on the body

January 21, 2014

Adapting a block pattern into something else pt. 8 : the final pattern alterations and a finished design

Modeling the final version of the cardigan
It took me quite a while to finish up the pattern modifications for this style. I would try on the first sample and look in the mirror, then go back to the pattern many times. There were a few things that were not right. Each time I would try it on, I would pull the jacket forward so the back neck rested higher. This would throw off the shoulder line. Finally, I realized I needed to raise the back neck and raise the shoulder at the neck point on the front bodice. This situated everything nicely. The first jacket is definitely a wearable first muslin, but the second sample turned out great.

Final pattern alterations:
  1. Remove extra wearing ease. I noticed that many similar cardigans are not really that much bigger than the average t-shirt, so keep this in mind when adapting your t-shirt pattern.
  2. Raise the back neck 3/4". I had left the original neckline of the t-shirt, which ended up being lower than I wanted for the cardigan.
  3. Raise the shoulder at the neckpoint 3/8" on front bodice to correct shoulder slope problem. I need to apply this correction to my t-shirt pattern too.
  4. Shorten sleeve length.
Cardigan with scarf


All that's left is to double check the seams to make sure they match and cut the pattern out of tagboard. This jacket is now ready for further iterations. Maybe a shorter or slimmer version. A waist line with darts. It's all possible.

If I wanted to take this cardigan into production, I already have some of the information needed and recorded in my blank forms:
  1. Style and cutting sheet lists all the pattern pieces with spec drawing.
  2. Sewing spec lists each step of construction.
  3. Fabric swatch cards with content information.
  4. Recorded the pieces in the pattern catalog.
To turn this into a more complete spec package, I just need to add:
  1. Finished pattern measurements for quality control
  2. Grading spec
  3. Cost analysis
I've also added a wash testing data form, which is not yet available (soon!) and not included in the book. This form records shrinkage information which is critical for knit fabrics.

November 21, 2013

Adapting a block pattern into something else pt. 6 : Sewing a fitting sample

Test fitting sample for a new cardigan design
You can easily spend a lot of time creating a pattern on paper but at some point, it needs to be sewn up. It is while sewing that you'll see your design take shape and lead you to make modifications as needed. I changed the design a bit by eliminating the folded neckband. The neckband is instead a single layer that is allowed to roll. I made this change because the fabric is pretty light and it would need some kind of stabilizer, which I didn't have. The cardigan is very comfortable and fits pretty well. Even so, I added just a bit too much wearing ease. So I need to reduce some of the body width. The upper back is a tad long and the sleeves need shortened.

It's pretty hard to get everything just right on the first attempt. I've done enough girls dress patterns that I don't usually have to do many iterations. Adult clothing takes a bit more tries because I lack experience with it. Industry pattern makers and sample makers will sometimes make many iterations of a design before they get it just right. This is a slightly different approach than home sewists might take. But once the pattern is nailed down, I won't have to worry about it anymore. It will be much easier to create variations on this style too.

Paper sewing pattern
Before I could tackle the pattern adjustments, I needed to stop and get organized. I assigned a style number, created a style and cutting spec sheet, and assigned pattern numbers. I explain how to do this along with providing printable blank forms to fill out in my book. If you prefer keeping a digital record, you can use the examples in the book to create your own spreadsheets. In many ways I still prefer paper and pencil. It forces your brain to think differently - perhaps more analytically. I have used both paper and pencil and spreadsheets. There are advantages to both.

November 12, 2013

Adapting a block pattern into something else pt. 5 : Making the pocket pattern

Sewn sample of the new cardigan style

Here's a sneak peak of the first sample of my cardigan pattern. I'm fairly pleased with the results, though there are a couple of minor pattern modifications to make. So more about all that later.

For now, we need to finish up the pattern. The last two pieces to deal with are the pockets (shown above) and the elastic casing. I referenced my sweater to determine the pocket dimensions and placement, which is basically a rectangle. Pockets come in all sorts of shapes and sizes with varying amounts of functionality. Pockets should be proportional to the overall garment. They can be graded for larger or smaller sizes to maintain proper proportions. Pockets can be applied in various ways and include seam and hem allowances.

I wanted a very casual look to my pocket so I used a narrow 3-thread serger hem around all four sides and topstitched it on. This allowed the fabric at the top of the pocket to roll. This detail mimics the detail on my sweater. I didn't have a lot of confidence in producing a neat topstiched pocket in which the raw edges are turned under. This is partly due to the fabric and my machine. For a more structured pocket this fabric would need a fusible to help stabilize it.

Pocket placement is noted on the pattern piece by a drill hole. In a factory, an actual hole is drilled into the fabric. I have seen knits marked with a drill that also contained a marking medium such as a washable marker. In that case, the drill bit was like a needle. My pattern at home will contain a hole large enough for a chalk marking pencil to fit. Even though there are lines on the pattern pieces indicating placement, they are not transferred to the actual fabric. They are just there for clarity.

Drill holes for pocket placement

The elastic casing is just another rectangle large enough to cover the elastic. I think mine is about 1/2" x 8".

October 30, 2013

Adapting a block pattern into something else pt. 4 : how to create the neckband pattern piece

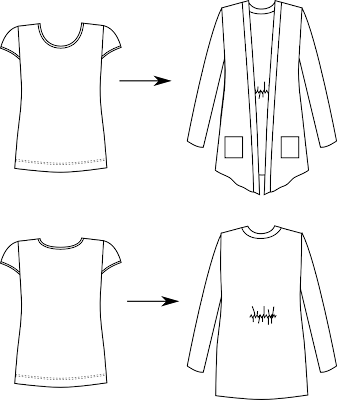
T-shirt into cardigan
For review read part 1, 2, and 3 of this series.

All of the major pattern pieces are now done. Next up is to do the neckband, the elastic casing for the back waist, and pocket. These three pieces are just rectangles. In a CAD pattern making environment, I will make pattern pieces for all rectangles and squares. Pattern makers, graders, marker makers and cutters all handle these kinds of pieces a little bit different, so ask if you are not sure.

For me, working on a personal pattern in my own workspace I handle rectangle and square pieces one way. I figure out the dimensions and note them on my style sheet. You can do this for patterns* that will be used in a factory setting too, but you will need to create a cutting guide for any rectangular pieces which might be graded. For now noting the cut dimensions is sufficient.

Up to this point I haven't really needed to consider how the cardigan is to be constructed. The majority of the cardigan has rather simple construction that mimics the construction of the t-shirt. But the neckband can be constructed and attached in a number of different ways. I also have to consider the stretch factor along the back neck. Do I want a 3-piece neckband with seams at the shoulders or a 2-piece neckband with a seam at center back? How do I finish the neckband at the hemline? How wide? All these things have an influence on the dimensions of the cut piece.

I like to keep things simple so I opted for a 2-piece neckband with a seam at center back. A 3-piece band might be necessary if the fabric width is too narrow. A 1-piece neckband might be possible if the cardigan was smaller. Begin by measuring the front and back neckline of the cardigan patterns.

Measure the neckline for the neckband

Now it is a matter of math. There really isn't a formula for this. It's just adding and subtracting.**

Neckband width = (front neck+back neck) - (front and back shoulder seam allowances + hem allowance) + seam allowance for center back + seam allowance at hemline - some stretch factor for the back neck.

Neckband length = 2 * (Desired finished width + seam allowance)

The neckband will be cut across the width of the goods like this:

Cutting guide for the neckband

Dimensions should be written as Length x Width. In this case the Length is the shorter measurement. My neckband pattern piece will then be something like:

5 x 30 inches

A CAD version or hard pattern will look something like this with a pattern number assigned instead of the words neckband:


You'll notice that I have two notches. The notch along the length (the narrow end) instructs the sewing machine operator to stitch the neckband pieces together at that end. The other notch along the width (long direction) is the match point between the neckband and the shoulder seam of the cardigan. This notch is necessary because I reduced the back neck to account for a stretch factor. This will help the back neck fit better rather than stand straight up.

Since I am just making one size and working at home I will draw a picture indicating the notch placement with a measurement along with the cut dimensions for the neckband.


*Managing rectangular and square pattern pieces is the subject for at least two additional blog posts! Yep, it's hard to believe but there is a lot to say on the subject....

**I do all this adding and subtracting right at the calculator.

October 25, 2013

Adapting a block pattern into something else pt. 3 : Modifying the t-shirt back pattern piece and sleeves to make the cardigan

T-shirt into a cardigan
For review read part 1 and 2 of this series.

Next up on my t-shirt block pattern transformation to a cardigan is to work on the pattern pieces for the back. I won't go into too much detail because there isn't much difference from the front.

Trace off the back and add the same length and width adjustments as the front. Extend the shoulder the same amount. Drop the armhole the same amount.

Trace off the back pattern piece, add length and wearing ease


Next I add drill holes to indicate the elastic for the back waist. The elastic takes up some of the extra body ease in the back to make the cardigan appear more fitted. I didn't add additional design ease for extra fullness, just the same wearing ease as the front. If you draft your own pattern, you can add as much or as little as you want. I referenced the cardigan that I am knocking off for placement. In the picture below, the drill holes appear rather large, but that is just for clarity in the drawing. I'll take a picture of the finished pattern pieces when they are ready so you can see what it all looks like. In reality, the holes will only be large enough so a marking pen(cil) can make a mark.

Add drill holes for the back elastic

I also modified my sleeve for length and width. My previous blog post on how to reduce/eliminate sleeve cap ease* should give you an idea of how to adjust the sleeve cap. Walk the sleeve cap along both the front and back armhole of the bodices pieces. The armscye should be longer than the sleeve cap. Note the difference and enlarge the sleeve cap so that it matches the armscye. You can do this by slashing and spreading. Do not add any sleeve cap ease. This is a myth perpetuated by pattern drafting manuals and others. You don't need it.

Adjust the sleeve cap to fit and add length

Finally, I referenced some cardigans in my closet to figure out how long to make the sleeve (plus hem) and how wide to make the wrist. I have a tendency to make my sleeves a little longer than necessary because long sleeves from off the rack stuff tend to be too short for me. Also, I worry about shrinkage. I will be pre-shrinking my knit fabric, but some knits will shrink with multiple washings. In any event, add the length you need for your sleeve.

October 17, 2013

Adapting a block pattern into something else pt. 2 : Pattern modifications to turn a t-shirt into a cardigan

Rather than take pictures of my pattern making process of pencil on paper, I did up some line drawings. Just to refresh, I am tranforming a t-shirt block pattern into a knit cardigan.

T-shirt into a cardigan

I began by laying my t-shirt front pattern piece on to the cardigan that I'm knocking off and took notes on the differences. I had to keep a few things in mind as I compared the two. First, the t-shirt is close fitting with little extra wearing ease. The cardigan I'm knocking off was accidentally shrunk, so I need to add more wearing ease than is immediately apparent. A cardigan or jacket needs enough wearing ease that it is easy to put on and wear over other clothes. I can't tell you exactly how much wearing ease your pattern should have because it depends on what you prefer. Expect to add somewhere between 2-4 inches extra for this style.


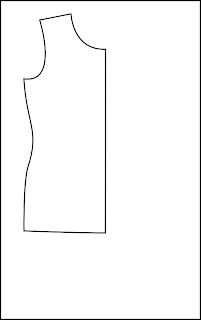
Trace off the bodice pattern
The first step is to trace off half of the front pattern.


Add length to the t-shirt
Next, I lengthened the pattern piece based on my notes. My pattern piece includes the seam allowances and hem allowance. I don't remove the hem allowance, I just make a mental note and add the hem allowance to the length I've added.


Creating the draped opening of the cardigan
To get the angled shape of the cardigan, I extend from the center front at the hemline and draw a line from the high point of the shoulder to the hem. Gravity will pull that point down and create the angle along with a bit of drape.

The greyed out area represents an area that is removed. On paper I scribble in any area to remind myself to ignore it. You could also erase it.
Adding extra wearing ease for the cardigan
Next, I add in extra wearing ease by moving out the side seam, dropping the armhole, and extending the shoulder line. The extra ease added to the side seam should only be 1/4th the total ease added because we are only working on 1/4th of the total body circumference.

I'm still debating on how much wearing ease to add. I need to compare my body measurements to the pattern to make sure it is enough.


And this is a far as I've gotten so far. I need to make similar changes to the back pattern piece. I also haven't assigned pattern piece numbers yet. Blank forms for managing patterns are available in my Pattern Making bundle or in the book with complete instructions.

October 09, 2013

Adapting a block pattern into something else pt. 1 : Noting changes for the new style

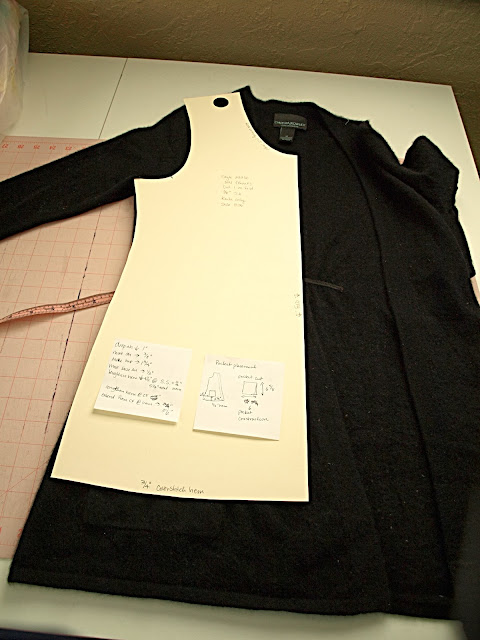
Pattern notations for modifying a pattern

A block pattern is a sewing pattern that has been proven. It is a pattern that has been trued, perfected and finished with seam allowances. The pattern has been sewn up and tested for fit. In other words, a block pattern just works. A block pattern becomes a part of a pattern file which can be used to make other patterns.

In the industry we rarely draft from scratch. Instead we modify existing patterns (or blocks) into something else. Some pattern making gurus talk about using slopers. Slopers are basic patterns drafted from body measurements and do not have seam allowances. Industry level pattern makers use block patterns, with seam allowances on, to make patterns for new styles*. It saves time.

It's easier than you might think to do this and this is just one example. I'm sure other pattern makers have their own procedures. My own procedures adapt to whatever it is I'm working on and whether I'm using CAD or traditional methods.

The problem:

I have this much loved cashmere sweater jacket. I snagged it off a sales rack a couple of years ago and I absolutely love the cut and fit. You know, the perfect layering piece, warm and soft for those cool days. I usually clean it by running it through the dryer using a Dryel kit. This last time was a disaster as I had left a piece of chocolate in a pocket. Chocolate ended up all over the sweater and everything else. So, I decided to run it through the hand wash cycle on my washer. That was a mistake. While the chocolate did come out, the sweater shrank. It shrunk just enough that I'm not sure I can wear it anymore. It made me very sad. And yes, I know better. I should have hand washed it.

The solution:

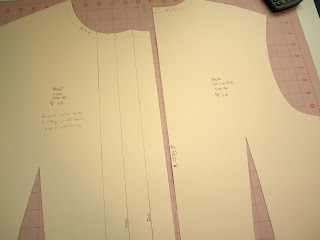
I always said that once this sweater was in pieces, I would make up a pattern to make a new one. So here it is. I recently finished up my t-shirt pattern, a block pattern ready to go. I began by carefully laying out the sweater and positioning the front t-shirt pattern on top. I then used scraps of paper to note the differences between the sweater and the pattern. You can see my notes in the picture above.

The notes** usually say something like: Move SH pt out 1/2" (left arrow) ; or Extend hem (down arrow) 3 inches. These notes are sometimes accompanied with drawings as needed. If I was working in CAD, I would just mentally note the differences and make the changes as as I went along. Since I'm drafting with pencil and paper, the notes are essential.

The next step is to trace off the t-shirt pattern and start applying the changes. More on that later.

*There are a lot of pattern making myths out there. I'm trying to keep this blog entry very focused but I'm happy to answer pattern making questions and myths in future posts. Please leave your question or comment below.

**These notes eventually find their way to my pattern piece catalog. I assign a pattern piece number, note the style/pattern piece that the new piece came from, and then tell what changes were applied and any other relevant details. Blank forms for managing patterns are available in my Pattern Making bundle or in the book with complete instructions.

July 19, 2012

Some more grading questions

I received some more grading questions.

Grading by Pattern Shifting

I am wondering what you think of the section in Aldrich's book about grading?  It seems like a simplified method in some ways and so I am wondering if for someone simply making the patterns (instead of the clothes) might this method do just fine?

 There are different approaches to grading. Aldrich's "method" is similar to Handford, just presented in a different way. The movements of the pattern pieces is done in basically the same way as Handford. I have not graded a pattern using Aldrich's method, but I don't see that it would be a problem. Just keep in mind that her grade rules are based off her own sizing study of a British demographic. It may or may not work for your customer profile.

DIY or hire a pattern grader

Its not that I am adverse to putting in the extra time, but sometimes I wonder to myself if I am doing way more work than necessary in order to avoid "cutting corners" and making a product that in the end is below par.
I've been grading patterns for over 15 years. I'm still learning. If you want a superior product, you will have to spend the time learning how it's done and gain necessary experience. People in business either hire someone to fill a knowledge or time gap or they spend a lot of time learning in the school of hard knocks. Grading is not especially difficult, but it does take time and effort to learn it. The best way to learn is by trying and doing. I don't mean to sound harsh, but there is no magic book or trick that will help you get what you want faster.

Can I grade patterns with Adobe Illustrator?

I am not drafting/grading using a cad program but am doing all my work by hand and in Adobe Illustrator if that helps you answer my question better.
A lot of people ask me if they can use Adobe Illustrator for pattern making and grading. I suppose you could but to be honest, it's not for the faint of heart. I know there are indie pattern makers using Illustrator to do what you describe. But as a professional pattern maker and grader, Illustrator does not provide the level of accuracy and control that is needed for superior results. If given a choice, I would do all of my pattern making and grading by hand, or in other words with a pencil and paper.

Now there are pattern companies that draft their patterns either in CAD or scan in hand drafted patterns and add all the extra notations in Illustrator. The Big 4 do it that way. No problems there.

July 08, 2012

Designing and grading for a large size range

I get the following question from time to time:

I am a self taught pattern drafter, drafting patterns for myself and my 
kids for years.  I decided to turn this into a business recently and am 
creating a line of children's patterns for the home sewer.  My size range 
is 6m-10 and this is where my question is... Can you help me understand the process of redrafting the SAME style/pattern in my different base sizes?  I  get that I can't just take a size 5 and grade all the other sizes from 
there.  I own several popular pattern drafting books as well as 2 different 
grading books and I can't seem to find this information anywhere.  Any 
information you can provide me would be SO HELPFUL.  I am guessing there is some precise way to redraft my base sizes so the design doesn't change much.  Can you shed some light on how they do this in the business?  THANK YOU!
There are several things. First, it is not unusual when designing children's clothing to cover a large size range. The reality is it is much more work than you would think. I would recommend reviewing my previous blog entries on grading, especially Creating a Grading Standard (also read the other grading tutorials, they'll be helpful).

Unfortunately, there is no other precise way to redraft your sample or base sizes except good old-fashioned pattern drafting. If you have some basic pattern blocks for each size range, then it is no big deal. Just starting out, though, it is a lot of work. It will take less time and become easier over time, so no worries. One thing to pay attention to are proportions. You may need to alter the design to accommodate the size while still giving the impression of the same overall design idea.

May 02, 2012

Grading a skirt pattern

I sewed a skirt from a Burda pattern 2 years ago in desperation. I had gained weight and none of my skirts fit me anymore. 6 months later, I dropped all that weight and the skirt was simply too big. I liked the skirt pattern and it fit really well, but I had to grade the skirt pattern down in order to use it again.

In order to grade the skirt, I had to figure out the grade for Burda's patterns. I did this by looking at their measurement charts and comparing the sizes. With a little math I determined that Burda was using a 1.5 inch grade in the waist and hips. After comparing my measurements with the chart, I learned I only needed to go down one size.

So I pulled out my handy Jack Handford grading book and followed the instructions for grading a woman's skirt one size down. There are charts and instructions for a 1, 1.5, and 2 inch grade. It was so much easier to do than I expected. I knocked this out pretty quick. This book is now out of print, but if you can find it, buy it.

Graded skirt pattern pieces

And I may be too much of a nerd, but I assigned a style number and created my own cutting spec for future reference. Now all I have to decide is which fabric to use to make up my next skirt.

January 09, 2012

T-shirt pattern quest pt. 4 : Analysis of fit and construction

T-shirt test samples for construction and fit

Here are the results of my first and second pattern test. I had enough fabric to make two shirts. Each shirt revealed problems with my construction and fit. I had added about 1" of extra wearing ease to shirt 1 and that was reduced to 1/2" of extra ease in shirt 2. The pattern was designed with 3/8" seam allowances. This allowed for an 1/8" cut off on the seam edges so that the seams finish at 1/4". I had difficulty in shirt 1 maintaining that cut off allowance, improving on the second.

One thing I did not notice is that this fabric is directional. With napped fabrics, the fabric can look darker or lighter depending on which direction the fabric lays. This interlock is not napped but it definitely looks different in different directions. I had switched the direction of the sleeves on shirt 2 and so there is a color variation. It is subtle and hardly noticeable except in certain light.

Finally, there is an issue with the fit of the armhole, which is just a bit too tight. This creates unsightly wrinkles in the underarm area. I guess I never noticed on the original shirt, but the problem exists there too. So, a bit of adjustment has to happen. I need to lower the armhole a bit and scoop out the front. This means the sleeve will need a bit of adjustment as well. The armholes will no longer be symmetrical front to back, which is how it should be. Anyway, more on that as progress is made.

The shirts are fine and comfortable enough to wear, but a modeled shot may or may not appear on the blog

January 03, 2012

T-shirt pattern quest pt. 3 : Sewing up the first sample


The next step in recreating my favorite t-shirt pattern is to test out some different construction options by sewing up a sample. This sample will also be used to double check fit. I began by testing some binding options on some scraps. I eventually discovered the best method for my machines that gave the best looking results.

Testing binding options for knits

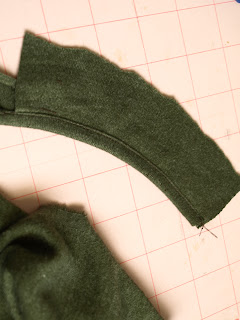
Before stitching the neckbinding to the t-shirt, I stitched one shoulder and overedged one edge of the neck binding.
Sewing a should seam on a t-shirt
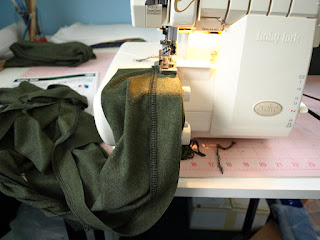
In the picture below I am stitching the binding strip to the neck. The binding strip is on top so that I can stretch it as it goes through the machine. The shirt is supported by the table. Don't let it hang down in front of the machine or gravity will do more stretching of the shirt than you intend. I did edge finish one edge of the binding strip by serging. I didn't have enough green thread, so some of it is in black.
Stitching a neck binding to a t-shirt
Next, I followed the same steps in stitching the binding to the sleeve hem edge. These sleeves show about how much I stretch the binding as it went through the machine.

Attaching the sleeve binding

I then stitched the remaining shoulder seam closed through the neckbinding. This means there is a visible seam at the shoulder. This type of shoulder - neckline construction is also visible on the original t-shirt.
Neck and shoulder seam construction
After closing up the second shoulder, attach the sleeves and sew up the side seams. This is the shirt just prior to topstitching. Just fold the binding strip to the inside and topstitch carefully from the right. You can see an example in the first picture of how it turned out, but I'll post a picture of the finished shirt later. I used a regular straight stitch for topstitching. I don't need the neck to stretch to pull it over my head, so it actually turned out fine. My Babylock Evolve does have a chain stitch option, and that is how it should be done. BUT, it takes a good amount of time to switch it over and because of the overly large presser foot, you can't easily see where you are stitching - too much bother. Industrial chain stitch machines look a lot like regular machines. I believe some vintage domestic Singers also have the ability to do a chain stitch, so if you have that option, than use that.

A few last words on the binding. The original shirt had a double fold binding, which is difficult to reproduce at home without the proper folders and adjustments to your machines. The binding I did is less bulky and easier to execute with home sewing equipment and it turned out just fine.

December 15, 2011

T-shirt pattern quest pt. 2 : Calculating the amount stretch in a knit fabric


Patterns for styles made out of a knit fabric need to include the amount of wearing ease for the desired fit. In some cases the wearing ease is actually negative ease. Negative ease means the pattern measurement is smaller than the actual corresponding body measurement. A good example of this would be yoga pants in which the pants stretch to fit a particular size. In some cases the pattern has positive wearing ease because the style is larger than the corresponding body measurements, such as an oversized sweatshirt. Determining how much to reduce a pattern for a desired type of fit requires first determining a knit fabrics stretch factor.

Note - My pattern is intended for knits that have already been pre-washed and shrunk from retail store knits. So no extra allowance is included for shrinkage.

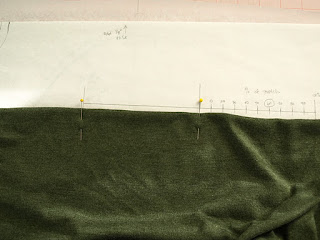
At this point I needed to check the amount of stretch in this fabric. Fold the fabric so that you are not testing on the edge of the fabric. Place two pins 5 inches apart.

Step one of figuring out a fabric stretch factor
Pick up the fabric and hold the left pin in your left hand at the zero mark and then stretch the fabric as far as it will go with your right hand. Watch where the right pin stretches on the stretch ruler. In this case, my fabric stretches about 30%. Only stretch the fabric as far as it will reasonably go without overly stressing the fabric.
Stretching a knit fabric to determine the amount of stretch

Let go of the fabric with your right hand and watch to see if the fabric returns to it's original position. Knits that do not return at all, have no recovery. In this case, my fabric returned to the 10% mark, which isn't great, but probably ok for a top.

I had forgotten, but this particular fabric is an interlock rather than a jersey. Interlocks do not stretch nearly as much as a jersey. I had originally planned on adding about 1 inch of extra wearing ease because I wanted a bit looser fit. Now I wonder if I should add a bit of extra? Once I work that out, I will modify my pattern and cut it out.

December 02, 2011

Understanding basic block patterns : a few definitions

Shari asked me some questions about basic block patterns.
So pleased I stumbled on you blog - wonderful work by the way!  I am keen to start designing kiddies clothing and I am trying to find block patterns and relevant information on using/adapting them, that is not too confusing.

I have got some info on-line and books out of the library but have not 
found anything that I am happy with.  I am wondering if you could give me any pointers on where to start looking and/or even purchasing basic block templates.
The first thing to do is to define the term block pattern. A block pattern is a finished pattern with all seam allowances, notches, notation, etc. The pattern has been tested and approved for fit. It has been used, perhaps, in a style that has proven to be acceptable with customers.

Developing a basic block pattern


A basic block pattern is a pattern from which all other styles are based. Sometimes they are derived from the original drafts created from body measurements with instructions from a pattern making manual. Sometimes not. A basic block pattern can also be the patterns from an approved style as described above.

Just as an example, we can look at my recent blouse making venture. After a bit of testing, the pattern pieces for that blouse have become my basic block patterns for future blouse styles. I cut them out of tag board so I can trace them off, either on fabric for cutting or on paper for drafting a new style. The pieces have seam allowances and notes to help for future construction.

Blouse pattern pieces in tag board
Pattern makers in the industry do not draft from zero every season. We trace off existing pattern pieces (blocks) and modify them. Over time we create a library of pattern pieces that can be mixed and match for a variety of styles.

How to acquire basic block patterns

There is no easy way to acquire basic block patterns. These types of patterns are considered proprietary to the business that developed them so they are rarely for sell. That leaves new designers with a few options and none of them are easy. And perhaps, that is how it should be. I know that sounds harsh, but your patterns will be better if you struggle through the development process yourself. You will come to understand how things should fit and be sewn and know how your patterns work.

So what are the options?

1. Draft your own patterns from body measurements using a pattern making manual. This is the most time consuming option, but ultimately the only way to ensure the fit you want.

2. Hire a pattern maker to do it for you. Probably the most expensive option. You will need to be prepared with a basic style, body measurements, etc. Expect a bit of back and forth as you refine fit.

3. Adapting commercial sewing patterns*. You can buy a commercial sewing pattern for a similar style but it will require a bit of fixing - actually a lot. Commercial patterns are usually sloppy and are not production ready by any stretch. One exception are Burda patterns which do not have seam allowances, so they will be easier to fix and adapt. Burda has even released their patterns as "open source", which is actually a misnomer. In other words, Burda has released their patterns with the license to use the pattern as you wish. And lest you think that I am encouraging the violation of the copyrights of commercial patterns, please know that the copyright status of patterns are in a legal quandry. In other words, in the U.S. no one can stop you from using the patterns you purchase as you wish, even though many believe they can. The only way to avoid that mess and confusion is to draft your own patterns from scratch.

4. Buy block patterns from someone else. I've never seen any production ready patterns available for sale. That doesn't mean it will never happen. I've even considered selling mine, but I haven't done it yet.
BTW, my blouse patterns were adapted from some Burda patterns and it worked well for the most part. The collar pattern pieces required a lot of work and I still don't have them right, IMO.

*If you buy a commercial pattern to take to a professional pattern maker to fix, you will probably be turned down. Commercial patterns require a lot of work to fix and it is honestly easier to draft a pattern from scratch. Some may turn you down for ethical reasons. Others may turn you down because you may give the impression that you are not ready or prepared to be a professional. I probably would turn you down too. The only way I would use a commercial pattern from a client is as a reference to match fit and styling while using my own block patterns or drafting from scratch.