Showing posts with label Tutorials. Show all posts

February 11, 2019

Frequently Asked Questions about Tech Packs

With the release of my Tech Pack, there are a lot of questions on how to use it.

Q: Is there an industry standard for Tech Packs?


No, but there is industry expected information. There are several tech pack templates and forms available for purchase on the Internet, and they are all a bit different in presentation. Generally, those tech packs seek the same information. A Tech Pack contains any and all information needed to manufacture your product. This information includes a cover page, technical drawings, cutting specs, labels, etc. The forms included in my Tech Pack allow for a lot of flexibility so it doesn't matter if you are manufacturing clothing, bags or tents.

Q: Does a Tech Pack include a cutting spec?


I have seen some statements that imply a cutting spec is usually not included in a tech pack. That has not been my experience. If a cutting spec is needed to make your product, then it should be included in a tech pack.

Q: What forms do I send to a contractor?


Only the forms that are needed for the work contracted. It is possible to hire a contractor that can do everything from product development to cutting, sewing, finishing and shipping. Usually, a sewing contractor is hired to do cutting and sewing. In that case they only need a cover sheet, style sheet/cutting spec, bill of materials, colorways (if needed), labels, swatches, and anything else needed to complete the work. Forms that contain proprietary info are for your own in-house use, such as a cost analysis.

Q: What is the difference between a Cost Analysis and a Bill of Materials?


A Bill of Materials contains a list of every input (fabric, trim, supplies) needed to manufacture your product. It does not contain pricing. This form can be used for ordering and inventory.

A Cost Analysis also contains a list of every input but also includes pricing and quantity. This form is used to figure the cost of manufacturing, sale price, and gross profit. This information is kept confidential.

Q: What else should my Tech Pack include?


A tech pack is usually just the paper work involved in product development. But if you are sending a tech pack to a sewing contractor, you should include a perfectly sewn sample and fabric and trim swatches. This is especially important if you are manufacturing overseas where there may be a language barrier. The sample will help clarify what you want when the contractor may not understand or read the tech pack. Swatches are also helpful if the contractor is also buying materials overseas.

Q: I don't draw well, do I have to include technical drawings?


Any drawing is better than no drawing. It is the primary way you will communicate with a technical designer and/or pattern maker. You can also hire people to create the drawings for you at reasonable cost.

Q: Can I customize The Simple Tech Pack?


Yes. Included in your purchase is a spreadsheet workbook version (Excel and LibreOffice Calc). You can add your company info and logo. You can also rearrange, rename information if you choose. The only caveat is that the forms are copyrighted and cannot be resold.

Q: I'm an indie pattern designer. Will this tech pack help me?


Yes. An indie pattern designer is very similar to a fashion designer. You will still need to develop a style, cutting spec, measurements, sewing instructions and grade rules. The cost analysis will help you price your product. The Simple Tech Pack can help you organize the information needed for your final product.

Q: Why does your Tech Pack have a Style Sheet instead of a simple cutting spec?


I created a combination form called a Style Sheet. This form contains both a technical drawing and a cutting spec. I have found it very useful in product development to include a technical drawing with the cutting spec as it travels through sampling. That way every person along the way has the same point of reference. It reduces both paperwork and questions.


Do you have any other questions? Please leave a comment and I'll answer your question in an upcoming blog post.

February 04, 2019

New! A Simple Tech Pack

A Simple Tech Pack

I am excited to announce that I have released a Tech Pack available for purchase in my Etsy Shop!


There are many versions of tech packs on the internet. I call my version A Simple Tech Pack because I have identified the most essential pieces of information needed. My forms have simple clean lines without much visual clutter. These forms will help you gather all of the needed information to manufacture your product. Included is an instructional guide on how to fill out each form. There are three versions provided – PDF, LibreOffice Calc, and Excel. In the spreadsheet workbook version, you can modify, expand, and otherwise customize these forms.

This tech pack will help you organize and present industry expected information needed to manufacture your product. There is no industry standard version of a tech pack, just the information required. I have used a version of these forms for the last 20 years either in-house or as a package sent overseas to contractors. With the included how-to guide, there is no need to track down extra videos or tutorials. This tech pack is perfect for fashion designers, design entrepreneurs, or anyone developing a sewn product.

A Simple Tech Pack forms


Forms included in the Simple Tech Pack:

Cover Sheet
Style Sheet/Cutting Spec
Details
Cost Analysis
Bill of Materials
Colorways
Finished Pattern Measurements
Finished Pattern Measurement Drawings
Grade Rules
Grade Rules Blank
Labels
Sewing Instructions
Fabric Swatches
Trim Swatches
Blank Swatches

Bonus!
Wash Testing Guide and Form

No physical product will be shipped. You will receive 3 digital files in a zipped folder. After downloading the folder, you will need to extract the files – most computers have this option available, look for the word “extract” after double clicking on the folder.

There are no refunds on digital sales. Please contact me if you have any questions or concerns. I will do my best to help you.

In full disclosure, some of these forms are also found in my book The Organized Fashion Designer. I did not see the need to create something new when it already existed in the form needed. In addition I have added several forms not included with the book, including a bonus form for wash testing. With your purchase, you will receive these forms as a spreadsheet workbook and a PDF. You can fill out the forms in Excel, OpenOffice/LibreOffice, or by hand. Which ever way you prefer. For complete organization of your studio, you can purchase both products to compliment each other. The Organized Fashion Designer is available for purchase on Etsy, Amazon, and Lulu.com.


January 07, 2019

Free motion quilting on a Singer 503a Rocketeer

**This tutorial is a work in progress and will be updated as I practice more.

After finishing up the piecing of the Patches and Pinwheels quilt, I began debating on how to quilt it. Do I quilt it myself on my Singer Rocketeer? Do I handquilt? Do I pay someone to do it for me? I am still debating on this quilt because it is so big but I do have my smaller Hawaiian quilt that I may try.

I did buy an aftermarket free motion/embroidery foot from Amazon. The Singer Rocketeer has a slant shank and there are two versions of a free motion foot. The first is a spring design and the second use a curved piece of metal as the spring. The second version has technically been discontinued but you can pick it up on ebay. The spring design is available from various sources.

Free motion quilting foot on a Singer 503A

Free motion quilting foot on a Singer 503A

This version is made by Honeysew and is available on Amazon for about $9.00. My understanding is that as the needle bar moves, the bar at the top of the spring lifts the foot so it hops as you sew. Having never used something like this, I don't know if that is true. In this case that little bar is at least a 1/2" above the needle bar and does not ever touch. In other words, it doesn't work the way I think it is supposed to work.

I had to refer to the machine manual and Amazon review comments to figure out how to make this work. The interesting thing about this Singer and many older models is that the instructions for free motion embroidery and darning instruct you to remove the presser foot and use a bare needle!

Singer 503 manual on Darning

This setup requires the use of a hoop, which is not practical for a quilt. Also, it exposes your fingers to the needle much more easily if you are not paying attention! So after a bit of trial and error, I eventually figured out the best setup. The manual has instruction on a few different pages, so I missed a few key steps at first.

1. Set the pressure to the "D" setting. This dial is on the inside of the machine and the "D" and is for Darning. This setting removes all pressure off the foot. This will allow you to move the fabric under the needle.

The D or Darning setting on a Singer 503 Rocketeer

2. Lift the feed dog plate.

Lift the feed dog plate for darning on a Singer 503A

3. Tension settings may need to be adjusted. I loosened it a bit only to turn it back to my normal setting. This may depend on your machine, thread, etc.

4. Bring the bobbin thread to the top and sew a little slower at first. It will take practice to determine the ideal speed for you. Also, I ended up wearing garden gloves with that nylon coating to help move the fabric under the needle.

My initial results are not pretty, but I think with a bit more practice I may be able to do free motion quilting on this machine.

Free motion quilting on a Singer 503 Rocketeer

If you have done free motion quilting on your sewing machine, please leave a comment on what machine you used and how it went.

*Links to Amazon are affiliate links.

February 25, 2014

Applying Elastics in A Swimsuit or Leotard

I was asked a while back to write a post on elastic application for a swimsuit. So the following is a pictorial demonstration on how I do it. I hope it will be helpful to someone.


Do not overlap the elastic, butt up the ends


I don't overlap the elastics instead a have the ends touch each other. This means I cut the elastic the exact length I need - nothing extra.The reason I don't overlap the elastics is to eliminate bulk and since it is stitched through I am not worried about it coming undone or shifting. I do overlap elastic ends for elastics placed in casings. Most patterns will give you an amount to cut for each area and they usually include an overlap amount (I subtract that out). But, you may find you need to adjust the length depending on the stretch and memory or return of your elastic. If I'm working with a questionable elastic I will sew up a sample and make incremental adjustments. I have learned a more calculated method of finding percentages/ratios and such but I can't be bothered by this and it gives me a headache.


Sew the elastic ends with a zig-zag
The elastic is sewn together using a wide zigzag with a tight stitch length (close to buttonhole stitch length).


Mark the leg openings into four equal sections

Next, I marked the leg in four equal sections. I learned from patternschool.com that elastics placed in modern stretch fabrics should be sewn in by stretching the elastic over 4 equal sections. This differs from information found in basic pattern-making books which have you leave the front elastic unstretched in 1:1 ratio and the back stretched with remainder of elastic in a sense creating what I feel a bubble butt. This unstretched and then stretched method was developed when fabrics for swimsuits were not as stretchy as today.


Mark the elastic in four equal sections
Elastics were also marked in four equal sections.  I used the seam as one mark, hence only 3 pins.


Pin the elastic into the leg opening matching up the sections
Here elastics are pinned into both legs and ready to sew.


Sew the elastic to the leg opening with a zig-zag stitch
I start my sewing in the crotch area so the outside leg area will look nice and even with no back stitching or overlapped stitching. This is also where I placed the elastic seam (or butt up elastic ends). I sew using a medium width zigzag 3.5-4 and about 3 in length.


Elastic sewn to the leg openings


Initial application of elastic is done.


Fold the elastic to the inside and stitch again with a zig-zag stitch


Next, I folded the elastic over to the inside and sewed with the same zigzag stitch while stretching the elastic evenly.


Steam the elstic back into shape with an iron
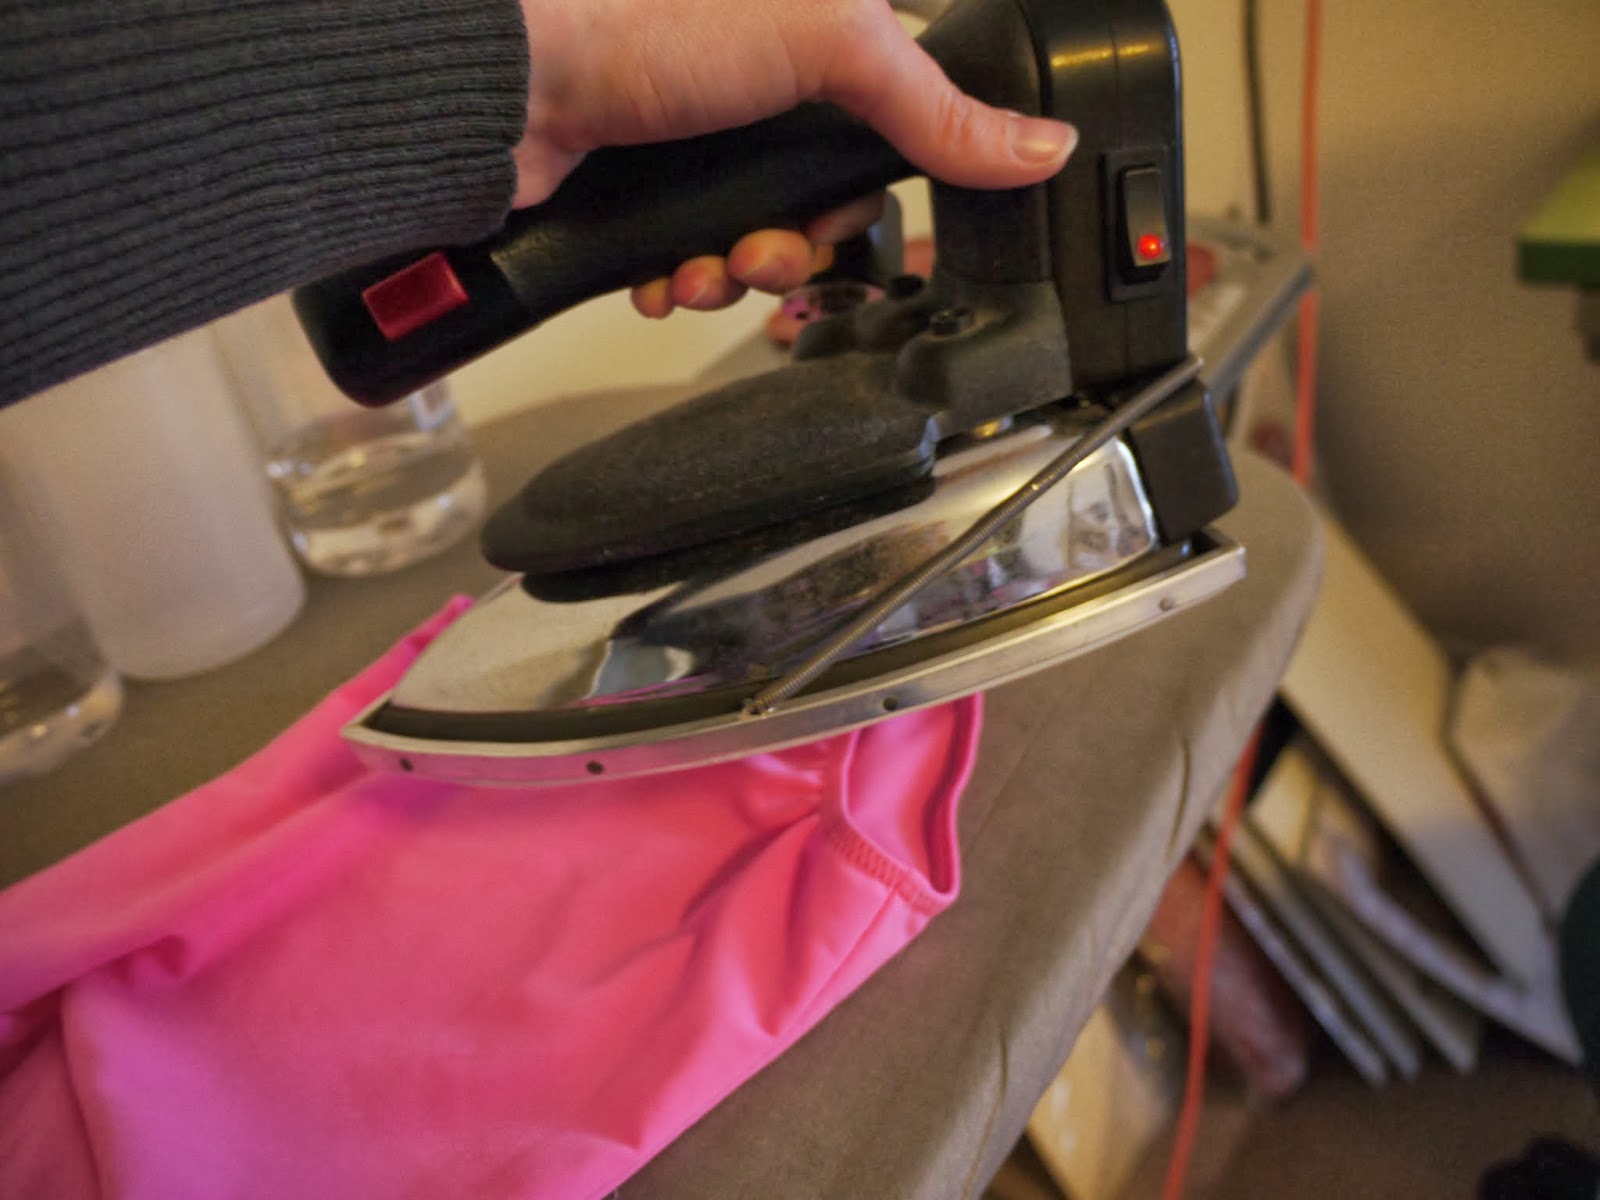
I like to steam the elastic back into shape. You can also wash and dry (in the dryer) if it is suitable for the fabric. This leotard is made from nylon Lycra and I am choosing to line dry it.


Finished leg opening
All done. One more note, when sewing through elastic use knit elastic not braided. Knit elastic can be sewn through without stretching out of shape. 1/4" wide is appropriate for children's swimsuits and 3/8" is better for women's.

November 12, 2013

Adapting a block pattern into something else pt. 5 : Making the pocket pattern

Sewn sample of the new cardigan style

Here's a sneak peak of the first sample of my cardigan pattern. I'm fairly pleased with the results, though there are a couple of minor pattern modifications to make. So more about all that later.

For now, we need to finish up the pattern. The last two pieces to deal with are the pockets (shown above) and the elastic casing. I referenced my sweater to determine the pocket dimensions and placement, which is basically a rectangle. Pockets come in all sorts of shapes and sizes with varying amounts of functionality. Pockets should be proportional to the overall garment. They can be graded for larger or smaller sizes to maintain proper proportions. Pockets can be applied in various ways and include seam and hem allowances.

I wanted a very casual look to my pocket so I used a narrow 3-thread serger hem around all four sides and topstitched it on. This allowed the fabric at the top of the pocket to roll. This detail mimics the detail on my sweater. I didn't have a lot of confidence in producing a neat topstiched pocket in which the raw edges are turned under. This is partly due to the fabric and my machine. For a more structured pocket this fabric would need a fusible to help stabilize it.

Pocket placement is noted on the pattern piece by a drill hole. In a factory, an actual hole is drilled into the fabric. I have seen knits marked with a drill that also contained a marking medium such as a washable marker. In that case, the drill bit was like a needle. My pattern at home will contain a hole large enough for a chalk marking pencil to fit. Even though there are lines on the pattern pieces indicating placement, they are not transferred to the actual fabric. They are just there for clarity.

Drill holes for pocket placement

The elastic casing is just another rectangle large enough to cover the elastic. I think mine is about 1/2" x 8".

October 30, 2013

Adapting a block pattern into something else pt. 4 : how to create the neckband pattern piece

T-shirt into cardigan
For review read part 1, 2, and 3 of this series.

All of the major pattern pieces are now done. Next up is to do the neckband, the elastic casing for the back waist, and pocket. These three pieces are just rectangles. In a CAD pattern making environment, I will make pattern pieces for all rectangles and squares. Pattern makers, graders, marker makers and cutters all handle these kinds of pieces a little bit different, so ask if you are not sure.

For me, working on a personal pattern in my own workspace I handle rectangle and square pieces one way. I figure out the dimensions and note them on my style sheet. You can do this for patterns* that will be used in a factory setting too, but you will need to create a cutting guide for any rectangular pieces which might be graded. For now noting the cut dimensions is sufficient.

Up to this point I haven't really needed to consider how the cardigan is to be constructed. The majority of the cardigan has rather simple construction that mimics the construction of the t-shirt. But the neckband can be constructed and attached in a number of different ways. I also have to consider the stretch factor along the back neck. Do I want a 3-piece neckband with seams at the shoulders or a 2-piece neckband with a seam at center back? How do I finish the neckband at the hemline? How wide? All these things have an influence on the dimensions of the cut piece.

I like to keep things simple so I opted for a 2-piece neckband with a seam at center back. A 3-piece band might be necessary if the fabric width is too narrow. A 1-piece neckband might be possible if the cardigan was smaller. Begin by measuring the front and back neckline of the cardigan patterns.

Measure the neckline for the neckband

Now it is a matter of math. There really isn't a formula for this. It's just adding and subtracting.**

Neckband width = (front neck+back neck) - (front and back shoulder seam allowances + hem allowance) + seam allowance for center back + seam allowance at hemline - some stretch factor for the back neck.

Neckband length = 2 * (Desired finished width + seam allowance)

The neckband will be cut across the width of the goods like this:

Cutting guide for the neckband

Dimensions should be written as Length x Width. In this case the Length is the shorter measurement. My neckband pattern piece will then be something like:

5 x 30 inches

A CAD version or hard pattern will look something like this with a pattern number assigned instead of the words neckband:


You'll notice that I have two notches. The notch along the length (the narrow end) instructs the sewing machine operator to stitch the neckband pieces together at that end. The other notch along the width (long direction) is the match point between the neckband and the shoulder seam of the cardigan. This notch is necessary because I reduced the back neck to account for a stretch factor. This will help the back neck fit better rather than stand straight up.

Since I am just making one size and working at home I will draw a picture indicating the notch placement with a measurement along with the cut dimensions for the neckband.


*Managing rectangular and square pattern pieces is the subject for at least two additional blog posts! Yep, it's hard to believe but there is a lot to say on the subject....

**I do all this adding and subtracting right at the calculator.

September 23, 2013

Repairing a leather sewing machine belt

If you own a sewing machine (industrial or otherwise) with a leather sewing machine belt, chances are that you will have to either replace or repair it at some point. Leather belts will stretch or shrink, and/or break. The climate of your workspace and other variables play into the life and condition of the belt. The area around the belt clip tends to get a lot of wear too. Leather belts are a little old school, but they do have a few advantages. They are customizable and relatively easy to fix.

You'll know you have a problem when the belt ends up in pieces or the machine is not operating properly. The leather belt on my Singer Hemstitcher 72w-19 machine stretched out over time and my machine was not going as fast as it should. It was time to shorten the belt.

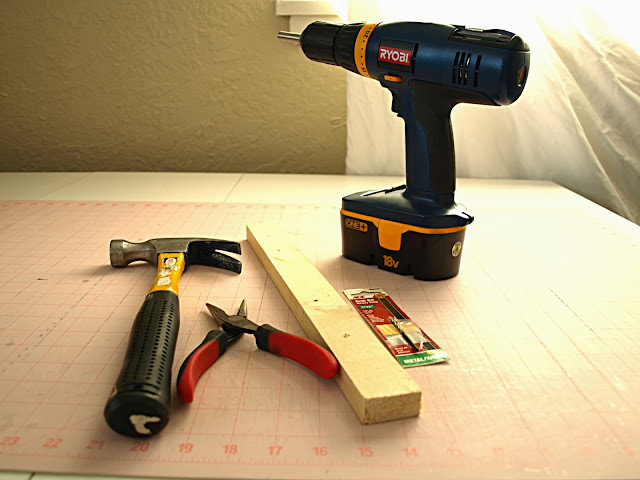
Tools needed to repair a leather sewing machine belt.
Any workshop should have a toolbox. For this job, you'll need these tools:

  1. Drill
  2. 3/32nd drill bit
  3. Scrap wood
  4. Pliers
  5. Hammer
  6. Utility knife (not pictured)
  7. Belt clips (not pictured)
I purchased a box of 500 belt clips from Southstar Supply. It sounds like overkill, but believe me, you will probably mess up the clip the first time you do it. Southstar also sells leather belting. You'll want extra length because you never know when you'll need it. Leather belting is not cheap, and there are other places on the net that will sell it in cut lengths. So it pays to repair a belt when you can.

One more note. There is a special tool designed to punch a hole in the leather belt for the belt clip. It's expensive. It doesn't work well (from what I'm told) and you don't need it. A drill with the right drill bit works really, really well.

Drilling a hole in a leather belt for a sewing machine

In my case, I first removed the belt from the machine by bending the existing belt clip apart with pliers. You won't be able to reuse it, so don't bother trying to save it (this is why you want a box of 500!).

Next, determine how much to shorten the belt. It won't be as much as you think. If you make the belt too short, the belt won't fit or the belt will exert too much tension on the machine causing the machine to work harder than it should. Using the utility knife, I only shortened the belt 1/4".

About 1/4" from the cut end, drill a hole through the center of the belt. Be sure to drill the hole on top of some scrap wood so you don't damage your work table! You do need your other hand to help steady the belt as you drill, but I was taking a demo picture by myself. All other safe tool handling rules apply.
Inserting a belt clip into a leather sewing machine belt

Place the belt clip through both holes to test, but don't mash the belt clip closed yet (Yes, I've done this!). Take the belt clip off one side and take the belt to the machine and thread it through the holes in the table. Attach the belt clip to the belt ends and place it over the handwheel and motor pulley to test the tension.

Leather sewing machine belt in place

How much tension is needed? It depends on your machine. You need just enough to turn the handwheel properly. In the photo below I'm testing the tension (or slack) on the belt. This is about how much I need to have the machine operate properly.

Testing the tension of a leather sewing machine belt

Finally, mash the belt clip closed with the pliers (sometimes you need a hammer) and you're good to go. It's amazing that a 1/4" shorter in length makes a big difference!

July 09, 2013

The Tutu Series : design details

I will be doing a series of tutu construction posts. This post is primarily some background and what I have been doing up to date.

A few years ago, I took a tutu making workshop from the ballet costumer at the local university. I met her during the years I taught costume design for the theatre department. I actually encouraged her to teach the class because I really wanted to learn. I had done some study and taken a short poster seminar at USITT but really wanted a hands-on experience. In the workshop, each student made a complete tutu. I made a black one which I learned is not the easiest color for a first timer, but of course I learned a lot from the experience. Following this, I studied up more on tutu construction. There are many ways to make a tutu, it is just finding what works for you. I bought some books and did some more studying. I made a romantic tutu for a neighbor's daughter and then two for my own daughters' halloween costumes.

About a year ago, I was able to go back to the university and help teach two more workshops. I also started on a white tutu. Well, I finally just finished it. It was one of those projects that had no deadline and took the back burner on many occasions.


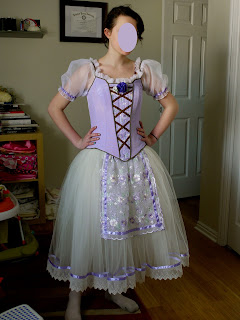
Giselle Tutu
Giselle for YAGP Feb 2012
The Giselle tutu is a 4 layer tulle skirt on a self net inner basque. The bodice is a 12 piece long line made from cotton/rayon bengaline and flatlined with coutille. For closures, I used hook and eye tape dyed to match fashion fabric. I used the tape instead of individual hooks and eyes for construction time reasons and since she was not partnering in this costume knew that this would be ok. I did a double row of eyes for future adjustment since she was 13 or 14 years old. The director was pleased with the costume but at final dress rehearsal requested the sleeves to be off the shoulders.


Halloween fairies with custom tutus
Halloween 2012
I made these Halloween costumes from an old Simplicity pattern but constructed them using traditional tutu methods.

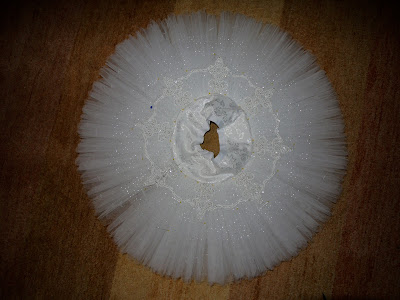
White Tutu 

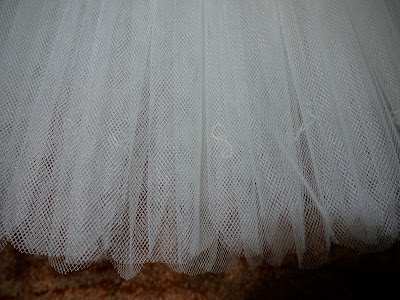
Double hand pleating on a tutu skirt
Double hand pleating of top two layers
Scalloped edge on tulle tutu skirt
Scalloped edges and hand tacking

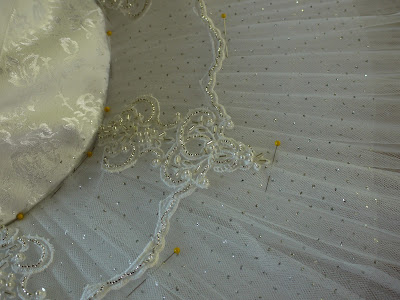
Decorated top plate on a tutu
Decorated top plate pinned on

Close-up of beading on a tutu
Close-up of hand beading

A complete tutu for a ballerina
Finished tutu

May 07, 2013

Stuffed Toy Floor Bag

My kids stuff toy collection is getting out of control, mostly due to grandparents but we are just as guilty. And since they are young, I have all their toys in the family room so I can watch them from the kitchen and the pile was becoming unsightly, overflowing their corner. One evening while on Pinterest, I came across an idea to use a bean bag as storage for soft toys. I also found a company that makes a bag but charges more than I wanted to spend. I mean it is just a giant bag.

My version is a giant floor bag, large enough for 2-3 little ones to sit on.

Stuffed toy bag storage solution - the kids love it
The girls love it.


Diameter of top and bottom circle pieces is 36". Side panel (in grey) measures 15"x 120".

Stuffed toy bag storage solution
Fabric is a double sided fur fleece.

I cut a 24" diameter inner circle in the top to create a mesh fabric window and zipper opening. The mesh fabric is an old laundry bag but you can buy mesh fabric like this from Seattle Fabrics. I used the small inner circle as a pattern for the mesh window adding 1" more for seam allowance. 
A 1/2" binding strip of sheer tricot was applied to the cut edge of the mesh so one side of the zipper could be sewn on to it. The fur fleece was overlapped to finish the other side of the zipper.


January 02, 2013

Creating fabric repeats with Gimp

This tutorial, such as it is, could easily be called How to create seamless tile repeats with Gimp. If you do a google search for Gimp seamless, you will find lots of tutorials. Because of that, I won't do a detailed tutorial. This is a follow-up of my review of A Field Guide to Fabric Design.

The main difficulty I had with Gimp and creating a seamless repeat is a problem filter*.

Don't use this filter:

Filters - Map - Make Seamless

The resulting image doesn't make an attractive repeat. It overlaps the repeat with transparencies.

Instead the offset tool, which is similar to Photoshop, is located:

Layers - Transform - Offset

Finding this tool made all the difference. Conversely, I played around with the select tool and moving layers around to accomplish the same thing. The offset tool works best with the design repeat located far from the image borders and in the center of your image. For more complex repeats, manually selecting parts of the image, copy-paste into a new image and moving them in layers works better.**

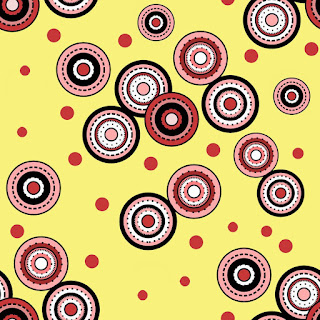
I started my experiment with a vector line drawing made in Inkscape and exported as a PNG file.

A vector line drawing of circles created with Inkscape
Next I pulled the line drawing into Gimp, added a background color, and then applied the offset tool. After that, I filled in the blank areas. Again, detailed instructions in the book for a simple repeat and more complex repeats.

A repeat pattern design created with Gimp

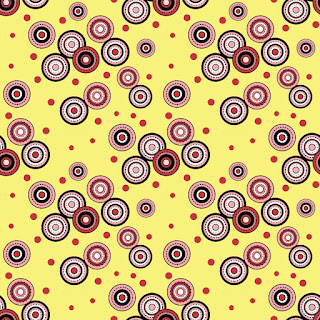
Gimp has a handy tool that allows you to test your repeat located here.

Filters - Map - Small tiles

This is how my repeat looks now.

Testing a pattern repeat with Gimp


The repeat could use a bit more work, but I think you get the idea. A Field Guide to Fabric Design has information on how to improve your repeat and also how to create a whole collection around this one design.


Of course, the real challenge is matching up the colors with Pantone.

* I tried to take screenshots of all of this but my print screen button wasn't cooperating.

** One of these days I may create a tutorial for this, but it is a bit more involved. My trial video demo took about 20 minutes.

December 15, 2011

T-shirt pattern quest pt. 2 : Calculating the amount stretch in a knit fabric


Patterns for styles made out of a knit fabric need to include the amount of wearing ease for the desired fit. In some cases the wearing ease is actually negative ease. Negative ease means the pattern measurement is smaller than the actual corresponding body measurement. A good example of this would be yoga pants in which the pants stretch to fit a particular size. In some cases the pattern has positive wearing ease because the style is larger than the corresponding body measurements, such as an oversized sweatshirt. Determining how much to reduce a pattern for a desired type of fit requires first determining a knit fabrics stretch factor.

Note - My pattern is intended for knits that have already been pre-washed and shrunk from retail store knits. So no extra allowance is included for shrinkage.

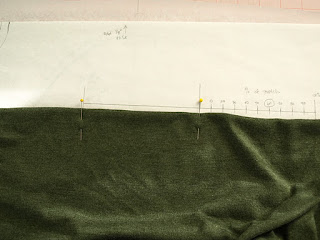
At this point I needed to check the amount of stretch in this fabric. Fold the fabric so that you are not testing on the edge of the fabric. Place two pins 5 inches apart.

Step one of figuring out a fabric stretch factor
Pick up the fabric and hold the left pin in your left hand at the zero mark and then stretch the fabric as far as it will go with your right hand. Watch where the right pin stretches on the stretch ruler. In this case, my fabric stretches about 30%. Only stretch the fabric as far as it will reasonably go without overly stressing the fabric.
Stretching a knit fabric to determine the amount of stretch

Let go of the fabric with your right hand and watch to see if the fabric returns to it's original position. Knits that do not return at all, have no recovery. In this case, my fabric returned to the 10% mark, which isn't great, but probably ok for a top.

I had forgotten, but this particular fabric is an interlock rather than a jersey. Interlocks do not stretch nearly as much as a jersey. I had originally planned on adding about 1 inch of extra wearing ease because I wanted a bit looser fit. Now I wonder if I should add a bit of extra? Once I work that out, I will modify my pattern and cut it out.

December 20, 2010

Tutorial: Reduce or Remove Sleeve Cap Ease pt. 2

I received a really great question on my previous tutorial on how to remove or reduce sleeve cap ease. Gina's question deserves it's own blog post.

Well, what do you do if you have big arms but too much ease? If I move it over I will lose bicep room. I am working with a dress right now and everything fits but the sleeves are tight and the have too much ease. How do I widen the sleeve get rid of ease and fit it to the armhole?
Thanks
This is a really great question and may require me to consider re-writing my tutorial. My previous tutorial is based off my experience drafting patterns for children's clothing. Usually it is not a problem to reduce the bicep line because it's usually too big anyway. My overall changes are small because I am perfecting patterns that I have drafted myself.

If you are working with a commercial pattern for adults, the approach will be similar. You can't always reduce the bicep line and the overall changes may be quite significant. Patterns from the Big 4 notoriously have too much sleeve cap ease. To be fair, if you follow the drafting instructions in some pattern drafting books, you end up adding in a fair amount of ease too. One pattern making book has instructions that result in as much as 1.5 inches of ease in a set-in toddler sleeve. Way too much. Such a practice is not common in the fashion industry and the production sewers will refuse to set-in the sleeves.

I had difficulty coming up with a solution and so I had to ask my pattern making friends at the Fashion Incubator Forum. We have to assume that everything fits Gina as it should, though it's possible there is some other fit issue that is contributing to the bicep width problem to begin with.(1) There are two possible solutions and neither is quick nor easy. Both will require testing. To add bicep width, slash and spread or slash and pivot the sleeve to the desired measurement. This alteration will require fixing the sleeve cap anyway.

1. Draft a new sleeve from scratch. (My solution)

2. Reduce the sleeve cap height equal to the amount of ease to be removed. (From Nora of the Fashion Incubator Forum).

Sometimes it's just easier to start over. It may save time in the long run and you will get exactly the sleeve you want.

If you would rather fix the sleeve, you can try Nora's suggestion. Nora's suggestion leaves the bicep width alone and only adjusts the sleeve cap height.

Walking a sleeve along an armscye
1. Begin by walking the sleeve along the armhole in a similar manner to my previous tutorial. In this case, start at the bottom and walk the armhole toward the shoulder. You will need to walk the sleeve on both the front and back armholes matching up the front of the sleeve with the front bodice and the back bodice with the back sleeve. Your sleeve should not be symmetrical and you will need to check the entire armhole. As you work, you may want to check the entire armhole and sleeve cap.

Measurement length difference

2. Measure from the seam line of the shoulder on the bodice to the center notch of the sleeve. This will be equal to the amount of ease on one side of your sleeve. Repeat for the back armhole. Total up the ease for the front and the back of the sleeve. This will equal the total sleeve cap ease.

Reduce ease by lowering cap height

3. Reduce the sleeve cap height equal to the amount of ease that needs to be removed and redraw the sleeve cap. You will need to repeat these steps until you get exactly the amount of ease needed to set the sleeve and no more.


Neither Nora nor I can guarantee that this method is the answer. This method will require lots of back and forth testing and iteration. The method is similar enough to my previous tutorial that I think it will work eventually. If you have the patience for lots of testing, then go for it. Also remember that you may still need *some* ease. When we say zero ease, we don't really mean zero ease. You may need some to help set the sleeve in. The only way to know is to sew up a few samples. 1/4" to 1/2" of total ease is not unusual. This ease is required to help sew opposing curves together. The sleeve should be against the feed dogs as it moves under the foot and the action of the feed dogs may require a little bit of ease so that the sleeve cap and armscye meet up in the end.

1. The armhole could be too small or too big. It may be in the wrong location or scooped wrong under the arms.


Thanks to Nora for her suggestion.

October 26, 2009

Do professional pattern makers work with seams on or off the pattern?

Professional apparel pattern makers work with seam allowances on their patterns nearly all the time. It's faster. I would argue it's more precise. This practice goes counter to what most pattern making classes teach. They teach that you must remove the seam allowances and add them back later. I don't know anyone in the industry that works this way. I think the idea is that working with seam allowances one can create variations that lead to fitting problems later. That's simply not true if you check your new pattern against the original block later. (This is assuming you make a copy or rubbing of your original before you start on a new style. But I'm sure you knew that).

If you are drafting by hand, it is time consuming to remove the seam allowances. Pattern blocks are made with seam allowances on. You would have to keep a set of blocks without seam allowances. It would be so easy to mix up seamed and unseamed pattern blocks. Apparel pattern makers leave their blocks seamed and theatre pattern makers or cutters leave their blocks (or rather slopers) unseamed. In fact a block is a finished pattern piece that includes all pattern markings and is seamed.

If you are drafting in CAD, you can turn the seam allowances on and off. You can work on the cutting line or the stitching line. It's a simple matter of hitting a few buttons. BUT, I have found that CAD programs have difficulty in calculating between seamed and unseamed because it involves a complex series of mathematics. So constantly switching between cutting and stitching lines can produce some weird anomalies. (As an aside, weird things can happen with notches on stitching versus cutting lines too). I have found this is true no matter which CAD system you use. So I work with seam allowances on and directly on the cutting line nearly 99% of the time. This means that I keep the seam allowances in mind while I work.

One Exception


In CAD, it is important to turn the seam allowances off and walk the pattern pieces along the stitching line in a few areas. Collars and necklines is one area that I nearly always check for matching on the stitching line. There are other situations that come up where this important. I learned this the hard way recently.

Two pattern pieces with seam allowances on

In this situation, I split a jacket back pattern piece and added corresponding seam allowances along the split line.

Comparing two pattern pieces to see if the cut edges match

Next, I aligned the pattern pieces to make sure they match. At this point they did and I assumed all was right. Until I got complaints from the sewing machine operators that things weren't matching up. I had to go back and double check.

Comparing two pattern pieces with seam allowances off

I took the seam allowances off the pattern pieces and realigned them. They didn't match, so I redrew the stitching line of the side piece to make sure it matched the center. I added back the seam allowances and realigned the edges.

 Correcting the seam allowances so the stitching line matches

The pieces didn't match again. Sewing machine operators also do not like this because they do not know how to align the pieces. In this particular case, the seam allowances are small, so I left the little "dog-ear". It can be difficult to cut those "dog-ears" off by hand when they are really small. It is easier to machine cut. In any event, there are different ways of dealing with this. I show one method below.

Trimming seam allowances on a pattern piece for better matching

Your pattern pieces will then look like this and match up in every way possible.

Two pattern pieces that match on the stitching and cutting lines