Showing posts with label Fabric. Show all posts

November 19, 2018

Book Review: Mending Matters


Mending Matters by Katrina Rodabaugh is a visually beautiful book. There is full color photography on every page. The pages are thick and glossy with a sewn binding in a hardcover book. The layout and graphic design work is really well done. Those qualities alone may justify the price.

Mending Matters is a book with two blended parts. The first part contains essays on Rodabaugh's journey to Slow Fashion. She explains what Slow Fashion is and the values that are important to the movement. There are also essays from other bloggers involved in the movement. The second part involves tutorials on mending with step-by-step photography for each project.

I have mixed opinions on this book. The first involves the discussion on Slow Fashion. Like the traditional food crowd, there are certain values involved with the consumption of clothing and textiles. There are words like sustainability, ethics, social justice, and activism used throughout. I almost felt brow-beaten by the philosophy. For Rodabaugh, Slow Fashion means buying and wearing only biodegradable fibers like cotton and linen. It means rejecting Fast Fashion trends completely and wearing clothing until there is no hope of repairing it. It means buying only clothing at a thrift store and using fabric dyes made from plants. There are a lot of little decisions one must make in order to be a part of the Slow Fashion movement. My first introduction to Slow Fashion was the Alabama Chanin trend, which has many beautiful examples. Rodabaugh's book goes a step further.


But even the author concedes that as you become more aware and educated about how clothing and textiles are produced, you will likely have to compromise on the very values you proclaim. This is because the entire production cycle from fiber to fabric to clothing to retail involves some process that may harm the environment or conflict with some other value. As an example, Rodabaugh wears linen because it is a biodegradable fiber. But the process in creating that linen fiber involves manual labor in foreign countries that do not necessarily pay what we would consider fair wages, followed by bleaching, dying, and transportation across long distances.

But as I have trouble with the Slow Fashion movement, I am actually participating. For me it is less about a political statement or personal philosophy. Granted, I think that we should work to find safer ways to grow and process fibers and find ways to reduce waste. Those are good things. My participation is more about thriftiness and economy. As I read this book, I realized that a majority of my wardrobe comes from the thrift store. There are, of course, certain things I can't buy at a thrift store, and those are purchased new, but on discount. I also repair and mend as needed and up-cycle what I can. Everything else goes back to the thrift store at some point. I never put a label on those activities because it was something that I naturally did.

The second part of the book contains tutorials on how to mend. The tutorials themselves are rather simple projects. Many similar projects can be found through online tutorials from various places. Rodabaugh does have a certain aesthetic and it really shines in the photography. Her mending uses sashiko stitching to elevate a mend or patch to something artistic. Sashiko thread is a cotton thread with long cotton staples and is known for its smooth, lustrous quality. Pearl cotton thread is a bit more economical, comes in many colors, and is pretty much the same thing. Sashiko stitching is precise stitching in a repeated pattern. Rodabaugh relaxes her stitching, though there are many beautiful examples of true Sashiko stitching online that you could follow if you choose.


In the past mending was meant to be invisible, if possible. In this case, it is meant to be a focal point. Some of the projects, such as the bags, lack practicality and would likely not hold up to heavy use. Hand stitching with large stitches lack strength. But, for some things it is probably fine. Below is a link to my pinterest board with more mending ideas.


As I said, I have mixed feelings. It is a beautiful book, no doubt. The projects are inspiring in their aesthetic appeal. It is making me rethink a few mending projects of my own. But is the book as a whole worth the cost? I'm not sure. What are your thoughts on the Slow Fashion movement?

*I am an Amazon affiliate and any links to Amazon are affiliate links.

September 30, 2013

A case study in paying for fabric waste

I recently had a customer bring me some fabric for some flannel blankets. She mentioned off hand that some of the fabric had not been cut very straight by the fabric store sales clerk. This is not terribly unusual - I see it all the time with my custom hemstitching customers. I've seen it with fabric that I have purchased. I don't blame the sales clerks entirely. The sales clerks have to handle (wrestle) the fabric on the bolts, try to straighten it out, and then use dull scissors to cut it. The entire set-up wastes time and gives a poor outcome nearly every time. Is it any wonder that the industry prefers fabric on rolls? This is one reason I always buy a bit more yardage.

This particular case was fairly egregious. My customer wanted to have 3 flannel blankets that measured about 36" x 45", so she bought 6 pieces of flannel in one yard lengths. Every piece was cut like the picture below, some were cut as much as 4 inches off.

Skewed fabric
If I were to take the conservative approach and say the fabrics were cut only 2 inches off, that would still leave the blankets 2 inches shorter than expected once I cut the fabric straight.
Evening up skewed fabric
Doing a little math, 6 fabrics times 2 inches means that 12 inches of fabric is wasted. In other words, my customer paid for 1/3 of a yard of fabric that ended up in the trash. I was a bit annoyed considering the current retail prices for fabric. Flannel runs about $6.99 a yard at Joann's which calculates out to about $2.31 in the garbage. And this is the conservative estimate.

Perhaps its not a huge loss. But it's still money in the trash.

I'm not sure if there is a way to avoid this problem. Just buy extra if you need to be sure and have a certain length. Do you have any similar examples?

August 20, 2013

Organizing my workspace : Creating a fabric swatch library

Fabric stash that needs organizing

It's time to start organizing my fabric stash - and believe me this is only one part of a larger whole! Any factory or design space needs to have some kind of procedure and policy in place for how to handle new fabrics. Swatches should be immediately taken and relevant information recorded. If this isn't done, it becomes incredibly difficult to hunt down the information later, especially when you need to do a cost analysis. Even when sewing at home, it helps to know the basics and it makes it easier to grab a swatch when heading to the store for additional supplies. I've learned my lesson after letting my stash of fabrics pile up.

Supplies and tools needed to create a fabric stash library


Here are the tools and supplies you might need if you are following along.

Tools
  • Rotary cutter
  • Cutting mat
  • Ruler
  • Pen
  • Stapler
  • Book rings
  • Fabric headers*
  • Bone folder (optional)
  • Hole punch
I'm using the fabric headers found in the book (or ordered separately on Etsy). They can be printed on card stock or bristol board.

Book rings are incredible organizing tools for the factory or craft room. There are two sizes I like - 1" and 2". Any size you prefer will work just fine.


Acco Metal Book Rings, 1in Diameter, 100 Rings Per Box (ACC72202)
Acco Metal Book Rings, 2in Diameter, 50 Rings Per Box (ACC72205)

How to

  1. Cut strips of fabric. For the small headers 2" x 7" (or however long you prefer). The larger header is about 7.5" wide and however long.
  2. Fold the headers in half and staple in the corners
  3. Store and display as you wish. You can use the book rings to sort your fabric swatches by color, style, or type.
Fabric swatches on a book ring
Here is the beginning of my swatches. I'm waiting on my order of book rings to come so that I can organize them better.

May 21, 2013

I Love Knits! : A guide to buying knit fabrics online

If you were to walk into my sewing studio, you will notice two things. One, I must have kids because it looks like a 2 year old has been in the vicinity and secondly, I have a large stash of knit fabric. I love knits. It is the main fabric of choice I have been buying lately. Back in 2009, I started making clothes for my first daughter and was introduced to Ottobre sewing magazines in my quest to find good children's sewing patterns. (Some other patterns I have used are Studio Tantrum and Roos - out of print). Many of the patterns in Ottobre are for knits.

When I first started working with knits, it was rather difficult to find cute knit fabric but now with the increase in demand many online vendors carry a variety of knits, which makes shopping much more enjoyable. (see my list at the end for some of my favorites).

I have learned several things along the way when working with knits:

Quality is worth the wait, research, and/or price. 


I seldom find good knits locally but do get lucky on occasion. Most of my purchases are online and some vendors send swatches for free. Price is not always a factor. I few years ago, a pattern/fabric designer launched a knit line and charged a pretty penny for it. I felt at the time it was more than I would spend especially since I didn't know what the quality was like. The prints were cute and a number of people I know bought them. Well, it had a horrible shrink factor of 10-12%. I believe this problem has been corrected by the manufacturer since I have noticed the online vendors no longer state the shrinkage rate.  I have bought cheap and still do but there is the risk of the fabric becoming piley and looking worn out quicker.

Analyze stretch. 


Stretch will impact the fit and choice of pattern. I will ask myself how much stretch does the fabric have and does it go back to the original shape and size afterwards. To find out stretch percentage, mark off 4 inches across (in the direction of the greatest stretch), then against a ruler hold down one side at the 0" mark while pulling until the fabric starts to resist, note how far it stretched. Let's say it stretched to 6", making it 2" longer. Now comes the math part (X/Y) x 100 = percentage of stretch. X = the number of inches stretched, here it is 2". Y = the base inches used, 4". 2 divide by 4 times 100 = 50%. If the fabric goes back to the original size/shape, great. If not I will make sure to use that fabric with a style that doesn't need retention, nothing close fitting.

Pick appropriate pattern for fabric


Pick an appropriate pattern for your fabric or know how to adjust to make it work. Last year, I made a dance costume which had a leotard under-structure. The leotard was made from a 4-way stretch miliskin and the attached over dress was made from a 2 way stretch metallic. The pattern for the overdress was based off of the leotard but had to be adjusted in both width and length. I highly recommend reading www.patternschool.com blog authored by Stuart Anderson, a stretch-wear pattern maker. He teaches the mechanics of stretch, fit and pattern making. And quite frankly, the best information I have found on working with knits.

Create your own design


Pointelle rib knit
Pointelle rib knit

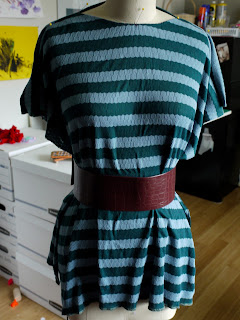
Besides making knitwear for my girls, I have been making t-shirts for myself. Lately, I am liking the looser blousier styles especially since I need to lose 20 lbs. of baby weight. My most recent shirt I made used a ribbed pointelle knit I found in the remnant section of the local chain fabric store. It was just under a yard and I probably paid less than $2.


Draping a knit fabric to design a t-shirt
Playing with the idea of a boatneck, batwing sleeve, and belt.


The fabric is very soft and drapey. I looked through all my patterns and just couldn't find one I liked so I draped it and used an old shirt of mine as a pattern for the neckline. I used the actual fabric to drape in so, when it came time to take it off the mannequin I thread marked the seam allowances instead of using a marking pen.


Since I didn't make a true mock-up, I checked the pattern in fabric. I doubled checked the shoulder length and side seams. I also did a quick and dirty fitting on myself to make sure the neck line laid properly. I have small shoulders and small back width from armscye to armscye. 

Stay tape on the back shoulder seam.

I stabilized the shoulder line which is needed in knits because this is one area that can stretch out of shape. Instead of buying stay tape, I make my own using either lightweight fusible woven or fusible tricot/knit interfacing, cut at 3/8" wide. If using the knit fusible, I cut the length in the direction of least amount of stretch.


I usually sew my seams with a narrow zigzag and then serge together the edges to finish it. I got used to doing it this way because my serger is an industrial 5 stitch machine and has to be threaded in a three thread configuration for knits. So, I sew the seam first on the regular machine for strength and durability. My regular machine does have a stretch stitch but I don't care for it. It is hard to unpick if I make a mistake, so narrow zig zag it is. I have recently acquired a domestic four thread serger which I could use to seam and finish all at once, but I have it set up for roll hems and too lazy to change it back.

Hemming knits


For hemming, I use a twin needle for stretch on a standard sewing machine. I don't own a coverstitch machine and have felt the expense not necessary for the amount of knit sewing I do. That being said, the twin needle works really well for t-shirts and clothing that don't need 100% stretch to function (100% stretch as required by swim wear and some athletic wear or dance wear). Twin needle hems will pop if the hem is over stretched. I have only had to fix a few hems from this happening. Sometimes for more stretch, I will use the triple zigzag, lightening or serpentine stitch (same stitch I just have heard it called all these names). Hemming (as well as bindings used for necklines or sleeves, will post about this later) is one area of sewing with knits that may need to have a sample sewn first before preceding with the actual garment. Below is a picture of a hem done with a twin needle. The fabric stretched out on me. There are some different methods of approach to fix this.

A knit hem sewn on a regular sewing machine
Before pressing
1. Hem using a coverstitch machine, though it can still stretch out.
2. Use the serpentine stitch to hem
3. Stabilize the fabric by placing a tear away stabilizer between the feed dogs and fabric.
4. Starch, lots of it. (just don't stretch the fabric while applying)
5. The lazy method, press with lots of steam and see what happens after hem is in place. (This works if the wonkiness is minimal and is what I used for this shirt).
6. Often times, a combination of any of the above.

A knit hem after pressing
After pressing
Neckline finish in a knit sewn with a twin needle
Neckline using same twin needle.


A simple t-shirt design created by draping
Me in the finished shirt (sorry for the composition my 3.5 year old took the photo)
Oh and lastly, I love working with knits because sewing projects work up really fast. T-shirts typically have 4-6 seams, not counting hems and the fabric is very forgiving.

Some online vendors I have bought knits from or just like to drool over:

Fabric.com
Print Knits Studio
Chez Ami
Girl Charlee
Gorgeous Fabric
Emma One Sock
Spandex World
Stretch House


January 02, 2013

Creating fabric repeats with Gimp

This tutorial, such as it is, could easily be called How to create seamless tile repeats with Gimp. If you do a google search for Gimp seamless, you will find lots of tutorials. Because of that, I won't do a detailed tutorial. This is a follow-up of my review of A Field Guide to Fabric Design.

The main difficulty I had with Gimp and creating a seamless repeat is a problem filter*.

Don't use this filter:

Filters - Map - Make Seamless

The resulting image doesn't make an attractive repeat. It overlaps the repeat with transparencies.

Instead the offset tool, which is similar to Photoshop, is located:

Layers - Transform - Offset

Finding this tool made all the difference. Conversely, I played around with the select tool and moving layers around to accomplish the same thing. The offset tool works best with the design repeat located far from the image borders and in the center of your image. For more complex repeats, manually selecting parts of the image, copy-paste into a new image and moving them in layers works better.**

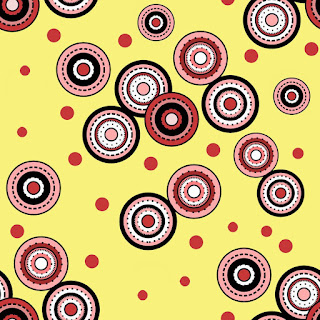
I started my experiment with a vector line drawing made in Inkscape and exported as a PNG file.

A vector line drawing of circles created with Inkscape
Next I pulled the line drawing into Gimp, added a background color, and then applied the offset tool. After that, I filled in the blank areas. Again, detailed instructions in the book for a simple repeat and more complex repeats.

A repeat pattern design created with Gimp

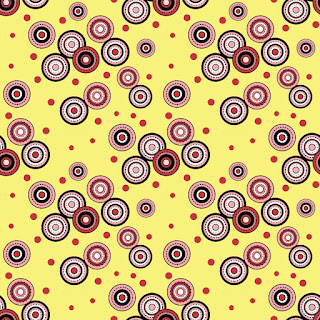
Gimp has a handy tool that allows you to test your repeat located here.

Filters - Map - Small tiles

This is how my repeat looks now.

Testing a pattern repeat with Gimp


The repeat could use a bit more work, but I think you get the idea. A Field Guide to Fabric Design has information on how to improve your repeat and also how to create a whole collection around this one design.


Of course, the real challenge is matching up the colors with Pantone.

* I tried to take screenshots of all of this but my print screen button wasn't cooperating.

** One of these days I may create a tutorial for this, but it is a bit more involved. My trial video demo took about 20 minutes.

December 27, 2012

Review : A field guide to fabric design


I hope all had a wonderful Christmas. It is during this time, the week between Christmas and New Year's, that I spend time cleaning off my desk and sorting my papers in preparation for the tax man. As depressing as it is to know that we will probably owe taxes this April, it is strangely cathartic to clear off the desk and start fresh for next year. Among the piles of papers is the book A field guide to fabric design by Kimberly Kight of the True Up blog.

Fabric design, or textile surface design, has long fascinated me. The ability to play with the color, proportion, and spacing of a design through a repeat is very intriguing. Kight briefly explores different styles, design and color fundamentals as applied to textiles. This includes a look at both digital and traditional design techniques. The meat of the book is the explanation of how repeats are created, including different repeat styles. Both digital and traditional (hand drawn) techniques are explained. Interspersed throughout the book are comments from fabric designers, both established and just starting out, from which the reader can draw inspiration. Finally, Kight presents ideas of how to print and sell your own fabric. What quickly becomes clear is that textiles fabric designing is a competitive and difficult market.

There are several instructional overviews including hand block printing, screen printing, designing a collection, and textile basics. All are comprehensive and a good foundation for further study and exploration.

The book is laid out well and is easy to read and follow. The instructions for designing repeats are clear and easy to understand. Kight strongly encourages the use of Adobe Illustrator and Photoshop because of their common usage in design work. She discourages the use of open source programs such as Gimp and Inkscape, which is unfortunate. Her primary objections to Gimp and Inkscape are the lack of Pantone color palettes*. The objection is valid because Pantone is used to ensure proper color matching. But anyone that has printed fabric knows that colors don't always work out as expected even when using Pantone**. Pantone color palettes are proprietary and that is the reason Gimp and Inkscape do not include them by default. In other words, their exclusion is entirely a legal and financial matter and not anything lacking in the software itself. But the palettes can be acquired (not easily) and added. Also, Pantone has CMYK and RGB equivalents (here is one tutorial) and if you are serious, you can buy a set of color chips and match things up. There will probably be a lot of back and forth until the correct colors are obtained, and that is probably why most designers use Illustrator and Photoshop (because there will be less of that). At the end of the day though, Gimp and Inkscape are just as robust as their commercial counterparts. In a separate blog article, I'll show how easy it is to design repeats using Gimp.

I liked this book a lot and I will reference it when I play around with designs, whether for a desktop wallpaper or for fabric I intend on printing.


*For more information google Gimp and Pantone.

**I managed to design a book cover using only free software and have it printed exactly as expected at one printer and not at another. There are a lot of variables between designing on a screen and a printer's capabilities that can't be completely solved by the use of one color matching system.

November 16, 2012

Question on fabric copyrights.

Fabric prints

I've received some questions and thought I would take some time to answer them in a series of short blog entries.

Lara asked a question on fabric copyrights.
I wonder if you can help!?  I came across your blog and a similar thing happened to me - I make bags and was sold fabric for the bags that infringe on a large company's design rights.  I have now found some different fabric and am wondering how I can double check that it is not copyrighted to anyone - do you know how I can check this?
In the US, fabric that is sold is subject to the First Sale Doctrine, meaning you can use it as you choose. The exception to this is if the image contains licensed images or trademarks. An example of this would be a team logo or recognized cartoon character. Though even the use of fabric with licensed images is up for debate.* This right is currently being challenged as we speak at the US Supreme Court, which if the judges rule a certain way threatens this right. It would probably upend business as we know it.

Anyway, the current trend among textile surface designers is to license their designs to fabric converters (such as Michael Miller, as an example) while retaining all their copyrights. They seem to be ok with personal, home use of the fabric printed with their designs, but they don't like their designs being used on commercially made products without their permission. The idea is certainly in conflict with the First Sale Doctrine.

There have been instances of copyright and trademark infringement on fabric in the US. In those cases, the design on the fabric was copied and printed outside the distribution and control of the original designer and/or fabric manufacturer.

I think the situation presented in this question is a bit complex and I don't know enough of the details to offer much help. I think Lara may be from the UK? In which case there are different issues at play. The UK and European Union have seized on the idea of design rights and patents. In that case, a fabric print in combination with a specific product can be protected. I don't know how you can check on the copyright status or design rights of a particular print. You would probably have to rely on the integrity of the fabric supplier. In any event I think it would be difficult to ever know for sure if something was ok to use.

In the US, the answer is similar. Fabric prints have traditionally not been registered with the US copyright office. Designs, as in completed items like a dress, are not protected. So, you must rely on the integrity of the fabric supplier to supply fabric that is available for the use you intend. Intellectual property lawyers may be able to help, but I don't how many are versed on the complexities of the textile and fashion industries. Unfortunately, if the above trends continue (and if certain legislation is passed) the need for an IP lawyer will become a requirement for designers.

*If you can look past the hyperbole of the Tabberone site, they do make some interesting points.

April 03, 2012

More on copyrights - this time on fabric

Printed fabric

I've wanted to write a blog entry on the latest state of copyright and intellectual property issues in the fashion and sewn products business for a while. I've been watching the assertions of copyright restrictions by indie pattern designers (sewing and knitting) and the appearance of copyright restriction on fabric selvages. I've struggled with how to approach the topic because it can become quite heated very quickly.

As a fashion designer, I like to use printed cotton fabrics in my girls dresses. Over the last several years, I've been watching the rise and popularity of certain fabric print lines and their designers. I've loved the prints they are producing because they have hit upon a formula which is constantly fresh and inspiring. Long gone are the sweet floral rose buds that were so typical for infant clothing. Now there is an explosion of modern, colorful designs that are mixed and matched like crazy.

In the fashion industry there is an assumption that fabric available for sale can be used to make commercially sold products*. We don't usually take the time to ask for permission from every vendor and copyright holder before we design a season. To do so would bog down the process considerably. And let's not forget the concept of the first sale doctrine, which in the United States says the creator of an object loses control of it once the item has been sold**. Even so, I went so far as to ask permission on one fabric design a few years ago because it was designed by a well known scrapbook paper designer. This designer was known to go after individuals who used her scrapbook products to make new products to sell. But when I asked the fabric vendor, they thought I was crazy - of course I could use the fabric for a commercial product.

Well it appears with the rise of celebrity fabric designers***, that is changing. I've been reading of the recent case involving Kate Spain and C&T Publishing/Emily Cier. I won't rehash the whole thing but you can read a good analysis at The Free Motion Quilting Project. With the resulting chaos and ill will that is now floating around the quilting industry, you can see how quickly creativity can be curtailed.

This one situation throws chaos into more than just quilts. There are many childrens clothing designers, accessory makers, and manufacturers who use fabrics from celebrity fabric designers. What's to be done there? I can assure you that the fashion industry as a whole will not stand for it. There is a cost associated with printing up fabric, but it is not as hard to come up with our own designs and print our own fabric as it has been in the past. Those fabric designers need to be careful that they don't alienate the very customers they seek to serve by limiting what can done with the fabric they create. They may loose the very income they seek to protect.


*Generally speaking, it is suggested that a fashion designer not use a fabric print that contains a licensed character such as Mickey Mouse. Doing so crosses into trademark territory and Disney will come after you. There are some designs which are so distinctive that there can be no doubt that the design refers to another brand. So while the first sale doctrine may apply, why would you want to go there? In addition, it is copyright infringement to copy an existing fabric design and print it yourself. Though that gets into murky water because there are many, many fabric designs which are technically in the public domain, though which is and is not public domain is difficult to determine.

**Those statements printed on fabric selvages that limit usage to personal use are probably not legally binding due to the first sale doctrine. Though I'm certain some individuals may actually try to enforce it with lawsuits and threats anyway. If you see it and you have a concern, then just don't buy it. And as mentioned above, some companies will actually come after you.

***Please don't think that the usage of the terms celebrity fabric designers is disparaging. On the contrary, these fabric designers deserve the recognition that comes with their talent. The term celebrity simply refers to their popularity and the expansion of their brand across multiple product lines. Just as there are celebrity chefs, actors, and what not, there can be celebrity fabric designers.

August 12, 2009

A Warning on Labeling Bamboo Textiles


Bamboo fabric has long been considered a miracle green fabric. It is super soft, absorbent, biodegradable, and considered antimicrobial. It is true that bamboo is considered an eco friendly plant because it can be grown quickly without the use of chemicals. Many products have been produced from bamboo - from floors to textiles. Some of the eco friendly claims have come under scrutiny, especially bamboo textiles.

Bamboo textiles are produced by two methods. One can be considered sort of green and the other not. With the first method, bamboo stalks are crushed and broken down with enzymes and then combed out. The second utilizes harsh chemicals to break down the bamboo stalks into pulp which is extruded by spinnerets. This second method is the same process in which Rayon fabrics are manufactured.

You can bet that the majority of the bamboo fabrics on the market are manufactured by the second method. Because of this, the FTC has declared that bamboo fabrics must be labeled Rayon with the qualifier from bamboo. While this is a controversial position taken by the FTC, it is more accurate due to the actual processes being used. The FTC has clamped down on some companies claiming their bamboo textiles are "green". The charges include falsely advertising some of the more outlandish claims of being antimicrobial and biodegradable.

Anyway, be careful of how you label bamboo. The FTC has further guidance on how to deal with bamboo.

July 17, 2009

What is a fabric converter?

Fabric prints

Fabric or textile converters may not be a term some are familiar with. Fabric or textile converters are factories that embroidery, dye, print, flock, bead, pleat, etc. fabric. They may specialize in one area and simply call themselves embroiderers or printers, or they may provide multiple types of conversions. A fabric converter takes specially prepared or greige (pronounced grey) fabric and converts it into finished goods.

There are various forms of greige goods. Generally greige goods are fabrics that come right off the loom. Some have been minimally processed, not processed at all, or the yarns have been processed prior to weaving or knitting. There are various types of finishes that depend on the desired outcome. There are finishes that prepare the fabric for printing or dying. Other finishes enhance the fabric's qualities, such as singeing, desizing, scouring, bleaching, calendaring, and many more. These are finishes done to the fabric prior to printing, dying, or embroidering and so they are still called greige goods by some. Since these finishes do finish the fabric to some degree, they are technically called by other names. There are various acronyms and labels for the different types of "greige" goods and it all becomes kind of fuzzy (or grey, heh) for me. In any event, greige goods are warehoused until an order comes in to print (or whatever) the fabric. Printing and embroidering are some of the fabric conversions done at the very last stage of fabric manufacturing.

July 15, 2009

Printing your own fabric pt. 2 : Sourcing Fabric Converters and Printers

Fabric flower print design

Say you are a fashion designer or retailer and you want to custom print your own fabric. You have the skills (or the funds to hire a designer) to create artwork. There are many fashion designers, and even some retailers, who print their own fabric. Off the top of my head Laura Ashley, Ralph Lauren, and Ikea all print their own fabrics, though smaller companies also do it. This is a bit different than my previous blog entry (Printing your own fabric pt. 1), as these individuals are not necessarily textile designers professionally. But as part of a brand image or look, custom prints become necessary.

There is a lot of existing artwork already out there. Freelance textile and graphic designers are available to create the artwork to complement the look of a line. You can also hire graphic designers, though it may be helpful if they have experience in preparing artwork for textile printing. You could even create your own artwork if you have the skills and inclination. You should receive a "strike off" or proof to approve prior to printing. A strike off is a sample of the print and it should represent the actual fabrics, colors, and print registration of the final goods. Make sure to evaluate the strike off thoroughly before committing to a print run.

As a fashion designer, you can contact fabric converters/printers yourself. They can help walk you through the process of preparing the artwork, setting up the repeat and printing the goods. Each printer will vary in their abilities and processes, so don't be deterred if one place is not a good fit. There will likely be a set-up charge to prepare the artwork, so don't be surprised by this.

The biggest question when printing your fabric rests on minimums. How much fabric will you be willing to carry in inventory? Typical minimums average about 3,000 yards. The smaller the quantity, the higher the price per yard. Stateside factories generally require higher minimums. Overseas factories vary - some high, some lower. Some factories may break up the 3,000 yard minimum and allow you to do different colorways of the same print. Others may require 3,000 yards per colorway. Even then, some factories will do less yardage. It is all a matter of research and asking the right questions.

Q: "Can you do custom prints?"

A: "Yes, but it will be a 3,000 yard minimum and 6-8 weeks."

July 13, 2009

Printing your own fabric pt. 1

Fabric prints

This may be a future series. I recently talked with someone who has been custom printing his own fabric for a few years now. There are several steps involved with printing your own fabric but it isn't as hard you might think. I am talking about having your designs professionally printed by a fabric converter. There are options that have become available to home hobbyists to print their own fabric, but it is extremely expensive. If you were to take this up as a business, you would need a printer who can print hundreds of yards at an affordable price or you would never make any money.

I have to say I admire some of the up and coming print designers. I admire their skill and ability to create a cohesive collection 1-2x/year. Many of these designers have training in the arts, either the fine arts or graphic design. On top of that, they have some experience working with cloth as seamstresses and pattern makers. I wish I was more skilled at designing prints. I think I could do it but I would need to dedicate a great deal more time to it. Maybe someday I will get up enough gumption to try it and print my own designs.

Traditionally, a textile designer creates their artwork using traditional media - paint and a brush, markers, pastels. At the very least then and now, an artist carries a sketchbook around with them everywhere. They are able to capture patterns and designs in the world around them and translate them into a fabric. They can pick colors suitable for apparel or interior fabrics.

I think most modern textile designers today create their artwork using computer aided design (CAD). Adobe Illustrator and Photoshop are the primary tools. (Free versions include Paint or Gimp, Inkscape). Artwork created in Illustrator or Photoshop is not immediately ready for printing. The artwork must be made into a repeat, created by a special filter or plug-in. The idea is to offset the image 50% horizontally and vertically and fill in with the offset parts. Look for a tiling filter or tool in your program to do it automatically. Once this step is taken, the artwork is ready to be printed by some methods (Spoonflower, for example).

For mass production, the artwork goes through some additional steps though I am sure the technology has changed since I was last exposed to it. There are specialized CAD packages in the industry that some artists use directly or through a trained technician. Artwork is brought into the software and the design is fine tuned through color reduction, recoloring, etc. The design is made into a repeat. The process is rather involved because digital artwork has to be translated into the chosen printing method. And there are several methods out there - heat transfer, roller printing, block, screen printing and digital. The method chosen depends on the converter's ability and/or appropriateness for the print.

If you want to be a textile designer, there are two main approaches. You can create artwork and shop it around to existing fabric manufacturers/printers/converters. Michael Miller, Westminster, and others buy the rights or license artwork from designers. Other designers print and sell their own fabrics. In either case you don't necessarily have to understand all the ins and outs of textile manufacturing and printing. Fabric converters/printers can take your artwork and prepare it for printing (their may be an up-charge or setup fee).

Anyway, more to come as I find this to be an interesting topic....

July 07, 2009

Wedding Dress Care-Content Labeling

Care content label in a wedding dress

This article now has a follow-up blog entry with some corrections and additional opinions. Your comments are welcome, but hateful or spammy comments will be deleted.

As I was working on the alterations for this wedding dress, I wanted to see other dresses by this designer/maker. Perhaps the sleeve pattern shaping was intentional and not a mistake? Perhaps the problem is consistently found in other styles? I had no idea who the designer was, only where the dress was purchased. The dress was not in the store's web catalog and the only label in the dress was not helpful. The dress was missing a brand label and had no RN number. Further, the care instructions were rather bizarre/interesting (click on the picture for a closer view). I googled the style number and came up empty.

At a minimum, the dress should have had an RN number on the label. You can search an FTC database to find out the manufacturer of an apparel item. Wedding dress manufacturers/bridal shops have been fined in the past for failing to disclose or intentionally removing this information. Alterationists may remove the labels after purchase but should give them to the bride (links to come later as the FTC website was having problems when I wrote this).

The label states:

100% polyester
Do not dryclean
Spot clean ONLY
Use cold water and
mild soap
Made in China
See reverse for care
----------------------
Do not spray Alcohol
based product directly
on gown such as Perfume,
Hairspray....etc. This will
damage beadworks and
embroiderie designs made of
Rayon, Nylon, and other
synthetic materials.

I found the care instructions rather hilarious. How many of you spot cleaned your wedding dress with only cold water and mild soap? The fabrics themselves probably could be dry cleaned or even hand washed (though that may be more work). The beads will probably dissolve in the dry cleaning solvents, so thus the "do not dry clean" instructions. But, if you can find a reputable dry cleaner who will clean the dress and avoid the beads, then go ahead and have the dress dry cleaned. Otherwise, hand wash the dress. BTW, there were no further care instructions on the back of the label. Many wedding dresses are currently manufactured in China, which may explain the poorly written tag.

The extra instructions are interesting. I suppose it is possible that perfume or hairspray may damage the beads. Though the bride would probably need to be drenched in it before the beads dissolved. Sure would like to put those beads to the test....

The label should have been written to say:

100% Polyester
Hand wash or
Spot clean
in cold water with
mild soap. Hang to
dry. Do not bleach,
Do not iron.
Made in China
RN12345 ( ------ Made up)
---------------------
Avoid the use of
Alcohol based products
such as hairspray,
perfume, etc., as these
may damage the dress.

And of course, the care instructions should be thoroughly tested by the manufacturer. Good industry practice (and the government) dictate that a manufacturer should have a reasonable basis for the cleaning instructions. This means actual test data recorded and stored with the manufacturer. At this point in time, manufacturers (except children's clothing manufacturers) can do their own in-house wash testing. Children's clothing manufacturers will have to have it done by a certified laboratory. Wash testing is not specifically mentioned in the CPSIA, but it does imply that ANY testing will have to be done in a certified lab.

November 07, 2007

Americana Apron from a 1950's sewing pattern

Ok, this is day 7 of the Sew, Mama, Sew challenge of 30 gifts in 30 days. Here is my entry that was supposed to be for day 1. Of course, I made two, because I was in desperate need of a new one. DH used our only apron to carve some elk - let's just say it's not too pretty anymore. From here on out, I am only doing one of each item on the list that I can manage to accomplish.

1950's apronI chose a pattern I had made as a teenager - it came from an old high school Home Ec manual of the 1950s. I loved this pattern as a teenager, but what I failed to realize is that I (ahem) am not a teenager anymore. The original pattern has a cute bib with ties. I am thinking my younger, shorter sister, aka Twiggy, should be able to wear this with no problem. She recently has expressed an interest in cooking, so I will tuck a couple of my favorite go-to recipes in the pocket.

I know that I said most of my gifts would be made from scraps. Well, I purchased this fabric from the thrift store for about $2 and it has been collecting dust in my stash for at least 5 years. I think it counts - plus, this fabric may show up in other scrappy projects.

1950's apron without the bibI left the bib off of my apron, which works just fine. DH says it makes me look like a 1950s housewife. Not sure what to say about that..... Anyhoo, both aprons are trimmed with some left over ribbon along the hem and pocket. And yes, I am wearing socks with my shoes because the mountains are chilly this time of year.....


Homemaking for teenagersHere is the book that I acquired as a teenager. I still love it. I wish modern Home Ec books were so practical about making a home as this one.

Up next on the list for Nov 8th is "Whimsy". I have no idea what I will come up with. I may browse some books at the library for ideas. Whimsical is something I am not so this may be a good design exercise.

March 09, 2007

A question on binding a leg opening on a onesie

A baby onesie or bodysuit with constrasting binding
Laura sent me this really good question on the binding around the leg opening of onesies:

I don't mind you posting anything -you can use my name. I actually want to ask many things but for now off the top of my head I have a question about making onesies. When I went to my pattern maker he said that the banding that goes around the edges, where the snaps go, comes on rolls. What is it called? I can't even find this. I am using bamboo fabric so that part I would like to be organic. 

It looks like it's just rib fabric, would I have to get it made or how is it usually done? I've been working on getting t shirts right for a while, almost there. That's a whole other thing that's been challenging. The onesies are the next thing.

The banding (or rather BINDING) that goes around the edges does come on rolls (more about this below).

You can choose whatever fabric you like for the binding. I have seen it made out of the same fabric as the onesie (generally an interlock) or a rib knit. You could even use a jersey, but it can be problematic because it doesn't have a lot of stretch. If your onesie is made of an interlock and you choose a rib knit for the binding, you will need to make sure the two fabrics are dyed together. No worries if you use the same fabric or contrasting color.

Here are some things to think about:

How heavy is the fabric? Will it be too bulky?

How much does the fabric stretch? (the manufacturer will need to adjust the machines to accomodate the stretch of the fabric).

How will you apply the binding? - You can do a double fold, single fold on top - flat on bottom, contrasting thread. Also consider the type of stitch - coverstitch, single needle, chain stitch.

I pulled some onesies out of my stash of samples and they all had a different application (pictures below). Do some comparison shopping to get an idea of what you would like. Buy a sample of what you DO want to show your sample maker and patternmaker.

Now how do you get the rolls of binding in the first place? There may be some fabric suppliers that will pre-cut the fabric rolls for you, although I imagine that would be the most expensive option. There is an easier way. When you determine your fabric yields or allocations, you have to figure out how much binding you will need. By doing some math, you can then figure out how many yards of full width fabric you need (maybe I will demonstrate the math for this, just not today). If your binding is the same fabric as the body of the onesie - just order extra fabric for the body. If your binding is different, you may have a separate fabric minimum just for the binding.

There are two ways to get the rolls made. The easiest and simplest is to find a manufacturer that has the ability to cut the rolls for you. There are machines that roll off the fabric onto a second tube and then cut the tubes into rolls with a giant saw. (From what I understand, these machines are difficult to come by and are generally antiques, at least the ones I have used were ancient. I would imagine news ones are $$$). The second option is to roll off the approximate yardage needed for binding onto a separate roll and send it off to be cut by someone like Superior Bias. Be sure to discuss these options with the manufacturer ahead of time.

You can cut your own binding for samples. Binding is generally 1" wide and cut across the width of goods. The actual width will be determined by your application method and fabric stretch.

Just a quick word about knit fabrics. Many knit fabrics are made to order and they have high minimums (sometimes as much as 3,000 yards). Some factories carry stock of their basic - usually a white fabric. When you order sample yardage, make sure to ask if the sample fabric has been completely processed - meaning washed and already dyed. Sometimes the available sample yardage is prepared for dying or printing (in other words, not completely processed). This type of fabric will shrink a lot when washed and is not the ideal for samples.

Ok, now time for some pictures:

A bodysuit leg opening with contrasting binding This is a traditional binding with a contrasting rib knit fabric. The body of the onesie is a printed jersey. The binding is applied with a coverstitch machine. The binding has one fold on top and is flat on bottom. I usually call this a coverstitch binding.


Coverstitch binding on a onesie leg openingThis is also a coverstitch binding similar to the first example. The actual stitch is different from a traditional coverstitch, so the machine requires a different set-up. The binding is folded the same way as the first example. Of course, the design detail comes from the contrasting thread color. The binding is the same rib fabric as the body.


Double fold binding on a bodysuit leg openingThe binding on this onesie is made of the same fabric as the body, just a contrasting color. The fabric is a pebble (or textured) knit with not a lot of stretch. The double fold binding is applied with a single-needle stitch. The binding is a bit bulky because of the double fold and the texture. This application is probably the most appropriate for the style, just not my favorite.

January 02, 2007

Knits-Wovens - How to tame the stretch


Remember my previous blog on flower buttons? I promised to blog further on how this manufacturer worked with combining knits and wovens. Combining knits and wovens opens up wonderful design opportunities, that is until you try to sew the two together. The knits invariably stretch out of shape and the wovens will stubbornly refuse to stretch.

The most frustrating thing is trying to gather a skirt (with a high gather ratio) to a knit bodice. Imagine a pretty gathered taffeta skirt sewn to a stretch velvet top. While I am not going to explain every tip and trick out there, this well-loved jacket has some excellent examples of how to do this.

The most important thing to remember when combining the two is that knits will have to be stabilized in some way. This jacket has a facing which has been interfaced with a light-weight interfacing appropriate for a stretch fabric. In other words, after the interfacing is applied, the knit fabric retains some of its knit characteristics - it doesn't feel stiff as a board. The interfacing prevents the buttonholes from stretching out and the topstitching is straight and even.

As a design inspiration, you can see how the facing is an entirely different fabric. The neckline and center front seams would have been too bulky if faced with the french terry knit. Instead, they used a flower print jersey. I am sure this jacket was part of a two piece set that had a matching pair of flower print pants.

The gathered eyelet trim was pre-gathered onto a twill tape and then applied to the hem. The manufacturer could have applied a twill tape to the jacket and then gathered the trim directly to the hem. In either case, the knit fabric has to be stabilized to prevent stretching. The jacket, sleeve and pocket hems all have this gathered eyelet trim. Wow!

The manufacturer gets bonus points for their patch pocket application. The rounded pocket would have been very difficult to maintain the round shape and topstitch it without stretching. They used a 1/2" strip of interfacing around the edge of the pocket. This picture is a close-up of the inside of the pocket.

The final tip is not easily observable. In a factory, the sewing machines can be adjusted to help prevent stretching. How the fabric is fed through the machine is part of the reason store-bought knits look so good. This adjustment is often called the differential and it refers to the movement of the feed dogs. Industrial machines with differential feed have two sets of feed dogs. These feed dogs can be adjusted in how far they move back and forth and up and down, in relation to each other. The front feed dogs can either pull extra fabric or pull less in relation to the back feed. This is not to be confused with the stitch length, also controlled by the feed dogs. Few home machines, with the exception of some overlock sergers, have this ability, requiring knits to be stabilized even more when sewn. A walking-foot attachment, or machine, may help with seam distortion too. American and Efird has some good suggestions on sewing knits.