Part 2 of this series continues the discussion of how to grade complex styles. It is not necessary to have the Handford book to understand the concept, but some experience with grading would be helpful.
This part of the series was going to contain a lot of explanation with lots of examples. There are two reasons that I held off on that. The first is I am considering writing a book on the subject. I am sure it will be a best seller and I will be able to retire early [eye-roll]. The second is that it would be impossible to discuss every possible scenario. It would be best to explain the principle and let you work out your specific grading problem on your own. You will benefit with having to struggle with the material and learn lots in the process.
Just a side note, these pieces have been simplified, no darts or extra gathers. I am also ignoring the seam allowances. The grading is done the same way regardless. This demonstration only shows how to figure out a length grade. The same principle works for widths.
Anyway, let's move on to the examples....
In order to grade a complex style, you need to have basic blocks that are already graded. On top I have a basic block that is already graded. Below that is my ungraded pattern pieces for a bodice with a mid-riff.
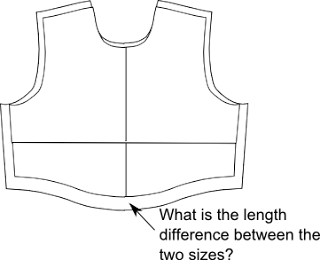
There are many ways to determine the total length grade. In this case, I just want to know what the length difference is between the graded basic block and the ungraded pieces. I want to grade my pieces up to the next larger size. To do this, I just lay the ungraded pattern pieces on top of the next size and align the pieces along the horizontal and vertical axis. My drawings are missing the horizontal, but you can pretend there is a line that runs from the side-seam/armscye points across the pieces. BTW if you would rather, you can figure all this out mathematically....
Once you know the length grade difference, you can then decide where you want that length growth to occur on your ungraded pattern pieces. In the examples below, you can have that length split between the two pieces or all of it in one piece or the other (shown in red).
The question you have to ask is:
This is where the beauty of computerized grading happens. I can play with the grade as much as I want - plugging in different numbers until the proportions look the way I want for each size. Hand grading would be a little more complex. The more complex the style, the more difficult the grade can become when doing it by hand. Handford's suggestion to tape the pieces together with long strips of tagboard can work in hand grading. The grader will have to determine if additional grade points should be added and how much movement should occur. This can be done by using Handford's red lines of distribution. Sophisticated manipulation at each grade point can only occur in CAD.
Still the principle works the same regardless of how complex the style or method.
1. Determine your total length/width grades.
2. Calculate the length/width difference between sizes at the grade points.
3. Decide where the growth should occur by comparing the total grade and the difference between each size at the needed grade points. What proportionally looks correct? How is my fit affected?


Great blog! Thanks for all the info on grading. It's very helpful! =)
ReplyDelete