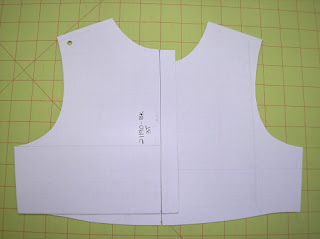
I am reworking some of my patterns and have both Aldrich's and Armstrong's books as well. As you mentioned, I have noticed that my own kids' clothes from various manufacturers are drafted "flat" as Aldrich describes it, with the front and back patterns basically identical except for the neckline, but was wondering if you could explain more why that is the standard.Here is a picture of what Tiki is talking about. Aldrich is the only other person I know of that addresses this topic. It is true that most childrenswear manufacturers work off of flat blocks, especially for infants. Aldrich only presents it for infant casual clothing. But I have seen variations of the idea spanning all children's sizes.

My basic blocks are a variation of the flat method. The armholes and shoulders of the front and backs pieces are identical. The body widths match (the long vertical line indicates the center back/front). The flat fit is a little more boxy and loose. My fit is not too boxy, but it does allow for some growth. You can see the fit of this bodice on one of my dresses. The patterns are not too boxy because the side seams do taper inward and my front waist has some curve. Aldrich's patterns have a straight side seam and waistline. BTW, I am not done refining the shape of this pattern - I am considering narrowing the shoulders and reducing the armhole. You have to start somewhere with your patterns, and they will evolve as you refine your fit.
I have read the discussion of armhole and sleeve shaping from Kathleen's blog and book and was wondering if the standard in the children's wear industry is due to simplicity in drafting, etc (perhaps because there is more ease built into the design of the garment itself) or if there is a specific anatomical/physical reason that makes drafting the asymmetrical sleeve/armhole unnecessary in children's wear. I guess, in other words, is that only the standard in loose children's garments or would drafting a more fitted children's garment with the same symmetrical sleeve still be correct/standard?I can't say for sure why this is the standard. It is definitely not something I learned in school, but rather on the job. Tiki's instincts are probably right. There is a simplicity in the drafting of flat pattern blocks, and it does save some time. There is a physical limitation too. The smaller the size, the less practical it becomes to draft a classic block. A flat block gives some wearing ease and allows for growth. Children, after all, grow and a little extra ease allows the clothing to be worn longer. And yes, you can draft a more fitted bodice block with symmetrical armholes/sleeves. That is what I did with my patterns because it is what looked right to me. Here are some pictures of a classic, fitted block with asymmetric armholes (click on images for a better view).
 This is a set of classic bodices sized three month. You can see the small armhole - there is little room to draw a nice curve. The back armhole is nearly a straight line. These drafts are based off of Aldrich's book. A classic block would be more appropriate for larger sizes.
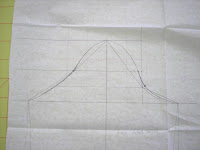
 This is a corresponding sleeve with an asymmetric sleeve cap. The sleeve cap seems really high and the curves are abrupt, IMO. These blocks could certainly work, but they require more refining. I opted to modify my blocks so they were semi-fitted and flat. The curves are easier and sewing is easier.
There is a relationship with children's body shapes and the flat method. Young children are simple round cylindrical shapes until about the age of 5 and it makes sense to keep the patterns simple.
I'm having difficulty understanding from Aldrich's book what makes the "flat" block or "classic" block more appropriate for a particular style, so I wondered what was standard practice here in the industry. I hope this makes sense.I look at it this way. Flat blocks are good for casual styles, like t-shirts. Classic blocks are good for more formal looks. Flat blocks are good for infant sizes, classic for older. Your fit and look defines your design and you can opt for either method. Usually I see a modified classic block for fit, but with symmetrical armholes and shoulders (perhaps more of a convention rather than a standard). I have seen some designers use only classic blocks and others only flat. Really, the decision is up to you.
This is a topic I am still researching and trying to understand. I hate to label flat blocks as a standard because there are several possible methods that may be considered "right" or the "standard". Pattern making is considered a technical, rigid system, but don't be afraid to do things your way. I learn things from those who do not have formal training and are not afraid to do things a little different. Sure there are certain accepted standards for labeling patterns or placing notches. Acceptable shaping and fit is open to interpretation.


