June 28, 2007

A boy's shirt pattern fix for Butterick 6030 pt. 2

A boy's shirt pattern fix for Butterick 6030 pt.1 is here

Well I spent a few hours working on this pattern and sewed up a sample. I decided to go ahead and do a style similar to the original. My sample is a basic shirt with a convertible collar. Once the patterns are completely worked out, endless style variations can be developed. So far I have corrected:
  • Neckline smaller
  • Reduced and reshaped front self-facing
  • Reduced seam allowances. 1/4" s.a. for the neckline, 3/8" everywhere else.
  • Drafted a new collar - a one piece collar that folds in half.
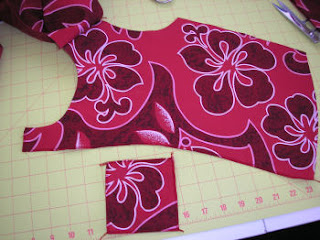
I thought it might be useful for my readers to see how I construct a simple, casual shirt. This is not a finely tailored shirt, by any means - just the basics to test the pattern. These steps are production-style but allow for use of home sewing machines. At this point, I assume the pieces have been cut and markings and notches have been transferred. BTW, I reduced the number of notches and only used two drill holes (could use chalk) for the pocket placement. Also, you'll notice I did not use any interfacing. Interfacing is often eliminated in children's clothing from budget to high-end clothing. Firmly woven fabrics may not need any stiffening. During product development test and see if you really need it.

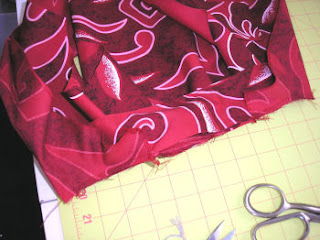
1. Prep work - edge finish the the pocket edges and long edges of facing. Fold collar in half and stitch collar ends (called "close" in the industry). Sew shoulder seams.
Edge finish a pocket before attaching to front
Sew collar ends
2. Details. Turn and press collar. Use a pocket template and press pocket. Stitch pocket hem. Topstitch pocket to left shirt front. Edgestitch collar. I think collars look best edgestitched 1/8" from edge. Further away can look homemade - but depends on style.

Edgestitch collar
3. Attach collar. This looks more complex than it is. This fabric is hard to see but there are three notches on the collar. Two match up with the shoulder seam and one for the center back neck match-up points. Sandwich the collar between the front facing and neck (notches on shirt front indicate center front neck where collar starts and and another for the fold back of facing). Clip the top collar at the shoulder seam point a little less than the seam allowance depth 1/4". Stitch the collar on using a 1/4" seam allowance, flip the seam allowance of the top collar out of the way. Notice there is no grading and clipping (my least favorite thing to do).

Attaching the collar to the neck edge
Tomorrow I'll show how to finish the collar, attach sleeves and give a review of the results.

June 13, 2007

Resizing Vintage Patterns versus Grading

Sewing pattern and notions

The same reader from the previous post also asked:
Also, I found some info on resizing vintage patterns http://www.sensibility.com/pattern/resizepattern.htm thought it might be of interest.
I checked out the link and I do like the website. However, Jenny's pattern resizing tutorial is mis-named. She actually is describing a grading process. It is not a very precise method, but perhaps it would work for a custom or one-time project. I would still encourage my readers to learn a better method, especially for preparing patterns for production.

The idea of re-sizing patterns implies there is an inherent sizing problem which should be solved. If you buy a commercial pattern and you need a longer waist, then you would resize the pattern by slashing and spreading it longer to the required measurement. Jenny does describe such a process at the end of her tutorial.

Jenny goes one step further and shows how to alter an adult pattern into a children's pattern. The method probably will work, but it will require too much fiddling. Why not take a basic block the size you need and draft the same style?

I don't think I am being too hard on Jenny. She does have a nice website. Just realize her perspective is geared more to costumers and others who don't want to be bothered with details.

June 11, 2007

Simplicity 3295 and vintage pattern measurements

A reader asked a very interesting question

I have started sewing for my 20 month old son and some of his friends and was wondering if you have any experience with vintage patterns (1940's, 50's, 60's). Specifically I'm wondering if you have any thoughts on size variations. I'm sure you are familiar with the dramatic shifts in women's pattern sizes (the 1940's pattern size 12 is very different from the current pattern size 12)...I'm wondering if the same shifts occurred in children's sizes. Any thoughts you would be willing to pass on would be much appreciated!

This question was a little difficult for me to answer because I don't use home sewing patterns very often (not for children, anyway). They require too much work to correct. They have a lot of sloppy patternmaking. It is easier to pull out proven blocks and draft whatever style I want. I will buy a commercial pattern only when I have difficulty figuring out a more difficult design, such as a sleeper and then I only refer to it. I almost always draft my own patterns.

At one time, I thought a collection of vintage children's patterns would be pretty neat to have. I started collecting a while a go, but haven't added much to it. See, I don't actually look at the pattern pieces. Instead, I collect the patterns for design inspiration - in other words, I like the pretty pictures. I can draft patterns with the same style using my own personal blocks. This is one of the few vintage patterns I have from 1950.
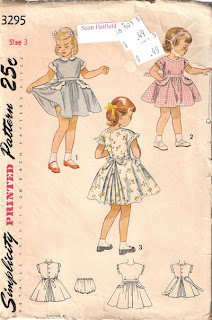
Vintage Simplicity 3295 girls dress pattern

I liked this pattern because it has an unusual skirt, pleated fullness in back and a gathered front waist. The bodice has a built-in cap/kimono sleeve. Besides, it is cute!

Now the question of sizing differences between then and now is also a difficult to answer. I haven't really done the research to be able to supply a truly adequate answer. I checked the measurements on the back of this envelope against my collection of measurement charts and the 1950 measurements fall within an acceptable range of contemporary measurements. In fact, the body measurements for this pattern were a little larger than today's measurements. I found this surprising considering the extensive reporting about childhood obesity. Of course, this is one style, in one size, from one company. I don't know how other vintage patterns may measure up. The best thing, of course, is to measure your own child and compare the measurements with the pattern envelope charts.

One difference that may exist between vintage and contemporary patterns is the amount of ease, design and wearing. Styles from the 1960's may fit closer to the body versus styles from the 1980's. This may cause one to think the patterns from the 60's were made to fit smaller people versus larger people in the 80's. The reality is that the prevailing styles influenced fit. It is helpful to try and look at the patterns from the correct perspective. Unless you are striving for authenticity, it is worth the time to draft your own patterns.

I haven't really seen a "vanity" sizing shift in children's clothing that is comparable to women's clothing. US Children's sizes are based on age designations. If anything, the sizing has become more specific. The 1950's may have had one infant size and then start with toddler sizing as 1, 2, 3, etc. Now, infant sizing is broken down by age too -- 0-3M, for example. Measurements are derived from the average measurements of children in each age grouping. Some consumers become frustrated by this sizing system because their children may vary from the norm (not to mention every manufacturer sizes differently). They may have a 2 year old child that actually wears a 4T. Trying on multiple sizes of one style can cause frustration in a changing room, if parents even take the time to try clothes on.

European sizing is evolving to a more intelligent sizing system. The Europeans are basing their sizing on height and weight measurements, available on hang tags and labels. Body size measurements are broken down by age grouping too, but they are not given age designations. This concept enables the consumer to buy the most appropriate size regardless of the age of the child.
May 22, 2007

Clothing for Children: Chapter 3, part 3

Essentials in the Layette
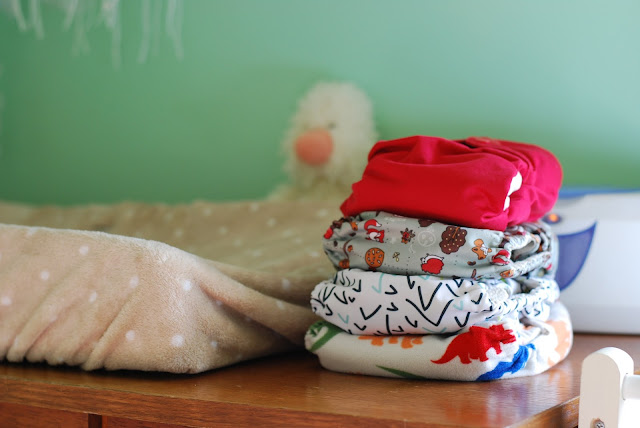
Cloth diapers

This section discusses what is needed in an infant layette. Diapers are considered one of the most important layette items to have, especially cloth diapers. Disposable diapers were available in 1949 but they were bulky and used mostly during travel. Disposable diapers have certainly improved since 1949 and many people use them. However, do we want to trade convenience for landfills brimming with diapers that don't decompose? It's past time to return to cloth diapers.

I will be the first to admit that I haven't paid much attention to cloth diapers. I have designed special occasion dresses for several years. When I think of cloth diapers, I think of diaper flannel. It's soft and absorbent. But there are many more choices today, not only in fabric but print and design. Suzanne from The Good Mama gave me a rundown of fabrics used in her diapers. Bamboo velour and organic cottons are both renewable resources, and soft, comfortable fabrics. The prints are adorable too.

In 1949 the typical diaper was a large rectangle of flannel fabric that was folded a certain way and pinned on with diaper pins. The diaper was then covered with rubber pants, wool soakers, or water-repellent batiste pants. The authors encouraged limited use of diaper covers because they did not breathe, especially the rubber pants. Wool soakers were preferred because they kept the baby dry and breathed. The wool soakers were made from a knit fabric.

The cloth diapers of today are engineered much better. They have closures like snaps and velcro - no need for diaper pins. They are absorbent and rarely leak, so no need for plastic diaper covers. They are constructed to withstand lots of washing. The fabrics are soft and more durable. The price may be a little higher, initially, than disposables but they will last a long time.

The rest of the chapter discusses all the rest of layette essentials, which is pretty common knowledge.

May 18, 2007

Clothing for Children: Chapter 3, part 2

The next section discusses safety. Imagine my surprise by the following statement:

A drawstring should not be used in the neck of a baby's garment. Such a string is dangerous, for it may get pulled too tight about the baby's neck and strangle him. Long ribbons, sometimes used as trimming on babies' clothing, are undesirable for the same reason.

This statement came from a publication published about 1949. The only difference between then and now is that the Consumer Product Safety Commission has issued guidelines (links to a PDF) for children's outerwear (2T-16). Drawstrings are not permitted in clothing for this age group. While the agency does not include infants, it is almost a given that the same guidelines would apply. The drawstring issue is a continual battle. The CPSC issued a recall notice as recently as April 2007. So please be careful.

The chapter also mentions oft over-looked safety issues such as snaps and buttons. Snaps or buttons which easily pull off are considered choking hazards and the CPSC will issue recalls for items that fail. Buttons can break during laundering. If the wrong type of snap is used or the snaps are improperly applied, they can fall apart or pull out of the fabric. So test, test, test.

Finally, the chapter mentions the use of safety pins. In the past, safety pins have been used with cloth diapers. But any trimming attached with a safety pin is a big no-no. They are not only a potential choking hazard, but also a poking hazard. And yes, I have seen manufacturers try to use regular safety pins to attach trims. This is a picture of an acceptable pin back which may be used to attach removable trims such as silk flowers:


This pin back is nickel and has a safety latch. The sharp point is covered. It can either be hot-glued or stitched securely to an item.