November 01, 2007

A Problem With Cap Sleeves

Over the last couple of months I have struggled with drafting a toddler cap sleeve. For whatever reason, my infant cap sleeve came off without a hitch. I tried some quick and dirty pattern making by grading the infant sleeve up to 24M and using it as my toddler base. The shaping just didn't work and I had to actually draft a 3T sleeve. I used the opportunity to compare draft instruction between Aldrich and Armstrong and these are my results.

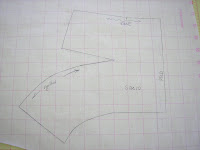
The actual draft instructions for either cap sleeve are fairly simple and easy to draft. Even so, I didn't like the shaping and resultant styles of either sleeve. I'll try to explain the differences of each. I had a stronger preference for the Armstrong version, but I still modified hers considerably.Sewing pattern of different sleeve cap shapes
The top sleeve is the Aldrich version, the bottom my modified Armstrong sleeve. The Aldrich sleeve is very straight - such a sleeve results in a large sleeve cuff opening. Her sleeve is not a fitted cap sleeve. The instructions were easy to follow, I just had a styling disagreement.

I much prefer a fitted cap sleeve. The basis of the sleeve draft must start with a regular sleeve block. Just draw in a style line similar to what you see in the photo for the shaping at the hem. There are some minor refinements detailed in the Armstrong book. The problem with the Armstrong draft is that the sleeve cap height was too high for a toddler. I decreased the cap height by about a good 1/2". Walk the sleeve cap along the armscye and adjust any length differences. Armstrong states there should be 1-1 1/2" of ease in the sleeve cap, which is simply too much. My sleeves have virtually no ease because I removed it. Sometimes the fabric calls for 1/4-1/2" of ease, but not anymore. A sewing operator will return a bundle with too much sleeve cap ease. It is just too difficult to sew in an industrial sewing. And in IMO, it doesn't do anything for fit or wearing ease. Armstrong's draft instructions are easy to follow and you can make any adjustments you prefer after you have the shape you want.

If you look closely, you will notice that my sleeves are symmetrical. This is because my bodice armhole shapes are identical for the front and back. This is typical in the industry for infant and toddler styles. In older children, this is not true and Aldrich's basic sleeve drafts illustrate the differences very well. Kathleen Fasanella has blogged much on the proper shaping of sleeve caps.

A sewn sample with two sleeve that have different sleeve cap shapesHere is a sewn sample. On the right is the Aldrich cap sleeve and my modified Armstrong sleeve is on the left. Can you see the difference in the sleeve shaping and cuff openings? The sleeve on the right is good for t-shirts and casual styles. The sleeve on the left is better for more formal, fitted styles. I have a few minor refinements to make and at least one more sew test and I will have my toddler cap sleeve done! (I am debating on adding 1/4" back to the sleeve cap height, overall I like it).

Either book will get you a basic cap sleeve. My eyes prefer the fitted style. Any questions? Anyone need draft instructions?

October 30, 2007

Stewart Girl's Dress pt. 4

This may be my last or second-to-last post on this subject. I may post some sketches of design ideas that I may want to try this design element - that is if I can work out the construction. Here are some sewn samples from my pattern that may illustrate more clearly my difficulties...

Sew testing a skirt dartIn this first picture you can see how the sample sews up. I am unsure if the dimple at the end of the dart is from my poor sewing or if the dart needs more shaping. I used a poly-cotton broadcloth. The gathers were made by pulling up the bobbin thread.


Skirt pattern piece with a dart and added fullnessHere is the pattern with the seam allowances added.


A closer look at a dart with added fullnessIt didn't occur to me until after I sewed up the sample that the skirt below the dart would now have a bias grain and the area above straight. I think a softer fabric, like a rayon, would gather up beautifully. But sewing the bias of the front skirt to the straight grain of the back skirt would cause all kinds of difficulties. I suppose some of the difficulty could be overcome by putting the entire style on the bias - which would fit the style period of the 1910's. The style requires a skilled pattern maker familiar with working on the bias.

As I said before, I would like to meet the original designer to see how she put this dress together.

October 25, 2007

Stewart Girl's Dress pt. 3

I have made some progress with the pattern. I still believe the greater challenge is coming up with a mass construction technique. No matter how I twist my brain around the style, it still requires hand manipulation of the gathers. So per Kathleen's suggestion, here is what the pattern would look like. I realized after I took the pictures that I had left off the seam allowances for the dart - must add that before sewing up the samples. This is a quick and dirty pattern, and I know it is not production ready. The style is going to work for girl sizes 8-16 and older. Younger sizes do not have (or need) darts in the skirt, although they can be added for a style detail.

Skirt sewing pattern with dart detailsThis is a basic skirt block for a girl's size 10. A style line is drawn on the pattern where the gather detail is to be placed.


Adding fullness to a dart on a skirt patternLines are drawn from the dart point and the style line until they intersect. The skirt is slashed along those lines to the point of intersection. The dart is partially rotated closed. The original style had some fullness in the waist. The dart equivalent fullness only adds about a 1/2" to the waist front. I suspect the original style had more. The original style was probably for an older teenager rather than a young girl. Anyway, slash lines are drawn from the lower dart leg to the hip line (On a full length skirt, the slash lines would go to the hem. For ease, I am only working to the hip line).

Added fullness to a side dart on a skirtSlash the skirt along the new slash lines to the hip and spread to the desired fullness. In this case, I spread for a 2:1 gather ratio. The finished pattern would look something like the one to the left. Like I said, I forget to add seam allowances to the dart opening. If you try this yourself, don't forget to add them.

Fabric samples will have to wait until later - too many pressing projects.

October 23, 2007

Warning - Taggies Blankets have a patent


You probably have seen them. These blankets are made of two squares of fabric with ribbon loops sandwiched around the edge. I have seen them sold on Ebay, online web sites and demonstrated in blogs and mommy discussion groups. Some well intentioned new designer could find themselves in a heap of trouble if they attempt to sell a similar product.

This is the kind of patent I dislike. The product is so simple. There is nothing unique to the concept other than the brand name. It is easy to copy and reproduce. It would be easy to unintentionally copy the concept. Just attach a ribbon loop to a product, and oops - patent infringement. (This particular patent extends to related products and not just the blankets, and would, of course, have to be tested in a court of law).

This is how the designer intends to treat potential customers and fellow designers. The designer states:
In our appreciation of your notification of any product infringements that you may find, a donation of TAGGIES will be made to a charity. In addition, your first name and state of origin only will appear on our Random Acts of Kindness page as sincere recognition of your efforts.
I think there are better ways to protect your product. Try superior product quality, customer service, shopping experience. Sure, others will copy and imitate, but you can do better in all of those areas. Build loyalty on trust - not threatened action.

Patent protection is only as valuable as the intended enforcement of the patent owner. This designer is actively protecting her patent and products. (They claim copyright protection too, although that claim is rather dubious IMO). Anyway, just a warning to any other designers - stay away from the "Taggies" concept.

[This blog entry has been edited to remove some of my stronger opinions on this subject. If you would like to share your opinion, please leave it in comments.]

October 19, 2007

Stewart Girl's Dress pt. 2 : Testing the idea

As a continuation from my first entry on this topic, I made up some samples to illustrate the sewing problem. (Click on the images for a better view).

This is how the pattern might look. I suspect the slit would be similar to a dart. The top of the slit is angled upward. I left the bottom of the slit on grain, but it probably should angle down too, making it a true dart, and not a slit.


Sewing a partial seam in skirt with a gather detailThis is how the sample looks sewn. The yellow arrows indicate the direction of sewing each dart if sewn with a 4/5 spool industrial serger with a shirring arm (my sample is not, so this is an approximation). At the end of each dart is a flat spot because of the physical limitation of the foot and shirring arm getting in the way. Even with my straight stitch machine you can see similar problems. On the left, a pretty little tuck and dimple show up. On the right, the flat spot is more pronounced because the gathers can not start at the end of the dart opening. I also ended up with an open seam where I failed to catch one side. I could easily see these sewing errors occur in an industrial setting.

I suspect there may be more to the pattern than I am thinking.