I hit upon a bit of inspiration while searching the net for info on how to make a dress form. I kept running into the terms papier mache. The professional forms have a papier mache center. At Vintage Sewing (link no longer works) there is a demonstration on how to pad your own form.
Papier mache is a simple medium to work in, just messy. I bought an all vinyl doll to use as a base. It has smaller measurements than I need - which is perfect to later pad it out. I pulled the doll apart, sprayed it with oil and wrapped plastic wrap around the body. Next, layers of paper and glue. I then cut it off the body and slashed and spread it apart to get better proportions. More layers of glue and paper....
I have the body, done and I am now working on the legs. No pictures yet, but soon. Hopefully, I can start doing the padding next week!

May 18, 2006
Making a dress form pt. 2 : How to suspend it and checking measurements
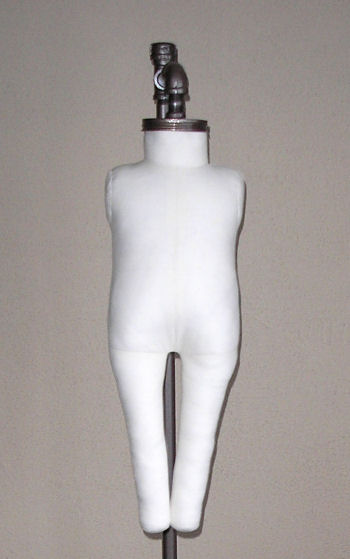
I made some more progress this week on my infant dress form (sized 3mo). I created a stand from bits and pieces from the hardware store and spray painted it to make it uniform. I love my stand! The form, on the other hand, has presented some problems - ones I am not quite sure how to work out.


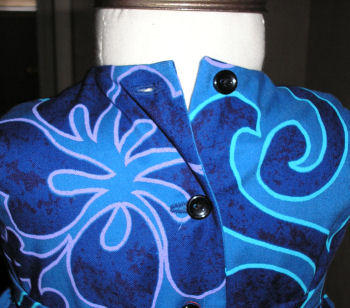
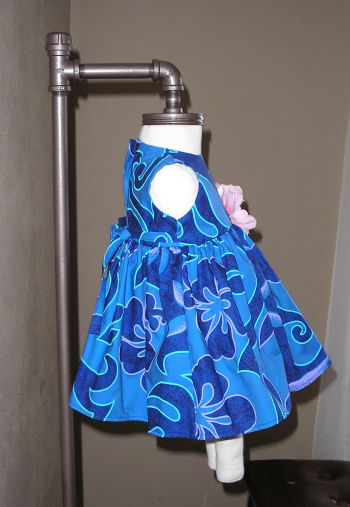
From the front, the form actually looks ok. The dress is one of my Hawaiian dresses, sized 3 mo. I know this dress fits because I have tried it on children. It may be hard to tell in these pictures, but my first problem is the neck size. I drafted my pattern from Aldrich's measurements. Her neck base is at least 1" larger in circumference than all of my other size charts. IMO, it is too big and I will be making it smaller in my next draft. The neck of my dress is on the small side, however, and I will be adjusting it in my next line, although not much. When I did my fittings, the moms actually commented on how the neck fit better than most RTW (which are usually too big!).
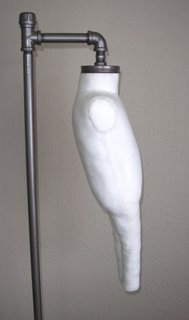

In these pictures, you can see how my form swings out from the bottom. The only adjustment I can think to make is to drop the back of the neckband at least 1/4", thus pulling the form into a straigher line. You can see how this may cause problems with checking the skirt.
You can see how large the neck size of my form is in comparison to my dress in this picture.
Another BIG problem is my measurements are all off. The girth measurements match a 12mo. The vertical trunk measurement matches a 6mo. I drafted my pattern in a 3mo with no ease. I can only assume that my measurements were thrown off from the fabric stretching while stuffing. This is probably why the professional forms use a heavy-weight linen fabric.
I think this project still has potential, but it is back to the drawing board. Plus, I need to try and find a medium/heavy-weight linen. I would appreciate any suggestions that you patternmakers may have out there?!
My other big project is designing my Fall/Holiday dresses. I am thinking about some red silk holiday dresses, just need to order some fabric and try not to fall too behind...

From the front, the form actually looks ok. The dress is one of my Hawaiian dresses, sized 3 mo. I know this dress fits because I have tried it on children. It may be hard to tell in these pictures, but my first problem is the neck size. I drafted my pattern from Aldrich's measurements. Her neck base is at least 1" larger in circumference than all of my other size charts. IMO, it is too big and I will be making it smaller in my next draft. The neck of my dress is on the small side, however, and I will be adjusting it in my next line, although not much. When I did my fittings, the moms actually commented on how the neck fit better than most RTW (which are usually too big!).

In these pictures, you can see how my form swings out from the bottom. The only adjustment I can think to make is to drop the back of the neckband at least 1/4", thus pulling the form into a straigher line. You can see how this may cause problems with checking the skirt.
You can see how large the neck size of my form is in comparison to my dress in this picture.

Another BIG problem is my measurements are all off. The girth measurements match a 12mo. The vertical trunk measurement matches a 6mo. I drafted my pattern in a 3mo with no ease. I can only assume that my measurements were thrown off from the fabric stretching while stuffing. This is probably why the professional forms use a heavy-weight linen fabric.
I think this project still has potential, but it is back to the drawing board. Plus, I need to try and find a medium/heavy-weight linen. I would appreciate any suggestions that you patternmakers may have out there?!
My other big project is designing my Fall/Holiday dresses. I am thinking about some red silk holiday dresses, just need to order some fabric and try not to fall too behind...
May 10, 2006
Making a dress form pt. 1 : Start by drafting a pattern
Dress forms are expensive - at least the ones used in the industry. You can purchase retail display forms but they will not hold up in the work room. The average professional form averages $1,000. Not many of us have that much cash laying around and I certainly do not. I began to think about making my own dress form. This is an idea that I have seen floated around in vintage sewing books. One of my previous employers also did the same thing and it made me wonder if I could really do it.
Well I plunged in and drafted Aldrich's classic bodice using metric measurements without ease (size 3mo). I then drafted her sleep-suit block without ease. I had fairly good pictures of a child's full body dress form, so I used that picture to create a more anatomical form. I added shaping for a tummy and rear end. I added 1/2" seam allowances. Here are some of my pieces:
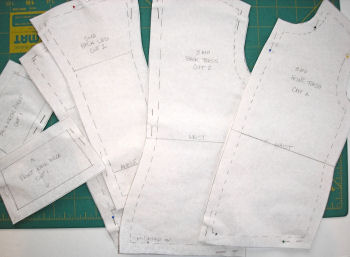
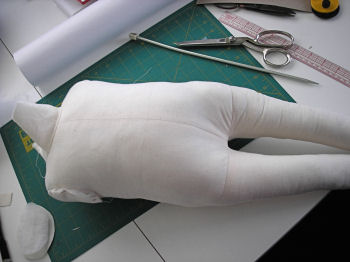
I have already sewn most of it together and stuffed it. I have already discovered some further pattern adjustments for the future. Especially the seam between the front leg and front torso. You can see the wrinkles in the picture below. I think I will angle this line more. The second thing I learned is that to get a truly smooth, surface, you need to create a cardboard body to put inside. I managed to find a piece of lightweight cardboard to put into the torso. I wrapped the cardboard in some pieces of batting and it made a huge difference. Next time, I will add some cardboard tubes to the legs and use a heavier weight of linen, like the professional forms. In this test form, I used muslin. So far, I am fairly pleased.

I have to finish sewing on the armhole pieces and finish up the neck. And then I have to figure out how to suspend this form. I will likely have to create my own stand...
Well I plunged in and drafted Aldrich's classic bodice using metric measurements without ease (size 3mo). I then drafted her sleep-suit block without ease. I had fairly good pictures of a child's full body dress form, so I used that picture to create a more anatomical form. I added shaping for a tummy and rear end. I added 1/2" seam allowances. Here are some of my pieces:

I have already sewn most of it together and stuffed it. I have already discovered some further pattern adjustments for the future. Especially the seam between the front leg and front torso. You can see the wrinkles in the picture below. I think I will angle this line more. The second thing I learned is that to get a truly smooth, surface, you need to create a cardboard body to put inside. I managed to find a piece of lightweight cardboard to put into the torso. I wrapped the cardboard in some pieces of batting and it made a huge difference. Next time, I will add some cardboard tubes to the legs and use a heavier weight of linen, like the professional forms. In this test form, I used muslin. So far, I am fairly pleased.
I have to finish sewing on the armhole pieces and finish up the neck. And then I have to figure out how to suspend this form. I will likely have to create my own stand...
Subscribe to:
Posts (Atom)