Showing posts with label Clothing for Children. Show all posts

June 28, 2007

A boy's shirt pattern fix for Butterick 6030 pt. 2

A boy's shirt pattern fix for Butterick 6030 pt.1 is here

Well I spent a few hours working on this pattern and sewed up a sample. I decided to go ahead and do a style similar to the original. My sample is a basic shirt with a convertible collar. Once the patterns are completely worked out, endless style variations can be developed. So far I have corrected:
  • Neckline smaller
  • Reduced and reshaped front self-facing
  • Reduced seam allowances. 1/4" s.a. for the neckline, 3/8" everywhere else.
  • Drafted a new collar - a one piece collar that folds in half.
I thought it might be useful for my readers to see how I construct a simple, casual shirt. This is not a finely tailored shirt, by any means - just the basics to test the pattern. These steps are production-style but allow for use of home sewing machines. At this point, I assume the pieces have been cut and markings and notches have been transferred. BTW, I reduced the number of notches and only used two drill holes (could use chalk) for the pocket placement. Also, you'll notice I did not use any interfacing. Interfacing is often eliminated in children's clothing from budget to high-end clothing. Firmly woven fabrics may not need any stiffening. During product development test and see if you really need it.

1. Prep work - edge finish the the pocket edges and long edges of facing. Fold collar in half and stitch collar ends (called "close" in the industry). Sew shoulder seams.
Edge finish a pocket before attaching to front
Sew collar ends
2. Details. Turn and press collar. Use a pocket template and press pocket. Stitch pocket hem. Topstitch pocket to left shirt front. Edgestitch collar. I think collars look best edgestitched 1/8" from edge. Further away can look homemade - but depends on style.

Edgestitch collar
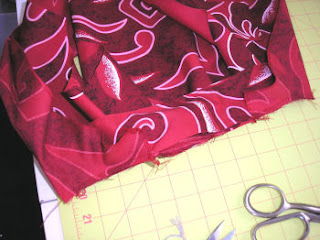
3. Attach collar. This looks more complex than it is. This fabric is hard to see but there are three notches on the collar. Two match up with the shoulder seam and one for the center back neck match-up points. Sandwich the collar between the front facing and neck (notches on shirt front indicate center front neck where collar starts and and another for the fold back of facing). Clip the top collar at the shoulder seam point a little less than the seam allowance depth 1/4". Stitch the collar on using a 1/4" seam allowance, flip the seam allowance of the top collar out of the way. Notice there is no grading and clipping (my least favorite thing to do).

Attaching the collar to the neck edge
Tomorrow I'll show how to finish the collar, attach sleeves and give a review of the results.

June 11, 2007

Simplicity 3295 and vintage pattern measurements

A reader asked a very interesting question

I have started sewing for my 20 month old son and some of his friends and was wondering if you have any experience with vintage patterns (1940's, 50's, 60's). Specifically I'm wondering if you have any thoughts on size variations. I'm sure you are familiar with the dramatic shifts in women's pattern sizes (the 1940's pattern size 12 is very different from the current pattern size 12)...I'm wondering if the same shifts occurred in children's sizes. Any thoughts you would be willing to pass on would be much appreciated!

This question was a little difficult for me to answer because I don't use home sewing patterns very often (not for children, anyway). They require too much work to correct. They have a lot of sloppy patternmaking. It is easier to pull out proven blocks and draft whatever style I want. I will buy a commercial pattern only when I have difficulty figuring out a more difficult design, such as a sleeper and then I only refer to it. I almost always draft my own patterns.

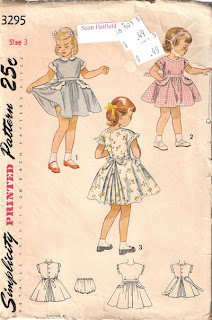
At one time, I thought a collection of vintage children's patterns would be pretty neat to have. I started collecting a while a go, but haven't added much to it. See, I don't actually look at the pattern pieces. Instead, I collect the patterns for design inspiration - in other words, I like the pretty pictures. I can draft patterns with the same style using my own personal blocks. This is one of the few vintage patterns I have from 1950.

Vintage Simplicity 3295 girls dress pattern

I liked this pattern because it has an unusual skirt, pleated fullness in back and a gathered front waist. The bodice has a built-in cap/kimono sleeve. Besides, it is cute!

Now the question of sizing differences between then and now is also a difficult to answer. I haven't really done the research to be able to supply a truly adequate answer. I checked the measurements on the back of this envelope against my collection of measurement charts and the 1950 measurements fall within an acceptable range of contemporary measurements. In fact, the body measurements for this pattern were a little larger than today's measurements. I found this surprising considering the extensive reporting about childhood obesity. Of course, this is one style, in one size, from one company. I don't know how other vintage patterns may measure up. The best thing, of course, is to measure your own child and compare the measurements with the pattern envelope charts.

One difference that may exist between vintage and contemporary patterns is the amount of ease, design and wearing. Styles from the 1960's may fit closer to the body versus styles from the 1980's. This may cause one to think the patterns from the 60's were made to fit smaller people versus larger people in the 80's. The reality is that the prevailing styles influenced fit. It is helpful to try and look at the patterns from the correct perspective. Unless you are striving for authenticity, it is worth the time to draft your own patterns.

I haven't really seen a "vanity" sizing shift in children's clothing that is comparable to women's clothing. US Children's sizes are based on age designations. If anything, the sizing has become more specific. The 1950's may have had one infant size and then start with toddler sizing as 1, 2, 3, etc. Now, infant sizing is broken down by age too -- 0-3M, for example. Measurements are derived from the average measurements of children in each age grouping. Some consumers become frustrated by this sizing system because their children may vary from the norm (not to mention every manufacturer sizes differently). They may have a 2 year old child that actually wears a 4T. Trying on multiple sizes of one style can cause frustration in a changing room, if parents even take the time to try clothes on.

European sizing is evolving to a more intelligent sizing system. The Europeans are basing their sizing on height and weight measurements, available on hang tags and labels. Body size measurements are broken down by age grouping too, but they are not given age designations. This concept enables the consumer to buy the most appropriate size regardless of the age of the child.

May 22, 2007

Clothing for Children: Chapter 3, part 3

Essentials in the Layette
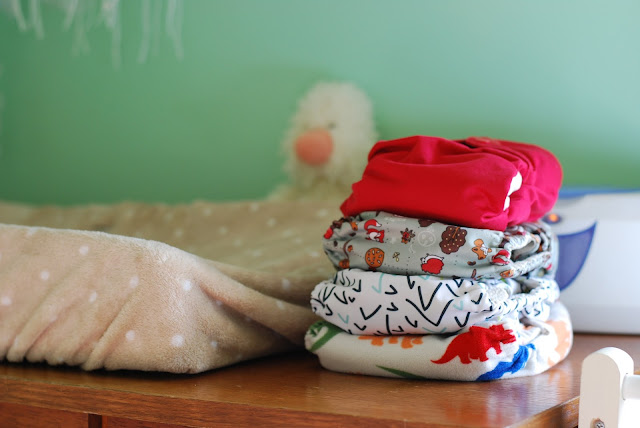
Cloth diapers

This section discusses what is needed in an infant layette. Diapers are considered one of the most important layette items to have, especially cloth diapers. Disposable diapers were available in 1949 but they were bulky and used mostly during travel. Disposable diapers have certainly improved since 1949 and many people use them. However, do we want to trade convenience for landfills brimming with diapers that don't decompose? It's past time to return to cloth diapers.

I will be the first to admit that I haven't paid much attention to cloth diapers. I have designed special occasion dresses for several years. When I think of cloth diapers, I think of diaper flannel. It's soft and absorbent. But there are many more choices today, not only in fabric but print and design. Suzanne from The Good Mama gave me a rundown of fabrics used in her diapers. Bamboo velour and organic cottons are both renewable resources, and soft, comfortable fabrics. The prints are adorable too.

In 1949 the typical diaper was a large rectangle of flannel fabric that was folded a certain way and pinned on with diaper pins. The diaper was then covered with rubber pants, wool soakers, or water-repellent batiste pants. The authors encouraged limited use of diaper covers because they did not breathe, especially the rubber pants. Wool soakers were preferred because they kept the baby dry and breathed. The wool soakers were made from a knit fabric.

The cloth diapers of today are engineered much better. They have closures like snaps and velcro - no need for diaper pins. They are absorbent and rarely leak, so no need for plastic diaper covers. They are constructed to withstand lots of washing. The fabrics are soft and more durable. The price may be a little higher, initially, than disposables but they will last a long time.

The rest of the chapter discusses all the rest of layette essentials, which is pretty common knowledge.

May 18, 2007

Clothing for Children: Chapter 3, part 2

The next section discusses safety. Imagine my surprise by the following statement:

A drawstring should not be used in the neck of a baby's garment. Such a string is dangerous, for it may get pulled too tight about the baby's neck and strangle him. Long ribbons, sometimes used as trimming on babies' clothing, are undesirable for the same reason.

This statement came from a publication published about 1949. The only difference between then and now is that the Consumer Product Safety Commission has issued guidelines (links to a PDF) for children's outerwear (2T-16). Drawstrings are not permitted in clothing for this age group. While the agency does not include infants, it is almost a given that the same guidelines would apply. The drawstring issue is a continual battle. The CPSC issued a recall notice as recently as April 2007. So please be careful.

The chapter also mentions oft over-looked safety issues such as snaps and buttons. Snaps or buttons which easily pull off are considered choking hazards and the CPSC will issue recalls for items that fail. Buttons can break during laundering. If the wrong type of snap is used or the snaps are improperly applied, they can fall apart or pull out of the fabric. So test, test, test.

Finally, the chapter mentions the use of safety pins. In the past, safety pins have been used with cloth diapers. But any trimming attached with a safety pin is a big no-no. They are not only a potential choking hazard, but also a poking hazard. And yes, I have seen manufacturers try to use regular safety pins to attach trims. This is a picture of an acceptable pin back which may be used to attach removable trims such as silk flowers:


This pin back is nickel and has a safety latch. The sharp point is covered. It can either be hot-glued or stitched securely to an item.

May 17, 2007

A Word on Handford and Children's Sizes


I have previously blogged about Jack Handford's book Professional Pattern Grading (I like this grading book!). I just graded my basic infant bodices using Handford's grading charts and I just wanted to pass on a few insights.

If you read my blog on children's sizing (Too Many Sizes!), then you will know that there is a lot of variety in how manufacturer's lay out their size ranges. Handford is not really any different. His sizing breaks down like this:

3M, 6M, 12M, 18M, 24M, 36M

You will notice that the 9M size is missing. A 9M is considered a half size between 6M and 12M. Some manufacturers include it and others skip it. After studying dozens of measurement charts, I tend to favor skipping it. Children grow really fast in the first few months of life, so there is no need to include lots of possible sizes.

Another thing to consider is his 24m and 36M sizes. His toddler sizes break down like this:

1, 2, 3, 4

Except for boutique/specialty shop stores, you don't really see toddler sizes denoted like this. Normally, the toddler range is 2T, 3T, and 4T (some throw in a 5T). Anyway, there may be some overlap between the infant and toddler sizes with your patterns. This doesn't mean you can grade all of the infant and toddler sizes together. You will still need an infant block and a toddler block. You may have some shaping differences between the two.

It took me some time to wrap my brain around his grading instructions. I could look at the diagrams and see that this was the type of grading done in the industry. Even computer grading takes it's cues from this method. The actual grading process, however, varies from computerized grading.

I am accustomed to working with all of the pieces nested together. I can select a grading point and enter in the X,Y changes. It really is pretty simple. Handford has you grade one size at a time. After grading one size, you cut it out and use it to grade the next size. Precision is absolutely key because mistakes gradually increase with each size. I eventually got the hang of it and found it to be pretty easy. Once I had all of the sizes, I nested them on top of each other and I could see how well it worked. And it did work well.

So now I have two sets of infant bodice patterns using the Handford method and an adaptation of Aldrich's measurement charts. I am going to compare the two to see which I like better. So far, there doesn't seem to be too much disagreement between them. I am also trying to decide if I should add in a 9M. Right now, I am leaning toward Handford.

May 14, 2007

Clothing for Children: Chapter 3, part 1

A smiling baby in comfortable clothes
I am going to do a series of posts on Chapter 3 of Clothing for Children because each section deserves its own emphasis. This is perhaps the best chapter in the book. It discusses standards, layettes, diapers, various pieces of clothing, etc.

The first section of the chapter is titled Standards for Infants' Clothing, pages 103-104. Most of the information is still relevant today and designers should keep these things in mind when designing. If you have an opinion or question of how these standards apply today, please leave a comment.

1. A baby's clothes should be made of material that is soft, pliable, and absorbent. Garments worn next to the skin, especially, should not be irritating.

2. The material should be durable, easily laundered, and, whenever possible, it should not require ironing.

3. The clothing should be light in weight but sufficient to keep the body at the normal uniform temperature of 98.6 degrees. The material and garment should both be constructed to allow ventilation.

4. The design of the garments should make them easy to put on and to remove. If you plan to make the garment, the design should be one easy to make.

5. The garments should be comfortable and allow freedom of movement.

6. The clothing should be well constructed with smooth flat seams and have easy simple fastenings.

7. The design, as well as any decoration, should be simple. Trimming should not add to the bulk of the garment. Baby's clothing should be attractive, but this does not depend on elaborateness.

8. The garments should be designed to allow for growth and development of muscles.

9. The garments should be safe.
Most of the standards seem pretty straight forward and practical. You can read my blog entry on Clothing for Children, Chapter 9 for my opinions about standard #7. I am not sure how to take standard #8. Most of the designs I have seen that allow for growth (such as an extra deep hem, tucks, etc), have been ugly. Plus, by the time a child has grown, the garment is worn out. I would like to see a practical solution to allowing for growth.

From a practical stand point, #2 is true for the majority of children's clothing sales. But as your price point moves up, the more likely that your customer may be willing to buy a dry clean or hand wash item. A higher price point customer expects specialty fabrics and they are willing to buy them despite special care. Still, I think higher-end designers tend to go overboard with feather boa trimmings and sparkles. There is a happy medium somewhere.

The point of #3 is that babies need to have their temperature moderated. Not too hot or too cold. It would be easy to assume that babies need to be bundled up all of the time, but it is better to remove or add layers as needed.

Finally, the authors give some sage advice. They suggest buying minimum amounts of clothing before the baby arrives. It is hard to know the size of the baby until born, plus babies grow fast. It is wiser to invest in clothing as needed. At baby showers moms are overwhelmed by lots of clothing sized 0-3M. If you do buy clothing to give, try buying clothes sized 6-12M as that size is mostly overlooked.

May 12, 2007

Neckline Finishes Examples

A friend asked me about the typical neckline finishes on childrenswear. There is a difference in the type of finish between adult and children's clothing. Adult clothing utilizes either linings, facings, and occasionally a bias binding finish. Children's clothing eliminates most facings, unless they are top-stitched down. Facings get in the way of dressing a child and roll out frequently. Another option is to have a full, flat lining usually seen on special occasion dresses. The majority of neckline finishes on children's clothing consists of bias binding.

There are several advantages to using bias binding. It is inexpensive and relatively easy to apply - you eliminate extra pattern pieces and reduce fabric usage. A bias facing is relatively flat and smooth, which may increase comfort. A bias facing can be made of self-fabric or contrasting. It can become a design element.

Here are just a few examples:

Bias facing neckline finish on a dress This is a typical example. This button-front, velveteen dress has a bias facing made of the same fabric as the collar. Usually the facing is made of the same fabric as the collar, rather than the body of the garment. This is so the facing appears to blend with the collar and not show from the front. If there were no collar, the neckline would still be finished with a bias facing, but the color would match the dress instead.


Bias facing on a hooded jacket This is a sweatshirt style jacket. The bias facing is made of a cotton broadcloth that matches the decorative stitching. This is a good example of how the facing can be a design element. It also disguises an otherwise unsightly seam.


Bias facing on a childs top A bias facing used on a knit style top that has a back zipper opening. The end of the bias is turned under near the top of the zipper. No need for a special facing pattern to deal with the zipper.


An example of a facing on a neckline of a child's topThis is an example of a poorly executed use of a regular facing. The facing is much too narrow and floats up. The seam is bulky because of the ruffle sandwiched between the facing and the neck. This is a size 3-6M top and the facing and bulky neckline seam could be an irritant. The neckline seam should be serged together to reduce bulk and the facing should be top-stitched down. A bias facing would probably work better.

May 08, 2007

Clothing for Children - a book review


I just received a book I requested through inter-library loan called Clothing For Children by Henrietta Mary Thompson and Lucille E. Rea. I had seen used copies of this book on Amazon, but I wanted to peruse a copy before deciding to buy. The book is a college level textbook written from the perspective of Home Economists. It was published in 1949, and contains many attitudes and philosophies from the time.

There are many interesting things in the book, which I hope to share with you. One curious chapter (about 75 pages) is devoted entirely to planning the child's clothing budget. It compares what clothing to buy for each age level, gender, and income level. While the numbers are amusing, it is not really of much interest. Does it matter that an urban family with a yearly income of $500 spent $26 a year on clothing for the WHOLE family? Maybe it does. Some of the numbers are surprising, and perhaps low (comparing a Gen X'er to a Baby Boomer). It certainly demonstrates a completely different attitude toward money and a clothing budget. (BTW, I have no idea how to adjust 1949 dollars for inflation and time, so it would be difficult to have a meaningful discussion anyway). It is safe to say that the modern consumer thinks of clothing as a disposable item. How many modern parents buy clothes allowing for growth? Do we really have hand-me-downs anymore? How many of us throw away clothes with treatable stains or repairable tears? As land fills over flow and raw materials become more expensive, perhaps we need to return to this type of thinking.

Here is a breakdown of the chapters:

1. Clothing and the child - psychological theories mixed with lots of opinions.

2. Planning the child's clothing in relation to the family budget

3. The infant - Standards for infants' clothing, safety & health, and other interesting things.

4. The Creeping Age - Design ideas for toddlers

5. Clothing the preschool child (2-6 years) - interesting section on "made-overs" or using adult clothes to make new clothing for children.

6-7. Clothing for the grade school girl and boy

8. Texture and Design

9. Trimmings and decorative stitches

10. Care and storage

Appendix - Factory methods in home sewing, sewing equipment, and some shortcuts.

I will probably cover chapters 3-5 and the appendix. If there is anything else that looks interesting, or perhaps you would like to know more about, be sure to leave a comment.

May 04, 2007

The State of the Childrenswear Industry in 2007

The information for this blog entry comes from one of those fantastic business databases available from my local library. One of the biggest hurdles in my business plan was trying to describe the current state of the industry. From experience, I could say things were in decline. And really, if I included that in my business plan, it wouldn't give a financial institution much incentive to loan me money. Who would invest in a business where the entire industry is in decline? Now I can write something with a bit more substance and support that things aren't so bad (not great, but not dismal either). I am not looking to secure financing through the SBA, but some of you might and this resource is something that could help.

The database where this information is found is called the Business & Company Resource Center powered by InfoTrac (owned by Thomson-Gale). Be sure to do an industry search. In the description area enter the word children. Several descriptions should pull up for children's and women's clothing industries. I selected #2361 - Girls', Children's and Infants' Dresses, Blouses and Shirts description.

The article has too much info to repeat here. Here are some tidbits that may interest you:

As was true for much of the U.S. apparel industry, these establishments tended to be small, family-run businesses, and they faced stiff competition from low-cost imports.
As of 2005, Wal-Mart carried a 12 percent share of the apparel industry, though it aimed for 30 percent. With more than 4,000 stores offering a wide variety of apparel falling within this industry, Wal-Mart's annual clothing and footwear budget alone was $35 billion.
Also contributing to the industry's decline in the United States was the reliance of manufacturers on offshore assembly of pieces cut in the United States, which actually increased during the mid-2000s.
By using computers to track inventory and sales, as well as consumers' responses to particular items, manufacturers gained the ability to respond quickly to market demand. This allowed them to get a jump on foreign producers who were often half a world away, and minimize their vulnerability to imports.
One interesting observation comes from the first paragraph. Most apparel businesses are small, family-run businesses. This is exactly how most childrenswear companies start! It is a good place to be. Later, I may pull up information on the industry leaders: OshKosh, Carter's, and Gerber. Very interesting.

When you read things like this, it makes you wonder why anyone would enter the childrenswear business in the first place. And yet, I discover new businesses starting up all of the time (they must not have read these reports). The truth is, there is room and growth in this business, and you can do it! These types of reports look at the big guys with the big numbers. The biggest thing to remember is that you should not compete with Wal-Mart or the industry leaders on price or even look. The specialty market is always looking for something new and exciting.

Other tidbits included in the article: News (from the last few years), company profiles and industry rankings.

Source Citation: "Girls', Children's, and Infants' Dresses, Blouses, and Shirts." Encyclopedia of American Industries. Online Edition. Thomson Gale, 2006. Reproduced in Business and Company Resource Center. Farmington Hills, Mich.:Gale Group. 2007. http://galenet.galegroup.com/servlet/BCRC

April 25, 2007

Neck Opening Circumference

Please note: Body measurement charts for infants which include the neck circumference measurement are now available in my book The Essential Guide to Children's Clothing Sizes, available on Amazon.

Libetty left a comment on a recent blog entry and I think the answer deserves its own blog.

So I have a sizing question that you may be able to answer... What is the minimum neck opening circumference that a child needs to get a garment on over their head? I've always thought that it was 18". Is this correct???
Babies are very interesting. Most babies have the head circumference that they will have as adults. There is some growth that occurs between newborns and older babies as the bones in the skull begin to fuse and the head takes shape. Other factors that contribute to head size are genetics and weight. A newborn baby's head circumference may start as small as 14 inches but grow to about 20 inches by age 2. Proportionally, babies appear top heavy because the head looks too big in comparison to the rest of the body.

When designing clothing and patterns for babies, there are some other considerations. Babies do not dress themselves. This means someone else must be able to reach into a shirt, for example, and comfortably pull it over the head. With a dress, you have to reach down through the neck and pull a dress over the hips and ultimately over the shoulders. Some degree of space must be included to allow for ease in dressing (as quickly as possibly too!).

The recommended head opening for children's clothes is 20 inches for all infants and 21-22 inches for toddlers and up. This is a minimum measurement. Additional ease may be required depending on the fabric and/or style. This recommendation comes from my experience working with big box retailers - and they all seem to agree on this point. Over the years, I have seen that this is the measurement that is actually needed. BTW, this measurement refers to the extended neck measurement (see pictures below). There is no US government regulation that I know of - this is an industry standard. You can measure lots of product yourself to see most things follow this guideline.

Incorporating 20 inches into a neck circumference can be very difficult. The assumption is made that the neck circumference of the pattern must meet 20 inches. A neck circumference on a baby is 12-14 inches (measurement taken at the base of the neck). If your pattern has a neck circumference of 20", then your garment will probably fall off. The extra girth needed to meet the extended neck circumference can be added by the addition of a front or back placket, zipper, button placket, lapped shoulders, elastic, or stretchy neck ribbing. In other words, make the neck of the pattern where it should be and add extra length/girth somewhere else.

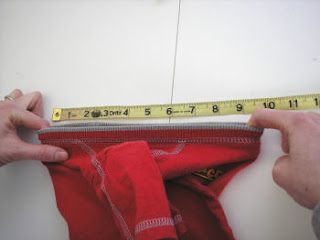
Here are few pictures of me measuring the extended neck circumference of a few different styles. Please note, I used a tape measure because it shows up better in the pictures. You should probably use a flat ruler instead. Plus, DH was taking the pictures off to the side, so it appears that I am not lining things up right, but I am. To measure the extended neck circumference, place one finger in the center front neck and another in the center back and stretch. Double the measurment from the ruler and you will have the extended neck circumference. If drafting a pattern, you can measure the pattern neck circumference plus any additional opening. It is best to double check a measurement after a garment is sewn up because things change.

Measuring a neck opening for a child's blouseThis shirt has an elastic neck. Stretch the elastic as far as it will go without damaging it. You can see this neck measures about 22" extended.


Measuring a neck opening for a child's polo shirtThis infant polo shirt has a front button placket. You can see this shirt stretches to 20".


Measuring a neck opening for a child's t-shirtThis infant t-shirt only stretches to about 18". It is a bit tight IMO. Part of the problem is the stretch of the ribbing and also how it is stitched to the neckline. The topstitching prevents stretching beyond this point and could actually break if I take it any further.


Measuring a neck opening for a girls dressTo measure the neck opening of a dress, measure from the center front neck to the bottom of the skirt placket opening. The extended neck measurement needs to be larger because the waistline needs to either slip over the head or the hips easily. This measures about 26 inches.

April 03, 2007

Designers hate care/content labels

I was shopping a week ago or so in one of my favorite discount stores, Ross Dress for Less. As I was working my way through the blouse rack, I noticed a significant problem with most of the blouses on the rack. The blouses did not have a proper notification of country of origin (I would of counted how many were not in compliance, but DH was getting bored). According to FTC recommendations, items with a neckline must have a label stating the country of origin at or near the inside center back neck. These blouses only had a small brand label. A separate care label was attached to a side seam, with country of origin disclosed there.

I have read the FTC recommendations dozens of times and I am always surprised of the amount of non-compliance that exists in the marketplace. Some companies must be ignoring (or are ignorant) of the requirement. Further, many of the items in this store are imports. This means they had to pass custom inspections. I don't get it.

I follow the rules, and yet I have seen many designers insist they don't have to place a label at the back neck. After all, it is ugly and takes away from hanger appeal. If no one else is doing it, why should they. Children's clothing poses an additional challenge - there is only so much space in the back neck.

Care and content label placementHere is a picture of an infant girl's dress. The label is correctly placed near the back neck. This placement requirement creates consistency across a broad range of products. Customers can know where to find basic product information. If I wanted to purchase Made in USA product, then it would be simple to find out.

It is only required that country of origin information be placed in a reasonable, accessible place (generally the back neck in items with a neck). Care information may be placed in a side seam, or elsewhere. Generally, children's items have the information combined on one tag. Think about your customers. Do you really want them to have to fish through an entire item of clothing to see where it was made and how it should be cleaned?

March 15, 2007

Bundiebaby - A good idea that could be great

Competing in the childrenswear fashion industry is all about finding a niche and doing it well. Jody Williams is one such individual who has a great niche, but is struggling with the execution. Jody was recently highlighted in Forbes magazine, (March 26, 2007 issue). (You have to register at Forbes online to read the article, so I am not providing the link to the article. Head to the library instead).

Jody creates clothing for children with special needs. Specifically children who need feeding tubes and ostomy bags. Her business idea developed after a rather difficult night with a special needs foster child. She sat down in front of her sewing machine to solve a problem and created a one-piece swaddling outfit with only one opening for diaper changes.

The article was not all that positive towards Jody. It reveals some interesting facts about her costs versus her retail prices. DE's need to pay attention to this kind of stuff, or it could sink a start-up. And please don't get me wrong. I WANT her to succeed. Her idea is very much needed. This is one DE that would benefit from reading Kathleen's book.

She has spent $35,000 and four years to sell only 100 units. Her wholesale cost for retailers is $22 and she retails them for about $40. She spends $10/each to manufacture. One very revealing detail is that she spends 26 cents for each label! But to be fair, many people will pay $40 for a bodysuit/onesie at a specialty boutique. I think she can overcome the sticker shock if she finds the right distribution and marketing.

She certainly needs to lower her manufacturing costs, but she has also chosen a difficult customer profile. Cash-strapped parents of special needs children have to be convinced to part with $40 for one outfit. Plus, hospitals are very difficult to work with because of fierce competition for high dollar contracts.

I hope she does well. Special needs children need her.

January 11, 2007

Recall : Drawstrings and snaps

The consumer product safety commission issued another product recall for sweatshirts sized 8-12 with drawstrings in the hoods. These sweatshirts were sold in Ross and Gordman stores. Customers who have purchased them should remove the drawstrings immediately. In all, there were 12 recalls for drawstrings in 2006.

At this point, I am just plain annoyed. The drawstring guideline (links to a pdf) has been around since 1996! We have had 11 years to learn not to put drawstrings in children's clothing. The recalls are occurring in the same types of products and even in the same stores repeatedly. I blame the designers. I blame the manufacturers. I blame the buyers. Shame on them. They should all know better.

In another recall, Samara is recalling two-piece overall sets because the snaps contain lead. The CPSC is working on creating a rule about metal jewelry for children that contain lead. The proposed rule will ban "children’s metal jewelry that has more than 0.06 percent of total lead" Once adopted this rule will certainly apply to any metal components found on clothing, including snaps and zipper pulls. There were four additional recalls for lead in December alone. The CPSC is aggressively enforcing this rule now, even though it has not been officially adopted.

Macy's is recalling outfits because of snaps that detach and pose a choking hazard. See Kai Run, of Woodinville, Wash, is recalling children's boots for the same reason.

Just as an observation, much of the above recalled product was manufacted in China. Manufactured Chinese product may be more or less safe than product made in the USA. Certainly, there are some shady manufacturers (US and Chinese) who send approval samples and test results that pass, and then turn around and use different components. Manufacturing overseas is no excuse for ignoring safety guidelines.

Let's make 2007 a safer year for children's clothing products.

Sizing Studies for Children

A few weeks ago, a new mother complained about the variation in infant clothing sizes. She explained that her 12 month daughter wore clothes ranging in size from 6m to 18m. Some marked for 12 months were either too big or too small. Finding clothes that fit was a matter of trying things on a fussy baby.

She stated, "You can't trust what the size tag says."

Kathleen at Fashion-Incubator wrote an article about problems with sizing studies, especially for women. Children's sizing studies present some of the same difficulties. Children's sizing is complicated by the fact that children grow and at different rates. Ethnicity plays a part in proportions, weight, and growth rates. As a technical designer, I feel that I am only taking my best guess when drafting patterns. I have to synthesize about a dozen different size charts and methods to come up with something that works and fits! I firmly believe that even infant children deserve clothing that fits.

My concern with most measurement charts and sizing studies are that they are minimally useful for patternmaking for infants. Many measurement size charts either completely ignore or present limited info for infant sizing. The Armstrong book starts her charts at size 2/2T (some of her measurements are a bit funky too). The Gloria Mortimer-Dunn book is the same way. Childrenswear Design, has some basic information for infant patternmaking although the information is not complete. The best presentation of measurement info is from Winifred Aldrich in her book Metric Pattern Cutting for Children's Wear and Babywear: From Birth to 14 Years .

I have drafted basic blocks using Aldrich's charts and instructions. They turned out ok, but definitely needed refinement for style and fit. I thought the basic, fitted blocks need a little more ease and a lower neck. The flat blocks needed a better armhole shaping. Despite that, with some tweaking, you could have a nice set of infant blocks to work with. Part of my difficulty could be that the British are accustomed to a closer fitting block and the metric system. I had to wrap my head around metric conversions, which probably introduced some inaccuracies.

I haven't talked much about measurement charts available from ASTM. This is because I have not purchased a set of charts from them. I don't have the need at this point. Other government studies are interesting, but don't contain enough of the measurements needed to draft basic blocks. Growth charts and retail size charts (and a few in patternmaking books), list infant sizes by pounds and lengths. Those are interesting for comparison and not useful for drafting patterns.

I am not sure what new childrenswear designers are to do. Most companies develop their own measurement charts and some are better than others. Getting those first, good bodice block patterns are critical because every future design is based off of them. It may be easier to drape your first blocks off of dress forms rather than drafting from measurements. Or maybe a combination of both. This sizing study problem could explain why infant sizing is all over the place.

Over the years, I have settled with basic patterns that have proven to work. They continue to be modified for improvement and someday they will be what I hope is a great pattern.

December 20, 2006

A boy's shirt pattern fix for Butterick 6030


About a year ago I was asked to make a a white shirt for an infant boy's christening. I didn't have the time to draft the pattern myself, so I turned to a ready-made pattern. Out of the big 4 pattern companies only one had a "traditional" woven shirt pattern. I could have saved myself a lot of stress by drafting the pattern anyway. I didn't really have time to fix the problems in the pattern either and I was disappointed by the results. Here is a picture of the pattern envelope. Maybe you can spot the problems too.

The first obvious problem is the collar and neck. The collar points splay apart too far. The collars don't meet at the center front neck and the front neck seems too low. On top of that the collar looks proportionally too large. Compare the drawings with the actual pictures. The drawings show a convertible collar with a stand in the back.

The problems become more obvious when you study the pattern pieces (sorry the pictures are fuzzy - tissue paper is hard to photograph).


1. On the front bodice piece the front neck is a V-shape and the neck is too low at center front. The front neck is just too big. To correct this problem the neck needs to be raised at center front and the front neck needs more curve.

2. Notice the large, built-in front facing. It is at least 2" wide, way too large for an infant shirt. This should have had a traditional built-in, double fold facing found in adult shirts. I will illustrate this later.

3. The collar is too wide. Of course, this piece has the obligatory 5/8" seam allowances. The collar has little shaping, except for a slight narrowing at the back neck. It is essentially a rectangle.

4. When I sewed the sleeves in the first time - there was too much ease. The shirt has dropped sleeves. There should be no ease in this style of sleeve at all. Also notice the strange jog on the right side seam. I have no idea why the sleeve turn back would be extended longer on one side than the other. I drew a red arrow down to indicate that the sleeve cap needs to be flatter.

5. The other major issue is the sizing used by the pattern company. The infant patterns are sized S-M-L-XL, divided up by height and weight. To me, those size labels are almost meaningless. I had to pull out my size charts to figure out what size matched up with the appropriate ages, heights, and weights. The sizing doesn't break-down very well because their height-weight measurements didn't match up with any of my industry charts. This is my best guess on Butterick's sizing:

Small=3-6M
Medium=6-9M
Large=12-18M
X-Large=24M

I have wanted a basic infant shirt pattern for a while, so I am going to take this pattern and fix it. The first step is to trace off the pattern pieces, minus the seam allowances. Normally, I do my pattern drafting with the seam allowances on - typical of the industry. In this case, I want to redo the seam allowances so they are appropriate for the seam. I will add 1/4" seam allowances for the neck and collars and 3/8" for everything else. The hem will have a 1/4" rolled hem - 1/2" hem allowance. I will fix the neckline and correct the sleeve. Finally, I will redraft the collar completely - the original is useless.

Once the pattern is fixed, I will re-sew it up. The hope is, it will look better and be easier to sew.

November 23, 2006

Hidden traps in manufacturing childrens clothing in China

Except for specialty boutique items, most children's clothing sold in the US is manufactured in either China, Vietnam or some other Asian country. If you are a children's clothing designer, you may be faced with competing product from these countries. Competition has become increasingly fierce as labor and raw material prices are rock bottom in China. You may be tempted to send your manufacturing to China in order to compete.

I am not against manufacturing in China. In fact, depending on your product, it may be the best option. The Chinese have become more skilled over time and can produce superior product. They can incorporate embroidery very cheaply, or produce complex pieces that many US factories balk at. If you are considering a move to China, you may want to read an article from Business Week (Nov 27, 2006), titled, Secrets, Lies, And Sweatshops and a book titled China, Inc.: How the Rise of the Next Superpower Challenges America and the World, by Ted Fishman.

Both this article and book detail the complexities of manufacturing in China. Clothing manufacturers will take advantage of you if you do not have enough money to protect your interests. They will bend over backwards to land the large volume accounts, like Wal-Mart, but not necessarily a small company. In other words, a small company can manufacture in China, but it must be done with a great deal of care and oversight. A small company can find factories willing to work with them, the difficulty is in finding an honest one. The same can be said about some of the remaining US and Mexico factories.

The greatest difficulty about manufacturing in China is quality control and worker efficiency. A Chinese factory would rather hire 5 employees for one job instead of buying a piece of equipment to perform that one operation. The owners are thinking only of short term solutions to get them through their current contract. Eventually those 5 workers will have to be replaced with a more efficient piece of equipment in order to compete effectively. I can see a time when Chinese workers will start to demand better working conditions and pay - it is only a matter of time.

Quality control is a huge issue. As I stated above, Chinese factories can produce superior product. Time constraints, the value of the contract, and the motivation of the factory all play a part. As the Business Week article suggests, inspecting the factories is the only current solution. And yet, parts of your product may be manufactured somewhere else and you will only see a part of it. If you do not have a person inspecting the product during manufacturing or prior to shipping, you may be stuck with sub-standard merchandise. Most, if not all, Chinese manufacturers require payment in full before shipping product. At least in this respect, the Chinese are different from their American counterparts.

I am not an expert in manufacturing in China. I have only experienced a small portion - creating technical specs to send to Chinese factories. And yet, this is an important trend for children's clothing designers to know about. I have seen some very good product come out of China. It can be done. Just be very careful and keep a close eye on your factory, sourcing agents, and product quality.

October 27, 2006

Creating a grading standard pt. 2

In a previous blog, I wrote about the first steps in creating a grading standard, but failed to discuss the details. It would be helpful to also review my blog entry titled Too Many Sizes! In this blog, I will try to explain grading terms and the rules by which grading can occur. In the future, I will show how to develop your actual grade rules and how I grade a pattern (which is different from any other method I have seen).

There seems to be a lot of confusion about grading. Some people view grading as a magical process that can turn your beautiful pattern in one size into any other size you desire. Before anyone can grade your pattern, you should have already done some homework. You should have chosen a category, size range, and measurement chart. Your category and size standard should be fairly simple. You should only be working in one category and your size range should not have more than 6 sizes. You may want to work in men and womens plus and regular sizes all at once, but it is just not possible.

Now, I have to stop here for a moment and explain the concept of categories. I don't know if this is the appropriate term or not. I work in a children's category, but you may work in Misses, Juniors, Mens, or whatever. Within those broad categories, there are sub-categories or classifications based on your sizing system. A classification is based on a specific figure type such as Misses, Petites, Plus, or Talls. Each of these designations have a separate and distinct sizing system. You can't magically start with a Misses size and turn it into a Plus size by grading it. That is not how grading works, so don't even attempt it. There is no magic formula.

Grading is a simple, yet difficult concept for people to grasp. Grading is a process by which a base pattern is proportionally changed to create smaller or larger sizes. Grading is always based on a set of measurements specific to a size range and classification. Successful grading does not change the overall proportions of the intended design as the size changes. This is why a size range should be limited to about 6 sizes. Any more than that and the largest or smallest size will be proportionally wrong.

Successful grading is all about having a good starting point. A base pattern is a pattern created and perfected to fit a sample size. From that base pattern, you will create the other sizes in your size range. Now some of you want to offer Plus sizes in addition to your Misses Sizes. It should be as simple as grading your base Misses patterns up to the appropriate plus size, right? After all, it would save a great deal of work. You already have a perfect pattern and why would you want to go to the work of creating a whole new set of patterns.

The reality is, you will have to create a whole new set of patterns in a new base size contained in a new size range and classification. I know this sounds like a lot of work. The truth is that it is, at least initially. You will have to develop a set of base patterns for your Misses sizes and a separate set for your Plus sizes. You may sample a new style in a Misses size initially. Once a style is approved, your patternmaker will then create patterns in any other size ranges you want to offer. The process required to create the plus size patterns will be very similar, if not identical, to the process required to draft the Misses size patterns. There may be a little tweaking for fit during sampling, but the process will be faster than the original style development. Your patternmaker will already know what should be done.

For example, one company I work for will create a new style in a size 5 (in a children's size range of 4-6x). They then decide they want to offer that style in the entire range 2T-16 and plus sizes. I have already broken up the sizes into ranges of 2T-4T, 4-6x, 7-16, and 8+ to 20+. I then make patterns in the sample sizes of 3T, 5 (which is already done), 10, and 10+. The patterns for each sample size are then graded within their range. It may sound like a lot of work, especially if done entirely by hand. Since I work in a CAD environment, I can accomplish this task in less than a day. By hand, it may take 2-3 days.

Going back to our previous example......Once your set of Misses patterns and Plus size patterns are finished, you will then send those off to be graded. And this is where you have to create your grade rules. To create grade rules, you will need your measurement charts. So here is your homework assignment. Read your measurement chart. If you are offering more than one classification, compare the two. How does a Plus size differ from a Misses? Do your measurements make sense? Do the measurements decrease for the smaller sizes and increase for the bigger? In the next blog, I will show how to create your grade rules from your measurement charts. Once you see the grade rules, you will then understand why you can't grade a Misses size into a Plus size.

October 25, 2006

Where do you get your inspiration?"

Artist inspiration

Over the last few years, I have given a few speeches to high school classes. The inevitable question you hear is, "Where do you get your inspiration?" I wish I could nail down a specific thing that inspires me, but it is not as simple as one thing. Many designers have a specific thing that motivated or inspired them to start. The more difficult thing is maintaining that inspiration.

My first job, right out of college, was with a children's design company. I will never know why they hired me - I was so green to the business. I had assumed that I would work with this company for a few years and then move onto a category that I truly wanted to design. I knew nothing about children's clothing and really didn't like it. Little did I know how important that first job would be. None of the advisors in college advise you to look for a job in the category you want right from the start. My advisors were more concerned with making sure their graduates had ANY job in the fashion industry - a topic for another blog.

Over time, I grew to like children's clothing and then to be inspired. Now, I can say I love designing children's clothing. I can't even imagine working in any other category. (In fact, it would be difficult for me to move to another category based on my skill set and experience - again another blog entry). Inspiration came to me through exposure to the category and hard work.

I have been surrounded by children's clothing and products for years now. If a new idea comes to me, I can immediately apply it to various children's products. Part of the exposure to the category came simply because of my physical work environment. Past clothing lines hung on the walls, fabric swatches hung in the design library, and more. One of my job requirements was to shop the market. Meaning, I was literally paid to shop. I went to the mall and boutiques every two weeks. I got to learn how frequently stores changed their displays, what things were selling, what was discounted, when sales occurred. I not only shopped the children's departments, but others too. Sometimes, categories that were completely unrelated. I would come home with sketches in my notebook of things I had seen or ideas to try.

Another important job requirement was to walk trade shows. It is difficult as a designer to attend retail trade shows because salesmen know why you are there (your tag usually says designer). This is probably the best way to check out the competition before their products hit the retail floors. You can spot which booths are busy and which are not. You can identify trends that are hot. Fabric trade shows is another way to pick up on color and print trends.

Eventually, you get to the point as a designer where you can predict what is coming next. It is in your blood. I can remember when a co-worker/designer and I both showed up at work wearing the exact same shade of lilac top. We had both sensed that color would be important next season and had made personal purchases accordingly.

So, my original inspiration was the need for a job - and to succeed in it. Today, it is so much a part of me, that I can't imagine doing anything else.

August 15, 2006

FAQ: Can I make a profit in the fashion business?

Calculator and Accounting

I received some great questions in my mail box the other day from a new childrenswear designer:

Is getting into children's wear a big business? I mean, can one be profitable? I see a lot of my friends who are women's wear designers just breakeven after all that hard work. I enjoy designing for kids and feel that it might be less competitive that women's wear so therefore one may be able to be a tad more profitable in this area?

Let me tackle these one at a time.

Is getting into children's wear a big business?
Yes. I won't take the time to find the numbers, but there is a lot of money to be made in children's apparel. Well known designers may start with women's wear, but they end with children's. It may seem they add a children's line as an afterthought, but that is also where the largest profit margins are. With a well established women's brand, it makes sense to extend it into children. Labor and material costs are less, but the prices can be as high as women's. Hollywood stars and well-meaning, new mothers launch their own children's line when they start a family. Then let's throw in cheap imports by the major chain stores. How is one supposed to compete with that!? If you don't fall into any of these categories, it can seem overwhelming! There is a lot of competition in children's clothing.

I mean, can one be profitable?

With all of the competition that already exists, this is a good question to ask. And it all depends on how you run your business. Any business is difficult. If you start a business, you are the one that bears the responsibility to make it successful. Often the hours you work will be longer and harder than a regular job. You will take your work home at night, lose your weekends, and may never really take a vacation. You do all of this in the hopes of making a profit (and maybe because you love it too).

The simple definition of a profit is to spend less money than you make. Even with the complexity of the fashion business, this simple definition remains true. At the end of the day (week, month), you must sit down and analyze your income vs. expenditures. If you are spending more than you make, you will not make a profit.

The real question here is "How do I make a profit?" This is a slightly more complex answer. There are a lot of variables, even in the childrenswear category. I have read business books and talked with many people in the fashion business. Here are some of the guidelines I have learned that I now use for my business:

1. Spend less than you make.

2. Avoid debt. Most small businesses will take out a small business loan or use savings to get started. Determine a plan to pay off your loans as soon as possible. A debt payment is less money earned in income.

3. Put a little into business savings and make a small charitable donation to your favorite organization (It will make you feel good, is tax deductible, and it just might help somebody). You can use your business savings for future equipment, expansion, and to cover lean times.

4. Try to deal on a cash basis as much as possible. If you are just starting out, you are not in a position to extend credit to anyone, nor to overextend your own credit situation. If you make a sale, try to get money as soon as delivery is made.

5. Plan carefully. More mistakes are made by not planning carefully. Kathleen Fasanella's book, The Entrepreneur's Guide to Sewn Product Manufacturing explains how to manufacture your designs. If you follow each step of the process outlined in her book, then you will more likely succeed.

6. Keep growth under control. You may have received a $20,000 order, but unless you can fill it, don't do it. It may seem ludicrous to turn down such a large order. But if you take the order and don't fill, you can do a lot damage and may put yourself out of business. When you are ready to start taking such large orders, have everything in place beforehand.

7. Set goals. Why are you in business? Where do you want to go? These can be large and lofty or small and mundane. One of my goals is to be able to pay my bills and earn X amount of income. Another goal of mine is to provide X number of jobs to the local economy. Try to set goals that are realistic for the short term, but keep in mind the big ones.

8. Stay focused. When starting out, it is best to focus on one category - like girl's dresses or boys outfits. Later, you can expand into related categories.

9. Ask for help (or hire it). It is easy to get overwhelmed. But believe it or not, there are many out there willing to help.

10. Enjoy what you do! If you love what you do, you are more likely to stick with it.

I see a lot of my friends who are women's wear designers just breakeven after all that hard work. I enjoy designing for kids and feel that it might be less competitive than women's wear so therefore one may be able to be a tad more profitable in this area?

The first few financial years of your business will either break even or run in the red. It is a simple fact of life. But if it has been longer than that, then I have to wonder if these designers are following any of the guidelines above. And really, it doesn't matter what you design, you must pay attention to the business end. At the end of the day, the numbers must make sense. Any category has an equal chance of success or failure. If you want to design kid's clothes, then go for it!

I hope these guidelines are helpful. They have proven to work for me. You can succeed in fashion and as Tim Gunn says, "Carry on!".
July 02, 2006

How to create a care, content and sizing tag for clothing

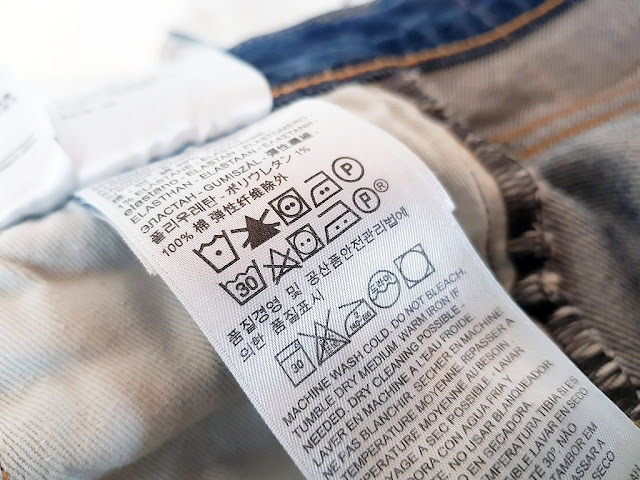
Clothing care and content label
Roland Russwurm [CC BY-SA 4.0 (https://creativecommons.org/licenses/by-sa/4.0)]*

Deciding what information to include on a hang tag or a garment's care and content tag can be frustrating. There are certain legal requirements for care and content tags of items sold in the United States and that can be found at the Federal Trade Commission website.

Let's start with the care/content tags. Let's assume that you have complied with all of the legal requirements. What else should go on your care and content tag? The answer is as little as possible. The tag has a finite amount of space, and it must be legible. But there is some critical information that will help the consumer pick just the right size.

Sizing information is one of those things that should be on the tag. For children's clothing it helps to put not only the size but also the weight. It would be nice to also include the height, but I rarely see this done in the US. I have seen the sizing information arranged different ways. For example, it could read like this: 0-3M (7-12lb).

This additional bit of information is very important to consumers. Even though we use a size system that designates an age, children come in all shapes in sizes at each stage of life. Ever hear of a newborn weighing 9lb? A newborn weighing 9lb at birth will weigh 12-15lb at about 3mo, and quickly move into 6mo clothing. Including the weight on a tag helps take out the guess work for the consumer. And don't forget every children's company breaks their sizing down differently. A 3mo outfit from one company will not be the same size as a 3mo outfit from another.

If there isn't room on a care/content tag for additional information, then it is helpful to include it on a hangtag. BabyGap has sizing information available on a card that is the size of a business card and it can be stuck in a wallet. What a great service for the customer! Not to mention, it probably helps reduce returns.

Most moms know the height and weight of their baby. They are given this information when they visit their pediatrician. The doctor will compare the baby's height and weight with a growth chart to make sure the baby is growing properly

If you have an online store, a size chart that includes basic height and weight information will greatly help your customers.

*Photo Credit