Showing posts sorted by relevance for query sizing. Sort by date Show all posts

September 02, 2022

How to find body measurement charts for children

Tape measure


This blog entry is part of a series on The Essential Guide to Children's Clothing Sizes.

There are a lot of children's body measurement charts floating around the Internet. But are they reliable? The answer to that question is difficult to determine. I have looked at some of the free charts out there and some are pretty good and others definitely have some anomalies. While I won't single out any particular chart, I would urge some caution on relying on whatever you can find freely on the Internet.

Some of the anomalies include inconsistent body measurements and differences between sizes. This may sound odd because you would expect that a size should measure what it measures. Having read a few measurement studies, the raw data that backs up body measurements are inconsistent between the sizes. But that raw data is difficult to work with, especially when it comes to grading. So statisticians and data analysts take the raw data and average it out. Then they take the average body measurements and adjust the numbers up or down small amounts to obtain numbers that are easy to work with as a convenience for pattern making and grading. This type of data manipulation does not result in fit anomalies as might be expected despite cries of vanity sizing and inaccuracies.

It's hard to say how these free charts available on the Internet came about. I suspect many of them are based off of cribbed data from various retailers. Some may be based on measuring some children. Some may be straight from official measurement studies. Regardless, caution is warranted.

You can use the free charts on the Internet, if you choose. It may be a place to start. It may also be a source of frustration if things aren't working quite right in your product development.

However, there are places to acquire body measurement charts. Some free, some not.

ASTM is an organization that develops standards, including body measurement standards. However, there standards are not free and contain restrictions on their use. This is the place for the most up-to-date measurement standards with sizing studies to back most of it up. Search for these standards on the Internet to find them.

D4910 - Size standard for infants, sizes preemie -24M

D6860 - Size standard for Boys, sizes 6-24, Husky

D6192 - Size standard for Girls, sizes 2-20, (Regular and Slim), plus sizes

D6829 - Size standard for Juniors, size 0-19

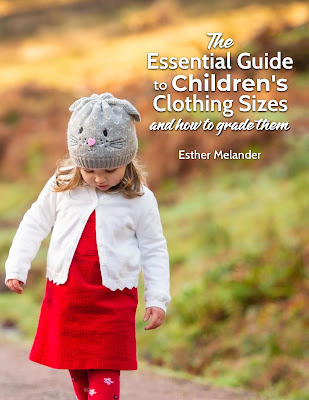
The U.S. government created a series of body measurement standards, which were in use into the 1980's. They were later withdrawn in favor of the ASTM standards. However, these charts are in the public domain and can still be found with some difficulty. In recent years the government has even pulled these from the Internet. They may still be found at government document repositories located within various libraries around the country or requested through standards.gov. I include complete copies of these standards in my book The Essential Guide to Children's Clothing Sizes. I created cleaned up versions of these standards that are easier to read in the appendix. I also include missing measurements from the original standard, which are the neck circumference, hand, and foot lengths and widths.

CS151-50 - Children

PS45-71 - Young Men

PS36-70 - Boys

PS54-72 - Girls

It is true that the withdrawn standards are a bit out of date. However, even the purchased, most up-to-date measurement charts from ASTM are based on this earlier standard. ASTM has added some sizes and refined some of the body measurements, but the similarities are still there. In other words, you can use the withdrawn standards as a good starting point in your product development and not be too far off. You will at least have a better foundation than using body measurement charts from unknown sources with questionable measurement data.

For this and more, see The Essential Guide to Children's Clothing Sizes.

May 17, 2007

A Word on Handford and Children's Sizes


I have previously blogged about Jack Handford's book Professional Pattern Grading (I like this grading book!). I just graded my basic infant bodices using Handford's grading charts and I just wanted to pass on a few insights.

If you read my blog on children's sizing (Too Many Sizes!), then you will know that there is a lot of variety in how manufacturer's lay out their size ranges. Handford is not really any different. His sizing breaks down like this:

3M, 6M, 12M, 18M, 24M, 36M

You will notice that the 9M size is missing. A 9M is considered a half size between 6M and 12M. Some manufacturers include it and others skip it. After studying dozens of measurement charts, I tend to favor skipping it. Children grow really fast in the first few months of life, so there is no need to include lots of possible sizes.

Another thing to consider is his 24m and 36M sizes. His toddler sizes break down like this:

1, 2, 3, 4

Except for boutique/specialty shop stores, you don't really see toddler sizes denoted like this. Normally, the toddler range is 2T, 3T, and 4T (some throw in a 5T). Anyway, there may be some overlap between the infant and toddler sizes with your patterns. This doesn't mean you can grade all of the infant and toddler sizes together. You will still need an infant block and a toddler block. You may have some shaping differences between the two.

It took me some time to wrap my brain around his grading instructions. I could look at the diagrams and see that this was the type of grading done in the industry. Even computer grading takes it's cues from this method. The actual grading process, however, varies from computerized grading.

I am accustomed to working with all of the pieces nested together. I can select a grading point and enter in the X,Y changes. It really is pretty simple. Handford has you grade one size at a time. After grading one size, you cut it out and use it to grade the next size. Precision is absolutely key because mistakes gradually increase with each size. I eventually got the hang of it and found it to be pretty easy. Once I had all of the sizes, I nested them on top of each other and I could see how well it worked. And it did work well.

So now I have two sets of infant bodice patterns using the Handford method and an adaptation of Aldrich's measurement charts. I am going to compare the two to see which I like better. So far, there doesn't seem to be too much disagreement between them. I am also trying to decide if I should add in a 9M. Right now, I am leaning toward Handford.

December 10, 2018

Home sewing patterns for newborns


I received this question about commercial sewing patterns:
Supposedly the XXS size on commercial patterns (McCalls, Simplicity, Butterick) is supposed to be for babies 7 lbs or less, but they swallow newborns up. If you read around the Internet, there are lots of frustrated grandmothers and mothers-to-be that want to sew for their new or expected baby, but can't find a pattern that will fit. I read that doll clothing patterns don't work because the neck is wrong for a human infant. I tried buying vintage layette patterns from Etsy and they were just as bad. I want to know how to downsize a commercial XXS dress or romper pattern so it fits a NEW 7-8 lb baby. I am sick of gowns and knit sleepers. - Pam
It has been a long time since I have sewn children's clothing from commercial sewing patterns. What I do remember is they are big. Too big. The proportions are bit off too. I don't know why either. Those companies have their own pattern blocks and I suspect they have not really updated or checked them in a long time.

Design school does not spend all that much time on children's clothing. I know there are few pattern making manuals that really get the sizing right, though sizing (exact measurements) is less of an issue than you might think. Regardless of where you start, you will have to make adjustments for fit. Only one manual even addresses infant clothing, and that book is Metric Pattern Cutting for Children's Wear and Babywear by Winifred Aldrich. I have a previous edition, but it covers most of what you might need. For Americans, the book is in metric. I didn't really have a problem drafting basic blocks using metric. You just need a metric ruler, though I did convert back and forth to see if I was on target. But even after drafting your basic blocks, you will need to make adjustments to the pattern until you get the fit you want. I have learned quite a bit by trial and error over many years.


For the home sewist, this is probably not all that practical. There is not really an easy way to size down a home sewing pattern that already has proportion issues (even Burda, which I prefer over the others). The biggest problem with some of the sewing patterns are tops are too wide, pant legs are too short just as examples. You could begin by folding out some of the width. But I can't say how much as it would probably depend on the style and desired size. In other words, no matter what, there will be a bit of back and forth. I guess my advice would be don't be afraid to experiment. Measure your baby and the sewing pattern and reduce width and length as needed. It is a bit of a challenge to measure a baby, but it really is the only way to arrive at your end goal. I wish there was some other way. Perhaps there are some indie sewing patterns for newborns? Please leave suggestions if you know of any.

July 30, 2012

A question on newborn sewing patterns

Pam had this question
Supposedly the XXS size on commercial patterns (McCalls, Simplicity, 
Butterick) is supposed to be for babies 7 lbs or less, but they swallow 
newborns up.  If you read around the Internet, there are lots of frustrated 
grandmothers and mothers-to-be that want to sew for their new or expected  baby, but can't find a pattern that will fit.  I read that doll clothing  patterns don't work because the neck is wrong for a human infant. I tried buying vintage layette patterns from Etsy and they were just as bad.  I  want to know how to downsize a commercial XXS dress or romper pattern so it fits a NEW 7-8 lb baby.
I had similar challenges sewing an infant shirt from a Butterick pattern. You are right that the sizing is just not right. You are also right that doll clothing patterns are not proportionally correct either.

There really is no easy way to fix the sizing issue. Perhaps the easiest would be to fold out some of the extra width and length to make the pattern smaller? Maybe try grading the pattern smaller -- though that won't solve the other problems that probably exist in your pattern. I can't really tell you how much to reduce the pattern because I don't know what pattern you are using. Even then, it would hard to advise you because I ended up redrafting the pattern I used above to even get it to work right.

One suggestion is to go to a thrift store and buy clothing in the size you want, take it apart and trace it off. Don't forget to add in proper seam allowances - as the existing seams have probably been trimmed off.

June 13, 2007

Resizing Vintage Patterns versus Grading

Sewing pattern and notions

The same reader from the previous post also asked:
Also, I found some info on resizing vintage patterns http://www.sensibility.com/pattern/resizepattern.htm thought it might be of interest.
I checked out the link and I do like the website. However, Jenny's pattern resizing tutorial is mis-named. She actually is describing a grading process. It is not a very precise method, but perhaps it would work for a custom or one-time project. I would still encourage my readers to learn a better method, especially for preparing patterns for production.

The idea of re-sizing patterns implies there is an inherent sizing problem which should be solved. If you buy a commercial pattern and you need a longer waist, then you would resize the pattern by slashing and spreading it longer to the required measurement. Jenny does describe such a process at the end of her tutorial.

Jenny goes one step further and shows how to alter an adult pattern into a children's pattern. The method probably will work, but it will require too much fiddling. Why not take a basic block the size you need and draft the same style?

I don't think I am being too hard on Jenny. She does have a nice website. Just realize her perspective is geared more to costumers and others who don't want to be bothered with details.

August 29, 2022

How did children's clothing sizes originate?

Children's Clothing Sizes

This blog entry is part of a series on The Essential Guide to Children's Clothing Sizes.

If you were to shop for children's clothing in any department or big box store, you will find the clothing arranged by sizes and age. Baby/Infant, Toddler, 4-6x, and 7-16 sizes are sub-categories of children's clothing sizes that have an association with the age of a child.

In the early 1900's, children's clothing sizes were even more general. There were two simple general sizes - infant and child. At that time children's clothing was still made at home. As the industrial revolution continued to gain steam, children's clothing eventually became available in retail stores. Retailers quickly realized they needed a way to market children's clothing to parents. They also wanted to provide a wider range of sizes so they could sell more product. With the influence of George F. Earnshaw and the trade organizations that existed at that time, retailers and manufacturers adopted a size system for children's clothing with size labels based on age.

Age based sizing became the de facto standard for children's clothing in the United States. It is a system that evolved almost naturally for practical reasons. It was easy to understand by everyone including manufacturers, retailers, and customers. It was a practical way to organize and market product.

This system continued without any confirmation from any sizing studies for many years. So in that vain, the U.S. Home Economics Department and the U.S. Department of Agriculture commissioned a body measurement study of children in the 1930's. The goal of the study was to understand, improve, and formalize children's clothing sizes. This study both confirmed what the industry was already doing but also suggested an entirely different size organization and labeling system. For a more complete explanation, refer to the Essential Guide to Children's Clothing Sizes.

The 1930's study was ground breaking. Nothing like it had ever been done previously, and it became the method that all future body measurement studies followed. Europe appears to have their own children's clothing sizes, but the reality is even Europe and Great Britain used the 1939 study results as the basis for their size systems. Europe and Great Britain have since switched to metric measurements and have also conducted their own body measurement studies. Regardless, there is a lot of similarity to the U.S. system.

For this and more, see The Essential Guide to Children's Clothing Sizes.

October 27, 2006

Creating a grading standard pt. 2

In a previous blog, I wrote about the first steps in creating a grading standard, but failed to discuss the details. It would be helpful to also review my blog entry titled Too Many Sizes! In this blog, I will try to explain grading terms and the rules by which grading can occur. In the future, I will show how to develop your actual grade rules and how I grade a pattern (which is different from any other method I have seen).

There seems to be a lot of confusion about grading. Some people view grading as a magical process that can turn your beautiful pattern in one size into any other size you desire. Before anyone can grade your pattern, you should have already done some homework. You should have chosen a category, size range, and measurement chart. Your category and size standard should be fairly simple. You should only be working in one category and your size range should not have more than 6 sizes. You may want to work in men and womens plus and regular sizes all at once, but it is just not possible.

Now, I have to stop here for a moment and explain the concept of categories. I don't know if this is the appropriate term or not. I work in a children's category, but you may work in Misses, Juniors, Mens, or whatever. Within those broad categories, there are sub-categories or classifications based on your sizing system. A classification is based on a specific figure type such as Misses, Petites, Plus, or Talls. Each of these designations have a separate and distinct sizing system. You can't magically start with a Misses size and turn it into a Plus size by grading it. That is not how grading works, so don't even attempt it. There is no magic formula.

Grading is a simple, yet difficult concept for people to grasp. Grading is a process by which a base pattern is proportionally changed to create smaller or larger sizes. Grading is always based on a set of measurements specific to a size range and classification. Successful grading does not change the overall proportions of the intended design as the size changes. This is why a size range should be limited to about 6 sizes. Any more than that and the largest or smallest size will be proportionally wrong.

Successful grading is all about having a good starting point. A base pattern is a pattern created and perfected to fit a sample size. From that base pattern, you will create the other sizes in your size range. Now some of you want to offer Plus sizes in addition to your Misses Sizes. It should be as simple as grading your base Misses patterns up to the appropriate plus size, right? After all, it would save a great deal of work. You already have a perfect pattern and why would you want to go to the work of creating a whole new set of patterns.

The reality is, you will have to create a whole new set of patterns in a new base size contained in a new size range and classification. I know this sounds like a lot of work. The truth is that it is, at least initially. You will have to develop a set of base patterns for your Misses sizes and a separate set for your Plus sizes. You may sample a new style in a Misses size initially. Once a style is approved, your patternmaker will then create patterns in any other size ranges you want to offer. The process required to create the plus size patterns will be very similar, if not identical, to the process required to draft the Misses size patterns. There may be a little tweaking for fit during sampling, but the process will be faster than the original style development. Your patternmaker will already know what should be done.

For example, one company I work for will create a new style in a size 5 (in a children's size range of 4-6x). They then decide they want to offer that style in the entire range 2T-16 and plus sizes. I have already broken up the sizes into ranges of 2T-4T, 4-6x, 7-16, and 8+ to 20+. I then make patterns in the sample sizes of 3T, 5 (which is already done), 10, and 10+. The patterns for each sample size are then graded within their range. It may sound like a lot of work, especially if done entirely by hand. Since I work in a CAD environment, I can accomplish this task in less than a day. By hand, it may take 2-3 days.

Going back to our previous example......Once your set of Misses patterns and Plus size patterns are finished, you will then send those off to be graded. And this is where you have to create your grade rules. To create grade rules, you will need your measurement charts. So here is your homework assignment. Read your measurement chart. If you are offering more than one classification, compare the two. How does a Plus size differ from a Misses? Do your measurements make sense? Do the measurements decrease for the smaller sizes and increase for the bigger? In the next blog, I will show how to create your grade rules from your measurement charts. Once you see the grade rules, you will then understand why you can't grade a Misses size into a Plus size.

May 26, 2015

Grading from body measurements pt. 3

This is part three of an ongoing discussion about N. A. Schofield's article Pattern Grading found in the Sizing in Clothing book. Part one is here, part two here. I recommend reading the previous parts of this series before reading this one.

So what were the results of Schofield's experiment? I can't reproduce the actual results here, but it was something like this.

Grading from raw body measurements results in pattern pieces with different shapes
Imagine the square is a bodice pattern piece in one size. The star is supposed to be the same pattern piece but graded to the next size. Clearly, the two shapes have no proportional relationship to each other. The problem is further compounded by a different grade for corresponding pieces.

Corresponding pieces do not match
Imagine these are front and back bodice pattern pieces. Each corresponding pattern piece was graded separately based on the measurement data for that body location. Now imagine trying to sew the front and back together. It can't be done. Schofield freely admits the difficulty in the results. Though she also believes we need to learn how to deal with new shapes in pattern pieces in order to achieve superior fit.

Schofield's experiment left me with a lot of questions. I did not understand completely why she rejected the ASTM measurement data, nor why she went back to essentially raw data. Her grading methodology left me a bit confused. The results were clearly not suitable for industry application. Superior fit is the holy grail of fashion, but I'm not convinced that grading is the entire source of the problem. Superior fit, for each individual might only be achieved on an individual basis. In this case, 3D body scanning and customized clothing is the answer, but is it practical?

I would like to see this experiment repeated. The factors that will impact additional experiments are the measurement data and grading methodology. Why not use ASTM measurement data? Why not use traditional grading methods? I always support those who are willing to test ideas and theories. This was a worthy attempt by Schofield to ask important why and how questions.

April 29, 2014

Grading vocabulary - Nest and stack point

As I have attempted to learn how to code (computer programming), I have been stymied by one simple problem. Vocabulary. Most programming manuals or tutorials assume the learner has some basic knowledge about programming and skip explaining essential skills or words. This is even true of the manuals designed for complete idiots and absolute beginners. One good example in the programming world is the word compiler. I understand it on a basic level as a set of instructions that tells the computer how to link various files to create the executable software program.* There are various ways to deal with compilers depending on the programming language and platform used.  I didn't know what compilers there were, which to use, how to write the instructions, etc. All I could find was some pretty lousy examples that I could copy and paste and they magically (or not) worked. I could present dozens of examples of this disconnect as I've stumbled my way through working on SodaCAD.

Grading manuals are similar, at least the ones I have used. They lack sufficient or clear explanations of the most basic of terms. Often times the manual writers skip sizing theory and jump to demonstrating their preferred grading method. This includes the much revered Jack Handford grading manual, the manual I still use and recommend today. Handford's book was the first that helped me understand grading but I recently reviewed the book and noticed the notations I made where I was confused.

One of my goals in writing my grading manual is to include a Grading 101 section. The above drawing is the illustration for two terms.

Nest - pattern pieces within a size range that are stacked along a common point or line. Indicated here by the horizontal line and star.

Stack point - the point at which pattern pieces are aligned, generally located in the middle of the piece but may be located elsewhere (indicated by the star). In CAD grading, the stack point may also be called the point of origin and can be easily moved as needed.

I'm still working on my vocabulary list and guide. If there is a term you have heard and would like explained, please leave a comment below

*I realize I probably just used some vocabulary that the readers of this blog might not know. In any event, it illustrates the problem.

November 29, 2007

Aldrich vs. Armstrong pattern drafting books


The two most useful (IMO) books for children's pattern making are by Winifred Aldrichand Helen Armstrong. There are others, but I rarely consider them because they lack essential information, and/or are outdated. Some of you may ask about Childrenswear Design by Hilda Jaffe and Rosa Rosa. IMO, Childrenswear Design offers a decent overview of the biz but lacks a lot of detail in the pattern making chapter. Both Aldrich and Armstrong are good references, though I have a stronger preference for one over the other. Tiki has left some interesting comments on another blog entry about her comparison of Aldrich vs. Armstrong. I thought it might be useful to reprint them in a separate blog entry. I'll follow up with my own opinions about the strengths and weaknesses of each book.

From Tiki:
I've been doing the same, pouring over measuring charts and re-working patterns. My 4 y.o. is my fit model, though, so I do have the luxury (ha!) of dressing her up when I need a fit, but it's by no means easier than having a dress form that won't want to dance around the room while I'm trying to check the fit.

Thank you so much for your explanation below about the flat patterns. I meant to respond earlier, but then got caught up in the holiday madness. Anyway, after much pondering conceptually over the "right" pattern method, I was encouraged by your explanation, especially that it's the fit that matters, not so much the method for getting there. I know that probably sounds simple and obvious, but since I have no formal patternmaking training, everything is a learning experience and I sometimes get stymied because I want to do everything "right." So I finally put pencil to paper to draft Aldrich's and Armstrong's patterns and compare them to mine. My patterns are a more like Aldrich's classic, although my armhole shape isn't quite as cut out (so my armhole is somewhat in between her flat and classic). I think the shoulder width on her flat block is too wide, but I guess that's part of what creates a boxier fit versus the slimmer fit of her classic block.

I did notice that Aldrich seems to modify the front armhole and lowers the front shoulder slope even in her "flat" blocks for wovens (on the infant woven on p. 25 and on the body/shirt block on p. 39), although it's not as pronounced as in her classic block (on p. 89). And when I cut out my front and back patterns for the classic block and woven flat block, the shape and contrast between the front and back of each are not that different. In other words, the difference in the armhole shape between the front of the classic and the back of the classic is very similar to the difference in the armhole shape between the front woven flat block and the back woven flat block (I laid the fronts over the backs and compared). Of course, the armhole shaping between the front classic block and the front woven flat block are significantly different, as are the back classic and back woven flat. I'm not sure exactly what that means, really, except that she seems to apply the "true" flat (meaning identical front and back except for the neckline) as you suggested to casual knit boxy styles like t-shirts (which she drafts also for older children on p. 45).

One more thing about Aldrich's book that I find confusing. I do prefer her drafting method to Armstrong's (for children, I haven't done anything with either of their adult patterns)--it seems simpler because it uses fewer complicated measurements (I suppose because she makes certain educated assumptions about the slope of the shoulder, etc rather than using actual measurements).

However, her book seems a bit schizophrenic, like several people drafted different patterns and she compiled them into one book. For example, the points (0,1,2,3, etc) are not in the same places in her various patterns--sometimes point 0 is center front and sometimes it is a point just above center front that lines up with the inner shoulder. Then her patternmaking steps are not consistent throughout. Sometimes she measures the width from this point 0 and then squares down and sometimes she measures the width from the center chest and then squares from there. Her patterns all end up with the same basic shape and I found following her drafting instructions for each pattern very straightforward. But I think comparing one pattern to another is difficult because in one pattern point 3 is at center chest and on another pattern point 7 is at center chest and point 3 is somewhere else. Maybe it's just my inexperience, but I found it more difficult when trying to compare, say, the chest width ease from one pattern to another, than if she followed the same drafting steps for each bodice.

I do love both books as they are great at explaining how/where to modify patterns for different styles. And I like having two resources to compare--they are both a wealth of knowledge.
If you draft your own versions from each method, I would be interested in hearing your comments. I agree with a lot of what Tiki has said about the ease of drafting Aldrich over Armstrong. Though I prefer Armstrong for some things. I am fairly certain that Aldrich created all of the drafts in her book. I think the points of reference are unique to each draft and can't be used for comparison between drafts. It may make things simpler if they were consistent. Also some of the differences may come down to European vs. American fit and expectations. Europeans tend to fit closer to the body - Americans have a boxier fit.

Anyway, here is a brief run down of the highlights (positive & negative) of each book:

Aldrich (third edition)
  • Backs up measurement charts with her own measurement studies
  • Simpler drafting, though some instructions may be difficult to follow
  • Includes Infant sizing and basic infant drafts
  • Draft instructions for flat and classic blocks
  • The only book that comes close to how things are done in the industry
  • The only nitpick I had was the shaping of some of her basic blocks. I agree with Tiki on the shoulder slope, shoulder width and the neckline circumference. These are easy things to adjust once you have a draft to work with. I also did not like her cap sleeve shaping - another thing that was easy to fix.
Armstrong (second edition)
  • Design variations are laid out on separate pages and not squished together like Aldrich.
  • Step by step draft instructions
  • Easy to read measurement chart, though her chart starts at size 3
  • Chapter on knitwear
  • Ignores infants
  • Sleeve drafts have too much ease

November 03, 2014

Grading rulers and how-to drawings

The set-up for grading a pattern piece
I've been hard at work on my grading book. The first half of the book explains children's sizing. The second half is a how-to manual on grading. I've been stuck on the how-to section for quite a while. I could not decide on whether I should do step-by-step photos or illustrations. I fiddled around in Inkscape and managed to pull together some pretty good how-to drawings. The drawing above is a sneak peak.

Photographs would be great but I didn't think I could pull off photographs that were good enough for print. There are some practical matters too. An eBook filled with as many photographs as I need would be enormous. Too big of a file size to process for print (fingers-crossed they turn out ok) and too big to download easily. There are photos in the book, but just a few. So yes, I am planning on an eBook version, though probably not for Kindle.

So the how-to section will be step-by-step drawings. The drawing above is the set-up for hand grading. It shows the guidelines and grading ruler placement. The shaded area represents tag board. The pattern piece is cut in tag board too, but is white for clarity.

The gridded area represents the grading ruler. My grading ruler is the rectangular gridded ruler in the middle below. I was lucky enough to find it at a thrift store stuck in the book below.

Grading ruler options

This style of hinged grading ruler is no longer available. Never fear, there are options. You can grade with any clear ruler that has 1/16" gradations like the 18 inch ruler in the picture above. You can also buy a grading ruler from Connie Crawford. The price can't be beat! I've been looking at special quilting rulers and those are tremendously over-priced in comparison.

The grading how-to section will cover hand grading in depth and a general overview of grading for CAD. CAD grading depends on the CAD software, so in depth instructions would be difficult to cover for each major system.

Because things can be lost in translation - meaning my drawings and photographs may not convey the best for everyone - there will be at least one how-to video. I'm not sure what I'm setting myself up for, but I'll give it a try.

August 31, 2022

Can children's clothing sizes be improved?

Little girl in a field

This blog is part of a series about The Essential Guide To Children's Clothing.

Any person that shops for children's clothing often becomes frustrated in their shopping experience. There appears to be a disconnect between what the retailer or brand are stating is one size and what the child actually fits. Why does this happen? Is there a better way?

It is true that age based size labels are sometimes inaccurate, or at least appear inaccurate. A child's body size and shape is influenced by a lot of different factors. Those factors include genetics, ethnicity, income demographic, diet, and nutrition. Children's clothing sizes vary because of this and other factors.

Manufacturers specialize on product type and a customer profile. This is true even in children's clothing. There is a size standard which exists for children's clothing, but manufacturers and designers will adapt or modify their product to fit their customer profile. This is not a bad thing. Children are individuals with their own unique characteristics. 

Many people complain that there needs to be a clear standard and by conforming to that standard we will solve sizing problems. Is it realistic to compel the industry to conform to a single size standard for children? By doing this, you will be guaranteed to never find clothing that fits all children at all times. There would always be a child that will not find clothing that fits if there is only one standard. Flexibility is needed in such a diverse marketplace. So while there is a general size standard that can be purchased, it may or may not be followed all that closely.

There are ways to make things easier for customers. Providing clear size charts and how to measure guides in the retail store and online can help customers select the right size. While it may be frustrating, customers have the ability to shop the market for alternate brands or sizes that fit their child. Variation is actually a good thing.

For this and more, see The Essential Guide to Children's Clothing Sizes.

April 25, 2007

Neck Opening Circumference

Please note: Body measurement charts for infants which include the neck circumference measurement are now available in my book The Essential Guide to Children's Clothing Sizes, available on Amazon.

Libetty left a comment on a recent blog entry and I think the answer deserves its own blog.

So I have a sizing question that you may be able to answer... What is the minimum neck opening circumference that a child needs to get a garment on over their head? I've always thought that it was 18". Is this correct???
Babies are very interesting. Most babies have the head circumference that they will have as adults. There is some growth that occurs between newborns and older babies as the bones in the skull begin to fuse and the head takes shape. Other factors that contribute to head size are genetics and weight. A newborn baby's head circumference may start as small as 14 inches but grow to about 20 inches by age 2. Proportionally, babies appear top heavy because the head looks too big in comparison to the rest of the body.

When designing clothing and patterns for babies, there are some other considerations. Babies do not dress themselves. This means someone else must be able to reach into a shirt, for example, and comfortably pull it over the head. With a dress, you have to reach down through the neck and pull a dress over the hips and ultimately over the shoulders. Some degree of space must be included to allow for ease in dressing (as quickly as possibly too!).

The recommended head opening for children's clothes is 20 inches for all infants and 21-22 inches for toddlers and up. This is a minimum measurement. Additional ease may be required depending on the fabric and/or style. This recommendation comes from my experience working with big box retailers - and they all seem to agree on this point. Over the years, I have seen that this is the measurement that is actually needed. BTW, this measurement refers to the extended neck measurement (see pictures below). There is no US government regulation that I know of - this is an industry standard. You can measure lots of product yourself to see most things follow this guideline.

Incorporating 20 inches into a neck circumference can be very difficult. The assumption is made that the neck circumference of the pattern must meet 20 inches. A neck circumference on a baby is 12-14 inches (measurement taken at the base of the neck). If your pattern has a neck circumference of 20", then your garment will probably fall off. The extra girth needed to meet the extended neck circumference can be added by the addition of a front or back placket, zipper, button placket, lapped shoulders, elastic, or stretchy neck ribbing. In other words, make the neck of the pattern where it should be and add extra length/girth somewhere else.

Here are few pictures of me measuring the extended neck circumference of a few different styles. Please note, I used a tape measure because it shows up better in the pictures. You should probably use a flat ruler instead. Plus, DH was taking the pictures off to the side, so it appears that I am not lining things up right, but I am. To measure the extended neck circumference, place one finger in the center front neck and another in the center back and stretch. Double the measurment from the ruler and you will have the extended neck circumference. If drafting a pattern, you can measure the pattern neck circumference plus any additional opening. It is best to double check a measurement after a garment is sewn up because things change.

Measuring a neck opening for a child's blouseThis shirt has an elastic neck. Stretch the elastic as far as it will go without damaging it. You can see this neck measures about 22" extended.


Measuring a neck opening for a child's polo shirtThis infant polo shirt has a front button placket. You can see this shirt stretches to 20".


Measuring a neck opening for a child's t-shirtThis infant t-shirt only stretches to about 18". It is a bit tight IMO. Part of the problem is the stretch of the ribbing and also how it is stitched to the neckline. The topstitching prevents stretching beyond this point and could actually break if I take it any further.


Measuring a neck opening for a girls dressTo measure the neck opening of a dress, measure from the center front neck to the bottom of the skirt placket opening. The extended neck measurement needs to be larger because the waistline needs to either slip over the head or the hips easily. This measures about 26 inches.

August 31, 2009

Comparing pattern shaping and children's sizes follow-up

Kathleen suggested that I post an update on a previous grading post I did about a year ago. You can read what I wrote previously at When Patterns Collide. In that post I suggested that it would be possible to combine the 24M and 2T and the 4T and the 4. My reasoning being that the 24M and the 2T are essentially the same sizes - why differentiate them? The subject is a little complex and perhaps controversial - at least to pattern making geeks. My goal was to reduce the work load. I was drafting and grading all of my patterns by hand. I am incredibly slow grading by hand. In addition, I was trying to solve one particular sizing problem that shows up in childrenswear, that is hard to illustrate. Since I shut down my Prairie Roses line, I am not knee deep in pattern making as I was a year ago. But perhaps it may be helpful to explain what I ended up doing.

Originally, I broke up my sizes into these ranges:

3M, 6M, 9M, 12M, 18M, 24M - sample size 12M

2T, 3T, 4T - sample size 3T

4, 5, 6, 6x - sample size 5

These ranges are rather typical of what you will find in retail stores. When developing my patterns, I have to make and grade the patterns for each size range separately. You cannot make one set of patterns in one size and grade them up and down all the way. It won't work because that many sizes will cause minute grading errors and strange fit, especially on the smallest and largest sizes. As you define your grading and size measurements, you will find that the 24M and 2T and the 4T and 4 overlap. I followed the Jack Handford grading rules, which are pretty darn good, but end up with a result like this:

Bodice pattern pieces in a size 4T and 4 and how they compare

In the picture above, the size 4 is laying on top of the size 4T. The size 4T is actually too long in length and too wide. I double checked all of my grading and there was no mistake. The size 4T was graded off my 3T and the size 4 off of the 5. The shaping of the sample size pattern pieces varied a little. The toddler was a little boxier because toddlers don't have any waist shaping, whereas a 5 year old does. If I were to leave my patterns this way, someone will eventually hang the two sizes next to each other and think there was some kind of manufacturing mistake. I needed to fix my patterns so that each size is incrementally bigger.

To do this, I rearranged my size ranges, combining some sizes:

3M, 6M, 9M, 12M, 18M - sample size 12M

24M/2T, 3T, 4T/4 - sample size 3T

5, 6, 6x - sample size 5

The next thing I did was reworked the shaping of my toddler sizes to look more like the 4-6x range. I pulled the waist in some and made the armhole smaller. I made these shaping changes because I found that my toddler patterns were just a little too big. Now, I can lay all of my bodice pattern pieces in order and they get incrementally larger from the 3M to the 6x. Your patterns may look different, but it is worth comparing the sizes on the outside edges of your ranges to make sure you don't have something weird show up like I did.

Even though I combined some sizes, I kept this behind the scenes. My customers still saw all of the sizes separated out. If someone ordered a size 24M and another ordered a 2T, the dress would be exactly the same except for the size tag. I offered all of the sizes on my website so that customers would see something familiar. Perhaps it seems a little dishonest? I don't think so because in the real world a 24M child is the same size as a 2T and I was willing to take the chance. For what its worth, no one ever complained or returned those sizes for fit issues.

Now, I don't know that what I did is "the way it should be done". In the past though, I have had people question why the 24M was larger than the 2T and I had no explanation. Once I worked through grading all of my patterns by hand, it started to click in my head. The relationship of the shape of the pattern pieces, the grade, and body measurements are all connected.

July 19, 2012

Some more grading questions

I received some more grading questions.

Grading by Pattern Shifting

I am wondering what you think of the section in Aldrich's book about grading?  It seems like a simplified method in some ways and so I am wondering if for someone simply making the patterns (instead of the clothes) might this method do just fine?

 There are different approaches to grading. Aldrich's "method" is similar to Handford, just presented in a different way. The movements of the pattern pieces is done in basically the same way as Handford. I have not graded a pattern using Aldrich's method, but I don't see that it would be a problem. Just keep in mind that her grade rules are based off her own sizing study of a British demographic. It may or may not work for your customer profile.

DIY or hire a pattern grader

Its not that I am adverse to putting in the extra time, but sometimes I wonder to myself if I am doing way more work than necessary in order to avoid "cutting corners" and making a product that in the end is below par.
I've been grading patterns for over 15 years. I'm still learning. If you want a superior product, you will have to spend the time learning how it's done and gain necessary experience. People in business either hire someone to fill a knowledge or time gap or they spend a lot of time learning in the school of hard knocks. Grading is not especially difficult, but it does take time and effort to learn it. The best way to learn is by trying and doing. I don't mean to sound harsh, but there is no magic book or trick that will help you get what you want faster.

Can I grade patterns with Adobe Illustrator?

I am not drafting/grading using a cad program but am doing all my work by hand and in Adobe Illustrator if that helps you answer my question better.
A lot of people ask me if they can use Adobe Illustrator for pattern making and grading. I suppose you could but to be honest, it's not for the faint of heart. I know there are indie pattern makers using Illustrator to do what you describe. But as a professional pattern maker and grader, Illustrator does not provide the level of accuracy and control that is needed for superior results. If given a choice, I would do all of my pattern making and grading by hand, or in other words with a pencil and paper.

Now there are pattern companies that draft their patterns either in CAD or scan in hand drafted patterns and add all the extra notations in Illustrator. The Big 4 do it that way. No problems there.

October 10, 2012

Book Reviews : Dressmaking, Collette Sewing Handbook, and Burdastyle

Our library recently acquired three new how-to-sew books. Sewing is picking up in popularity and the numbers of books coming out about sewing reflect that. I took some time to flip through them and here are my thoughts. All of these books give the impression of being exhaustive in their subject. They are also project based meaning the how to sections are emphasized by the included projects.

Dressmaking


Published by DK, Dressmaking has the fantastic photography one comes to expect from DK. The book is written by Allison Smith who previously penned The Sewing Book: An Encyclopedic Resource of Step-by-Step Techniques also put out by DK. The layout and organization of Dressmaking is above average. The how-to photography is clear and easy to understand.

The projects are in the back of the book with additional instructions to complete each project. This means the how to section is designed to support the projects. So, you will have to flip back and forth to get a complete how-to. It also means that the how-to section is not comprehensive. You will likely need a more comprehensive how-to sew book such as the Reader's Digest Guide to Sewing to supplement what is missing. What is missing is the info to complete some other project not included in the book. Much of the information can be applied to other styles. But you may want to do a project with some design feature that requires a different technique, which is not included in this book. Thus the need for some other sewing manual. For advanced sewists, this is not a big deal, but then again an advanced sewist probably wouldn't need the how-to section anyway.

The styles are pretty basic. The graded patterns are printed on grids at the back of the book. This means you would have to enlarge them yourself. Since I didn't make up any of the styles, I can't tell you how accurately the patterns are drafted. I also can't comment on fit. You will almost certainly have to spend time testing the pattern in muslin. The process would be time consuming.

The biggest problem with this book is the binding. It is a large book and while the binding is sewn, it is cheap. Many DK books of this size fall apart with semi-regular use. In the library, we have replaced one very popular DK book several times, which begins to fall apart after only two circulations.

The Collette Sewing Handbook

Written by Sarai Mitnick, the book was written to support Mitnick's indie sewing pattern company Collette Patterns. The book is spiral bound, so it will lay flat when open. The layout and photography is also pretty good.

Mitnick spends time explaining her five basic principles: a thoughtful plan, a precise pattern, a fantastic fit, a beautiful fabric, and a fine finish. I only spent a few minutes reviewing the sections on fit and sewing. The information presented is pretty basic and you will need supplemental resources if you do not have the fit issues described. The sewing information is also basic but will at least help you sew the projects in the book. The patterns are apparently drafted for a C-cup, which means that if that is not you, expect alterations. The patterns are printed on tissue and included in the back of the book. I didn't take the time to check the patterns or sew them up as the styles didn't appeal to me.

Burdastyle

This sewing manual is written by Nora Abousteit, a Hurbert Burda employee and Alison Kelly, a Project Runway alum. The book is designed to support the Burdastyle website and Burda sewing patterns. The book is spiral bound so that it will lay flat when open with the patterns included in the back.

I have an admitted preference for Burda patterns because I have used some of them from the magazine. They are usually drafted pretty well, though the instructions are very anemic, which is a challenge for beginners. This book explains how to use the Burda patterns from the magazine. It explains the pattern notations, how to trace off the patterns, and how to add seam allowances. Burda patterns are based off a European sizing system. It is important to measure yourself to find the appropriate size on the Burda size chart. Unfortunately, the how to measure instructions are pretty pathetic with simple, flat line drawings. The sewing instructions are pretty basic.

There is one thing that I really liked about this book. The book encourages the reader to experiment and redesign the styles. There are only four projects in the book, but the reader is shown several variations. There are instructions for a project with no alterations and then there are instructions for a variation. Additional variations are show in a photograph with no additional instructions in the hope the reader can figure them out on their own. The variation with instructions demonstrates how to alter the patterns to achieve the desired effect. I like how the authors encourage their readers to experiment and play because I feel that is the best way to learn. I think this may be a challenge for beginning or brand new sewists.

I think most of the projects are pretty achievable. I didn't sew any of them up because the styles didn't appeal to me. The jacket would be the most challenging project, especially the variation.

A few final thoughts

All of these books will help either a beginning or intermediate sewist with lots of hand holding for the included projects. Though, I expect there will be some frustration with the patterns and some of the instructions. Additional support material is definitely required for more complete coverage of the subject. The Reader's Digest book is still a gold standard due to it's comprehensive nature. Older how-to sewing books are also better. There really isn't anything new presented with the exception of the included patterns.

There is one popular book that I have not reviewed and that is Gertie's New Book for Better Sewing. The primary reason is that I don't have access to a copy and a full review would be unfair. But, I am admittedly biased against the book already. The content is just an updated version of previously available information. Gertie got her start by working her way through a Vogue sewing manual, and that is the primary source for her book. Some of her tutorials found on her blog have been lifted off of at least one other website. Also, from what I have heard, Gertie is the fit model for the included patterns, which are then graded up and down. If you aren't Gertie, then expect needing to make adjustments.

February 04, 2009

Who creates grade rules?

Tape measure

Some one asked me a grading question the other day. She wanted to know who creates grade rules?

A pattern maker, grader, or you could make the grade rules. If you choose to make the grade rules yourself, I have some guides available in The Organized Fashion Designer and The Simple Tech Pack. It's harder with children's clothing because there isn't as much standardization. An experienced grader should have some standard charts or be able to develop rules off of your measurement charts. I would personally start developing grade rules by referencing the Jack Handford book and make modifications as needed. I would only let a pattern maker or grader do it who has experience with it.

You can buy measurement charts from ASTM as a place to start. The ASTM measurement charts for children are probably the best resource for children's body measurements. Be cautious of using free charts found on the Internet. I have seen free measurement charts on the Internet riddled with inconsistencies that could lead to serious errors.

If you have time, you may want to sew up the smallest and largest sizes just to double check the grade and sizing. It doesn't have to be in your production fabric or anything. A fitting is the only way to know if your grade is correct. You won't need to do this on every style or very often. Kind of important when starting out though.

November 15, 2006

Creating a grading standard pt. 3

2019 notes - The original images for this blog entry have disappeared and I haven't had time to recreate them. I do have more complete examples in my ebook, The Organized Fashion Designer.  
 
I finally made my example measurement/grading charts. It took a little dancing as I had to create them in a spreadsheet, export them as a PDF and then convert them over to a jpg. Before I get too far, it may be helpful to review my previous blogs on grading: Creating a grading standard and Creating a grading standard part 2. You should have your own measurement charts handy. BTW, the measurements in my charts are real. I found them from the Sears website. I do not necessarily endorse Sears measurements as the industry standard - they were just handy (To be fair, their measurements are pretty good). Your own measurement charts should be far more complete and detailed than these for pattern development and actual grading anyway. This is the first step I take in developing actual grade rules.

Right off, I hope you notice a few important things. First, I have clearly marked my sample sizes. In this example they are sizes 10 and 10+. Each chart is labeled clearly. You would think these things should be obvious, but you would be surprised at what I have seen. Hanging off of the left side are numbers. These numbers are points of measure and should correspond to a How to Measure diagram (a future blog) and are not relevant for the immediate discussion. Also notice that my size ranges differ. The regular sizes run 7-16 and the plus sizes run 8+ to 18+. This is a fairly typical difference between the two groups. Also notice the difference in the measurements. There should be some obvious differences between a Misses and a Plus sizes chart too.

Usually, I have my grading chart separate from my measurement chart. I combined them here so you could more easily see how I am developing my grading rules. In the column for my sample sizes, I have placed a zero. A sample size is also called a base size in grading. It is your starting point and each subsequent size will grow or shrink proportionally off your base size. Next I subtract the difference between the base size and the next largest size. In the regular size chart, you will notice there is a 1.5" difference in the chest measurement from a size 10 to a size 12. This difference is called a grade step. Next I subtract the difference between a size 14 and a size 12. I don't subtract Size 14 from a size 10 because that is not the next grade step. Continue to subtract the next larger size with the previous size.

To calculate the grade for your smaller sizes, subtract your sample size from the next smaller size. Be sure to add the negative sign, which indicates the grade is getting smaller. Repeat by subtracting each size with the next smaller size. Create a grade for each measurement on your chart.

You will notice that the measurements and grades all have beautiful numbers. The measurements increase or decrease proportionally causing the grades between sizes to be relatively the same. This is where the art of grading and measurements come into play. I can guarantee that actual body measurements are not this pretty or consistent. These numbers have been averaged and rounded and are based on a large body measurement sampling. The numbers have been intentionally made easy to work with. Your measurements should be easy to work with too and you can adjust them as necessary.

What about accuracy? Rounding does introduce inaccuracies in your measurement charts, but only a little. If you look at growth charts, you will find that certain measurements will fit 50%, 80%, 95% or 97% of girls. If you adjust your numbers up or down, you will want to make sure those numbers fall into the 95% percentile. Adult measurements and sizing are similarly developed. Because these measurements are based off of measurement studies, it means a real girl will pick the size that most closely matches her measurements. Your measurement numbers just need to fall within the highest percentage category. You can round to the nearest 0.5" or 0.125", or whatever. Adjust your measurements so that you get a relatively consistent and even grade across the sizes. In my regular sizes I have a consistent 1.5" chest grade and a 2" grade for my plus sizes. Sure, you could throw in what ever grade steps you choose as long as you have justification for it.

Finally, I hope you can see the difference between the regular and plus sizes. Not only are plus size measurements larger, they are proportionally larger (the grade step is larger). This is why you absolutely cannot grade a plus size pattern from a regular sized pattern piece. Keep both categories, pattern pieces, measurements and grades separate from each other. I promise it will save your sanity.

I know this is a lot of explanation for this first step. If anyone has a question about this, just leave them in comments and I will try to answer them. In my next article in this series, I will explain how to create grade rules based off your first grading chart.

April 27, 2006

Children's Sizing and Measurement Standards Vary by Company

After studying and comparing all of my size charts collected from various sources I have come to realize the search for a good standard may be in vain. Here is just a brief example of one meausurement and how it varies among pattern drafting manuals and retailers.

Size 8 child: Major US Retailer
Bicep (inches) : 7.75
Recommended Ease : 1.5-2.0
Draft Line : 9.25-9.75

Size 8 child: Armstrong
Bicep (inches): 8.125
Recommended Ease : 2.875
Draft Line: 11

Size 8 child: Mortimer-Dunn
Bicep (inches): 8.75
Recommended Ease: 1.5-2.0
Draft Line : 10.25-10.75

Size 8 child: Dressform Co.
Bicep (inches): 7.75
Recommended Ease : 1.5-2.0
Draft Line : 9.25-9.75

As you can see there is quite a range in measurements. To fit the most average child, it is best to fall in between the range. But it still begs the question of who is correct? The Armstrong measurement is especially suspect because she recommends far too much ease in her drafting measurement.

For my new blocks, I have decided to use the Aldrich charts. She has statistical data to backup her charts. The US retailer and dressform co. charts are based off of the 1977 study and have been adjusted/updated over the years. I don't know where Armstrong and Mortimer-Dunn got their measurements, but their numbers seem odd. As far as I can tell, Aldrich is fairly close to the Major US Retailer. I am currently in the process of converting her measurements over to inches, to the nearest 1/8". This introduces an error into her measurements, but I am most comfortable using those units. Once I fine tune and tweak the numbers so they look right and are easy to work with, I will then compare my charts to those above and make sure I fall somewhere in the range. And I am still toying with the idea of working in metric anyway. I am unsure how my US customers would respond...

The next step is to draft some basic blocks and sew-up a fit sample.

My sources:
Major US Retailer - Kept confidential. Their size charts were last updated in 1981.

Patternmaking for Fashion Design by Helen Joseph Armstrong (5th edition) - her third edition has an even larger measurement for a Size 8 bicep and still too much ease. I have no idea about the fourth and fifth editions.

Pattern Design for Children's Clothes by Gloria Mortimer-Dunn - the book shows basic pattern drafting skills but her size charts are a bit odd.

Dressform Co. - kept confidential, but they have one of the better charts I have seen for infants.

Metric Pattern Cutting for Children's Wear and Babywear (4th edition) - the best book by far. I have not cited her bicep measurement because I am still studying her charts.

March 09, 2006

Hawaiian Paradise Line

About six months ago, I had worked on a design project for a friend of mine, Scott, to be placed in his store Blackpearl Designs. His store specializes in Hawaiian products such as pareos (sarongs or lava lavas, jewelry, Tahitian candles, etc.). I had fabric left over from that first project sitting in my design studio. It has been staring at me for months.

The fabric is truly special. Scott, also a graphic designer, custom designed this fabric for his pareos. The fabric is first dyed and then screen printed by hand in Indonesia. It is exclusively available from him. Scott's fabrics are the blue and gold on the left below. He also has a red and green shown further below. I bought some additional Hawaiian prints that are pretty too.

More fabrics


Nothing is more dangerous than leaving really cool fabric laying around in a design studio. It practically screams at you to do something with it. Since I design children's clothing, I didn't think the fabric would be suitable for my customers. That is until I tried it anyway. What has come out is a line of really fun girl's sundresses in 6 colors and sized 0-3M to 24M. Each colorway is limited in quantity and sizing.

Here is a sneak preview:

Completed dresses

As you can see, we are still in the middle of production and we are working as fast as possible to have them ready by April 1st. The dresses will have flower pins or headbands as accessories. You can currently buy pareos or fabric in Scott's store (hurry, they are selling fast!). These dresses would make a great mother-daughter combo for your Hawaiian vacation.

And if you can't get enough pictures, here is a sneak peak at one of our cute models wearing our red dress: