
Showing posts with label Clothing for Children. Show all posts
Showing posts with label Clothing for Children. Show all posts
July 25, 2008
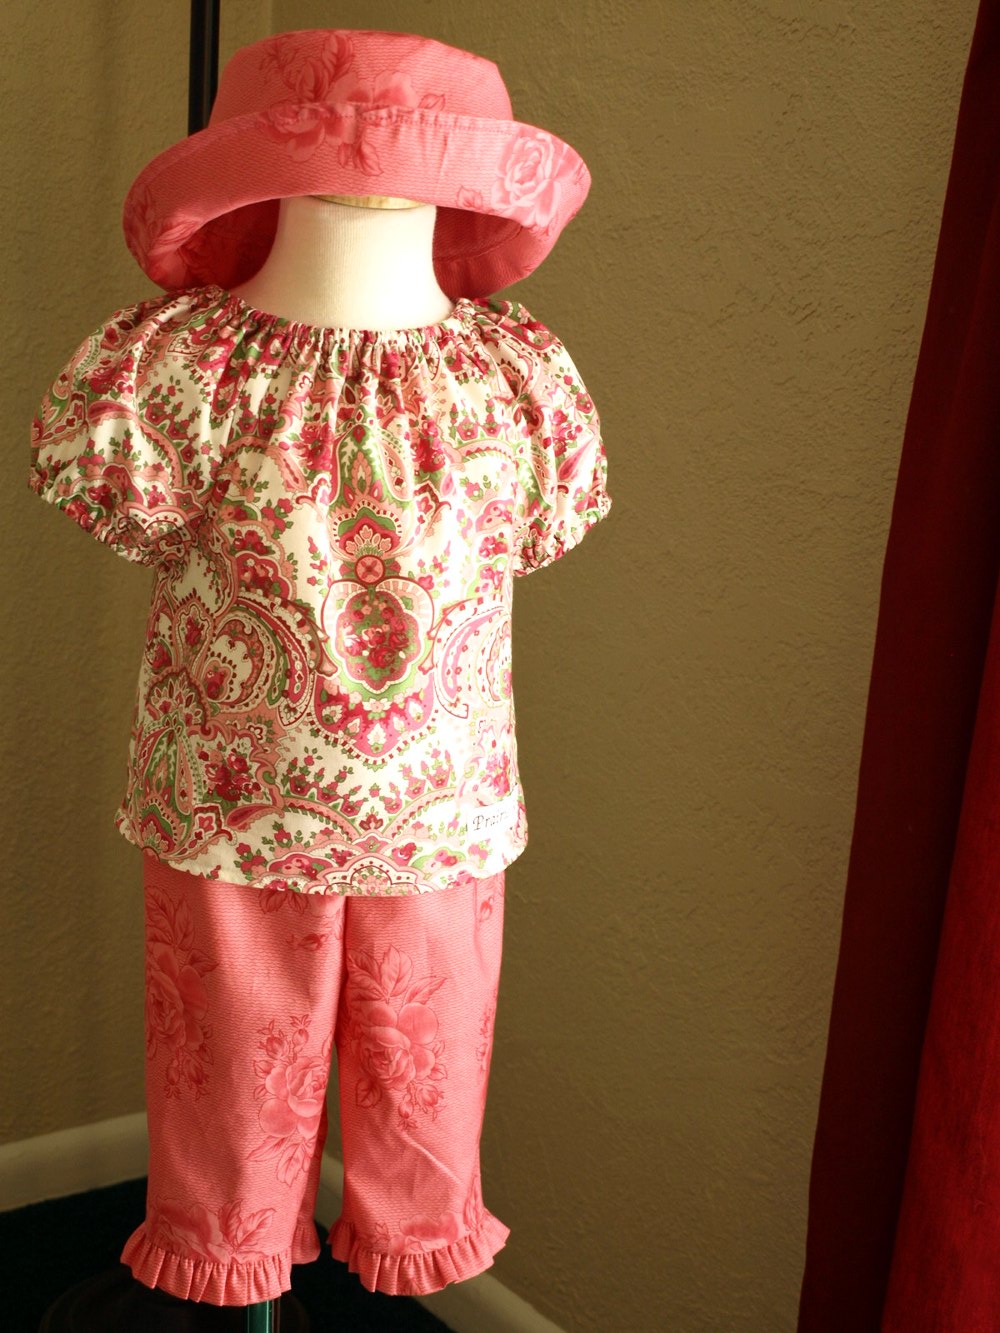
Product Review: Jacket and Pants set for a child pt. 3
Only one person ventured a guess on the size and price point of the hooded yellow jacket and pants I reviewed last week. Jennifer ventured a guess that it would be about $25-30 (AUS) and the Aussie size range of 0000 to 2.
Firstly, it's awesome that an Australian reads my blog! Very cool, this internet blogging thing. Secondly, I acquired this set from a thrift store so I don't know the exact price for which it originally sold. I think this set is private label for JcPenney, but I am not 100% sure. I used to do private label for JcPenney and some other big box stores so the brand looks very familiar.
You would have to look closely to see on the brand tag (partly smeared) was the word layette. Layette sizes normally run 3M-6M-9M or some variation of that (not sure how that translate into Aussie sizes, but probably similar). The set I showed is a size 3M.
Jennifer is probably right with the price point. JcPenney layette price points run about $15-$30 (USD), sometimes a little more. This set was made in China and there is a huge price savings because of cheap labor. A similar layette is available at JcPenney's online store for $20.
The only reason I made a big deal about the price point is because of the amount of detail included in a size 3M. What 3M old child really needs functional welt pockets on a jacket? Such detailing appeals to adults because it appears to add value. But does it really? We like to dress our babies up in clothing similar to ours with all of the same details. BabyGap sells 5 pocket denim jeans for infants too. Not really necessary and perhaps not as comfortable for a newborn, but it sells. Anyway something to think about.
BTW, it would be difficult, if not impossible, to manufacture this item in the US for this price point.
July 21, 2008
Product Review: Jacket and Pants set for a child pt. 2
Up next are the pants. I didn't take a picture of the whole pants. Oh well. Here is a closeup of the waistband. The pants have a set-on waist band with elastic only going partway around the waist. The front has a faux fly - typical of this size range. The elastic appears not to be centered correctly - I'll have to look at it again. In any event, this would be a difficult application. The elastic ends are topstitched through the front waistband. I am sure the waist was done this way so that the faux fly would lay flat.

An inside view of the faux fly. The center front seam is sewn in one operation. No separate pieces here.

Each pant leg has a patch pocket with velcro closures. Notice that each outseam is also topstitched.

Another close-up of the waist. The elastic is encased in the waist band and not stitched to the top pant edge like the corduroy pants. Because of the fly front, this is probably how the elastic waist has to be done. Still, I don't like the loose edge on the inside.

Guesses about the size can be left in comments here too. Any guesses on the retail price point?
July 17, 2008
Product Review: Jacket and Pants set for a child pt. 1
Do you like these product reviews? Maybe I should call it product analysis? I like to look at how other people are making their products. Children's products, in particular, require a little bit different construction because they are so small.
Up next is part 1 of a 2 part series on a 2 piece set consisting of a yellow jacket and casual pants. It is picture intensive and I didn't want to post it all in one super long post. I won't tell you the size yet. Maybe you can guess in comments? The fabric is what I call a "popcorn" knit. I think the correct classification is pointelle, but I am not sure. Anyway, it is a textured knit and there are some surprising details that I wouldn't expect in a bulkier knit or in this size.
First up is the jacket. Raglan sleeves, pocket with welts, lined hood, separating zipper, and a screen printed image. I wonder how the screen printed image will hold up in the wash? It is probably tricky to get it to "stick" on a textured knit. All of the sleeve seams and hems have a decorative stitch from a coverstitch machine.

Here is a close-up of the pocket. I am not entirely sure how to do this in this knit fabric and have it come out so nice. There is no interfacing or reinforcement stitching that I can see. There is the top-stitching around it though.

BTW, the pocket is functional.

The inside of the jacket with the back of the pocket. You can see the pocket extends into the hem but comes just short of where the zipper is located. You can see the zipper is covered with a facing too.

The back neck has a facing in a striped knit fabric. Look at that nice curve on the bottom edge of the facing. Hard to do in a knit. BTW, the facing is not necessary. It is purely for hanger appeal. The neck is finished with a "bias" finish out of the striped knit. The hood is nicely lined too.

The sleeves are set in flat. The sleeves would have been hemmed first, set into the body and closed under the arm. This is typical in this size range and price point.

The seam end of the underarm is tacked down with a straight stitch machine. This is also typical. It prevents the seam from opening back up during wash and wear. You can backstitch with the overlock seam and eliminate this step, but tacking the seam down provides another benefit. It reduces a point of irritation.

Next time I will show the pants. If you have a guess on the size, submit it into comments. I think I left enough clues, so it shouldn't be too hard. I welcome any other questions or comments about the review....
July 10, 2008
Product Review: Corduroy Pants for a toddler
I haven't done a product review in a long time. This is an item randomly pulled from my stash, a pair of elastic waist corduroy pants in size 18 months.
There was a time when this heavy-weight corduroy was popular. Is it still popular for boys? Even though this is a heavy weight corduroy, I don't know that this would be very durable. 18 month old kids spend a lot of time on their knees and bums crawling and scooting around. Most are probably walking, but not all the time. Anyway, you can see it has a pieced front leg with a bias piece over the knee. The waist has tunneled elastic.

Here is a close-up of the knee. Stitching this fabric can pose challenges because it is a thick fabric. BTW, the fabric is cut nap up (smooth toward the waist). Doing this gives a richer, more luxurious look, but also turns the clothing into a giant lint trap.

Here is the inside view of the front leg. One thing you could do to add extra value is to line, possibly interface, the knee piece. It would add some extra durability. But maybe people don't care about that when the pants are $5.

This last picture shows the elastic. I imagine the pattern maker and sample sewer spent a lot of time figuring out the correct cut elastic measurement. The fabric weight and tunnel stitching can cause the elastic to stretch out and not recover properly unless you compensate. The elastic is attached to the waist with an overlock stitch, turned to the inside and topstitched. I don't think there is any other way to do an elastic waist in this fabric. Too bulky otherwise.

March 27, 2008
Peasant Blouse Pattern Conquered
There are a few styles that have always perplexed me. The peasant top with an elastic neck and elastic sleeve cuff has always driven me crazy. When I relied on pattern making books to develop the pattern, I would start off with a kimono style. Bad move because it will create a neckline on the bias. On most styles, this will happen by default. But try tunneling elastic into a neckline casing that is on the bias? It doesn't happen. At least not well. Funny thing is, I have a RTW sample with tunneled elastic on a curved neckline. I am fairly certain the factory that sewed it had a set-up with a 1/4" rolled ball hemmer with an elastic feed. Anyhoo. I don't have one of those nifty set-ups.
The secret is that the neckline should be on the straight grain. I received a helpful tip from the blog Just Tutes with her peasant blouse tutorial. I didn't copy her method exactly. I had to study why it works and where her measurements came from. I drafted a peasant blouse off of my basic blocks and my measurements to get the same basic shape as hers. Amazingly, it worked well enough and I just need to grade my pattern for other sizes.
March 06, 2008
Tutorial: Reduce/Remove Sleeve Cap Ease
I have written an additional entry on sleeve cap ease. After reading this entry be sure to check out Reduce/Remove sleeve cap ease pt. 2.
Melissa wrote some comments on my blog entry A Problem with Cap Sleeves:
Just a few more words before you get to the drawings. This is just my method - Armstrong's is similar. My hope is to just illustrate the principle and not hard fast rules. You can have ease, if you choose, thus the tutorial is on how to reduce or remove the ease. You can use this same method to fix the patterns from the Big 4 - which notoriously have too much sleeve cap ease.
 Before you can remove/reduce sleeve cap ease, you need to know how much ease the sleeve already has. To do this you need to "walk" the sleeve cap along the armscye - without seam allowances. This is one of the few times I actually remove seam allowances when pattern making because they actually might get in the way. Align the center sleeve notch with the shoulder seam and walk the pattern along until you get to the underarm seam. Armstrong does this procedure just the opposite by starting at the underarm seam and moving toward the shoulder. Either way will work and her method is probably better. I usually do this in a CAD environment and my brain says start at the shoulder. It doesn't really matter so do what you think is right.
 More walking.
 Still walking. You can see at this point that my underarm notches meet up. This won't be true in the real world - this is just how my drawing ended up. When I am done altering the sleeve, I move the notches where I need them to be. Right now my goal is to get the sleeve cap and armscye to be the same distance. This is where the Armstrong method might work better for you as the underarm notches don't move.
 Finally done walking. Now measure any of the sleeve cap that is left over. This is how much ease you have on the front. Yes, sleeves have a front and a back and I only walked my sleeve along the front armscye. You will need to repeat the procedure since most of you will have assymetric sleeves. My sleeves tend to be symmetric for children so I only have to walk the pattern on one side. Make sense? Now that you know how much ease you have, you can decide how much to remove.
 This is where things can get a little fiddly... There are a few different ways to remove sleeve cap ease. I usually use a combination of these methods because I want to maintain a nice sleeve cap shape. Not too flat and not too round. My eyes have been trained to recognize a good sleeve cap shaping and it is not something I can pass along to you. You will have to experiment a little bit to see what works best. Try to keep the convex and concave curves balanced (again, how to explain that?). In this drawing I show two places to reduce ease. The first is to shorten the bicep line by moving in the underarm seam. Armstrong's extra 2 inches is too much for children. It may be too much for adults too. It all depends on your desired fit. The next place to remove ease is to lower the sleeve cap height. With my cap sleeve, I lowered the sleeve cap height at least 1/2 inch and re-drew the cap. Again it depends on your fit and the shape of your sleeve to begin with.
 Another way to reduce sleeve cap ease is to split the pattern and overlap it - similar to these drawings (remember I am only working on the front side so don't forget to do the back). Redraw the sleeve cap. This method reduces the bicep but may help preserve the cap shaping.
 As I stated before, I probably did a combination of these three methods so that I didn't do anything too drastic. It will take subtle changes to distribute the ease reductions to retain a nice sleeve cap shaping. Finally, check your notch placement on the sleeve and move it to where it should be.
Any questions?
Melissa wrote some comments on my blog entry A Problem with Cap Sleeves:
I was really excited when I found your blog on the children's sleeve draft from Armstrong's book. I have been working on a project for weeks now and I'm having a lot of trouble with the sleeve. Starting with the Basic Sleeve Draft, I found there was too much ease and took 2cm off the bicep measurement when I read that you take the ease out. But my worry is the shaping of the sleeve cap, it just doesn't look right to me. Even before I took out the ease, it looked like the under arm shaping was really short. When I compare it to bought patterns and the pictures in the book, it just looks like the notches are really low, and there is a very small amount left to go under the arms. I have tried a zillion things and it's been driving me crazy and I hope you might be able to shed some light on my sleeve shaping problem. Thanks so much!I responded:
One thing that is probably causing you trouble is the placement of your notches. The notches should match up with the notches on your bodice. They don't necessarily imply that is where you should start easing. Home sewing patterns use those notches to indicate the start and end of easing and thus some of the confusion.This is my promised tutorial. Even though I prefer the Armstrong shaping for cap sleeves, it still leaves too much ease. If you draft the sleeve exactly as outlined in her book, you will have to correct your draft by reducing or removing that ease. On page 68 (second edition) she explains that a sleeve should measure 2 inches bigger than the bicep and have an average of 1.5 inches of sleeve cap ease. On pages 69-70 she illustrates how to reduce/add ease to your sleeve. As I have stated before 1.5 inches of ease is simply too much. Some fabrics require 0.25 to 0.5 inches of ease, but not much more. Armstrong does use the notches to indicate easing. If your sleeve has no ease then the notches are just match points.
And just as an aside, There is more than one way to remove ease. You can lower the sleeve cap, fold out extra (like a tuck), or shorten the bicep at the underarm seam. I'm sure I did some combination of the above.
Just a few more words before you get to the drawings. This is just my method - Armstrong's is similar. My hope is to just illustrate the principle and not hard fast rules. You can have ease, if you choose, thus the tutorial is on how to reduce or remove the ease. You can use this same method to fix the patterns from the Big 4 - which notoriously have too much sleeve cap ease.
 Before you can remove/reduce sleeve cap ease, you need to know how much ease the sleeve already has. To do this you need to "walk" the sleeve cap along the armscye - without seam allowances. This is one of the few times I actually remove seam allowances when pattern making because they actually might get in the way. Align the center sleeve notch with the shoulder seam and walk the pattern along until you get to the underarm seam. Armstrong does this procedure just the opposite by starting at the underarm seam and moving toward the shoulder. Either way will work and her method is probably better. I usually do this in a CAD environment and my brain says start at the shoulder. It doesn't really matter so do what you think is right.
 More walking.
 Still walking. You can see at this point that my underarm notches meet up. This won't be true in the real world - this is just how my drawing ended up. When I am done altering the sleeve, I move the notches where I need them to be. Right now my goal is to get the sleeve cap and armscye to be the same distance. This is where the Armstrong method might work better for you as the underarm notches don't move.
 Finally done walking. Now measure any of the sleeve cap that is left over. This is how much ease you have on the front. Yes, sleeves have a front and a back and I only walked my sleeve along the front armscye. You will need to repeat the procedure since most of you will have assymetric sleeves. My sleeves tend to be symmetric for children so I only have to walk the pattern on one side. Make sense? Now that you know how much ease you have, you can decide how much to remove.
 This is where things can get a little fiddly... There are a few different ways to remove sleeve cap ease. I usually use a combination of these methods because I want to maintain a nice sleeve cap shape. Not too flat and not too round. My eyes have been trained to recognize a good sleeve cap shaping and it is not something I can pass along to you. You will have to experiment a little bit to see what works best. Try to keep the convex and concave curves balanced (again, how to explain that?). In this drawing I show two places to reduce ease. The first is to shorten the bicep line by moving in the underarm seam. Armstrong's extra 2 inches is too much for children. It may be too much for adults too. It all depends on your desired fit. The next place to remove ease is to lower the sleeve cap height. With my cap sleeve, I lowered the sleeve cap height at least 1/2 inch and re-drew the cap. Again it depends on your fit and the shape of your sleeve to begin with.
 Another way to reduce sleeve cap ease is to split the pattern and overlap it - similar to these drawings (remember I am only working on the front side so don't forget to do the back). Redraw the sleeve cap. This method reduces the bicep but may help preserve the cap shaping.
 As I stated before, I probably did a combination of these three methods so that I didn't do anything too drastic. It will take subtle changes to distribute the ease reductions to retain a nice sleeve cap shaping. Finally, check your notch placement on the sleeve and move it to where it should be.
Any questions?
January 21, 2008
Grading Pants Notes pt. 3
The following is my final entry on grading infant-toddler pants. Having a copy of the Jack Handford grading manual will be helpful in understanding what these notes mean, especially for this last entry. Hopefully you have at least read the introduction and the instructions for grading a bodice. If you don't have a copy of the book, save these notes anyway - they may come in handy. Part 1 contains an explanation of direction arrows, Part 2 explains notation.
My infant-toddler pants are between knee and mid-calf length. I designed them to peek out just below the skirts of my dresses without distracting from the overall look of the dress. I wanted the trim of the pants barely visible below the skirt hem. So what should be the length grade of my pants?
At the top of the page for the pant grade (i.e., pg 218), Handford states that the grade for various lengths can be determined by studying the grading chart and diagram. The grading chart contains instructions for grading ankle length pants. I don't know why, but it wasn't obvious to me what grade steps to alter. I ended up doing the ankle length grade and decided it was grading to much. Did I mention that I ended up grading my toddler pants three times? Anyway, if you want to grade shorts, or any other length, these are the steps to alter:
Move #5 and #9 (up) is the knee length grade.
Move #6 and #8 is the ankle length grade.
If you want knee length shorts, skip moves #6 & #8. If you want mid-calf length, you could try splitting the difference between the knee length and ankle length grade. Any other lengths will be some variation on the above mentioned moves. If the length is closer to the ankle, follow the ankle grade and vice versa for shorter styles. In other words, these moves are flexible and depend on the style you are grading. It also depends on the personal preference of the individual grader. I graded my pants using the knee-length grade.
One reason I had a little bit of difficulty with determining the length grade has to do with my computerized grading experience. Moves 5 & 6, for example, can be combined in one grading point. The grading of children's patterns can be simplified because the shapes and growth is simpler in some ways. Since you can select an individual grading point and put in relative changes, the moves are interpreted a little bit differently. I am a self-taught grader and it takes me a bit more effort to determine my approach.
Any other question on grading pants? I hope these notes are helpful.
January 03, 2008
Grading Pants Notes pt. 1
The following are my notes on grading infant-toddler pants. Having a copy of the Jack Handford grading manual will be helpful in understanding what these notes mean. Hopefully you have at least read the introduction and the instructions for grading a bodice. If you don't have a copy of the book, save these notes anyway - they may come in handy.
These are the first of my notes on grading pants using the Jack Handford book. Part one of these notes is an explanation about directions and movements of the pattern pieces. Later I will talk specifically about grading pants, shorts, and what I think is a mistake in the children's chapter. Handford's book is a textbook and like most design text books he starts with grading women's styles. The book progresses from woman's bodices, pants, and skirts, to men's styles, and finally to children. When design/pattern making/grading book authors finally get to the children's info, the information becomes abbreviated and incomplete (if they include it at all). Handford's book is different because he does include infant and toddler information and it is more complete than any other grading manual out there. Still, he falls into the same trap. He assumes the student has worked through all of the previous chapters before arriving at the children's chapter. He assumes you have a strong grading background and understand his method completely. But what about those who have no interest in grading woman's clothing and skip ahead to the chapters with the most relevant information? This is what I did.
Now I do have a strong grading background - computer grading. Hand and computer grading are similar and Handford's method is how it is done in the industry. The direction of the grading is done in a similar fashion. The grade rules are similar. The grade steps are the same. But physically moving a hard, paper pattern around versus selecting points and entering relative coordinates is different. Despite that, I have a general sense of how a pattern should grow or shrink between sizes - and that helped me finally understand Handford's method better.
 To start out, you will need to compare the grade instructions for women's pants to children. If you turn to page 79 (grading of women's back pant), you will notice arrows with words around each pattern piece. The arrows look like this drawing. If you flip over to the toddler pant grade (page 225), you will see arrows, but no words. It is at this point that Handford assumes you will know what direction is In, Out, Up, or Down. Now study the drawings of the women's pant and the children's pant. Do you see any other differences? There is one major difference that threw me off - I'll explain later...
 The next thing to understand are directions. All patterns will move IN, OUT, UP, or DOWN. Handford shows how this works on page 6 in relation to a bodice. The children's chapter doesn't have these extra helps. So I drew arrows like on the right and below to help remind me of grading direction. I added the words to body center or to body side to remind me of how to move the pattern IN or OUT. As you can see, IN or OUT can change depending on whether you are grading a left or right piece (applies to front or back too). Directions may change again when grading darts. Be sure to study styles with darts to see the changes. Infant-Toddler styles do not have darts, so movements will occur like these drawings. Movements UP move toward the body head and DOWN toward the feet. UP and DOWN movements are always the same.
 I hope I haven't thoroughly confused anyone yet. I felt like this brief explanation of the notation and movements was necessary before getting into more detail.
If you have questions, please leave them in comments.
December 17, 2007
Drawstrings and Child Safety
Below is an article that I wrote about Drawstrings. It appeared at Fashion-Incubator on December 17, 2007. This edition includes a picture of a bib with bias ties that was not previously included.
In 1996 the US Consumer Product Safety Commission (CPSC) created guidelines for the use of drawstrings in children's upper outerwear. The guidelines specifically target drawstrings found in the hoods and waistlines of sweatshirts. They were created after reports of several injuries and even death of children who wore such clothing that became entangled. The guideline applies to clothing sized 2T-16 and is considered voluntary.


The latest recalls are representative of the type of drawstring issues that keep showing up. The jacket has a drawstring at the waist (picture does not show it). The two pants are borderline with the ties at the waistline. They are not technically drawstrings, but they are knotted belts. The belt on the jeans appears to be stitched to the belt loops, but is being recalled because it is a related style to the other. The bright pink shirt with long pink ties are located near the neck. The hooded striped sweaters have knotted velvet ribbon ties. All of these products were found in major department and chain stores. The irony is all of these stores should know better because these guidelines have been in place for over ten years. The buyers should know. The quality auditors should know. The manufacturers should know. The technical designers should know. And yet, the problem continues to show up. As you can see, there is broad interpretation with the guideline and how it is applied. The original guideline applies to outerwear and the recalled jacket certainly fits. But what about the recalled t-shirt and pants?
The difficulty comes with understanding the difference between an industry standard, voluntary guideline, regulation, and law. For example, the lead levels in painted products began as a guideline and has now morphed into a regulation that can result in severe fines and penalties if not properly followed. The transition began with voluntary recalls by manufacturers and the CPSC. As the public became more aware of the problem and the danger explained, children's products that contain lead are now under mandatory recall. I believe the drawstring guideline is starting to go down the same path. The pattern right now is in voluntary recalls and public information. As public awareness increases, there will be public pressure to make this guideline a law or regulation. From a public or consumer point of view there is no difference between a voluntary guideline, regulation or law.What began as a voluntary guideline for drawstrings in upper outer wear for children 2T-16 has resulted in unintended consequences for related products. Any childrenswear designer has to question the use of ties for any age child in any piece of clothing. Potential sources of strangulation or entrapment are everywhere. Consider this bib:

In 1996 the US Consumer Product Safety Commission (CPSC) created guidelines for the use of drawstrings in children's upper outerwear. The guidelines specifically target drawstrings found in the hoods and waistlines of sweatshirts. They were created after reports of several injuries and even death of children who wore such clothing that became entangled. The guideline applies to clothing sized 2T-16 and is considered voluntary.
CPSC’s drawstring guidelines do not represent a standard or mandatory requirement set by the agency. And, while CPSC does not sanction them as the only method of minimizing drawstring injuries, CPSC believes that these guidelines will help prevent children from strangling by their clothing drawstrings.Even though the guideline is considered voluntary, it would be in a DE's best interest to follow them. In the first two weeks of December 2007, there have been 5 recalls of children's clothing with drawstrings!
The latest recalls are representative of the type of drawstring issues that keep showing up. The jacket has a drawstring at the waist (picture does not show it). The two pants are borderline with the ties at the waistline. They are not technically drawstrings, but they are knotted belts. The belt on the jeans appears to be stitched to the belt loops, but is being recalled because it is a related style to the other. The bright pink shirt with long pink ties are located near the neck. The hooded striped sweaters have knotted velvet ribbon ties. All of these products were found in major department and chain stores. The irony is all of these stores should know better because these guidelines have been in place for over ten years. The buyers should know. The quality auditors should know. The manufacturers should know. The technical designers should know. And yet, the problem continues to show up. As you can see, there is broad interpretation with the guideline and how it is applied. The original guideline applies to outerwear and the recalled jacket certainly fits. But what about the recalled t-shirt and pants?
The difficulty comes with understanding the difference between an industry standard, voluntary guideline, regulation, and law. For example, the lead levels in painted products began as a guideline and has now morphed into a regulation that can result in severe fines and penalties if not properly followed. The transition began with voluntary recalls by manufacturers and the CPSC. As the public became more aware of the problem and the danger explained, children's products that contain lead are now under mandatory recall. I believe the drawstring guideline is starting to go down the same path. The pattern right now is in voluntary recalls and public information. As public awareness increases, there will be public pressure to make this guideline a law or regulation. From a public or consumer point of view there is no difference between a voluntary guideline, regulation or law.What began as a voluntary guideline for drawstrings in upper outer wear for children 2T-16 has resulted in unintended consequences for related products. Any childrenswear designer has to question the use of ties for any age child in any piece of clothing. Potential sources of strangulation or entrapment are everywhere. Consider this bib:

This bib was purchased about 2 years ago from a discount retailer. Pre-guidelines, this bib would have been sold with knots on the end of the bias bindings. Now, it is sold without the knots. Yet, it becomes a strangulation issue because the ties could still become caught in a high chair. Do the guidelines cover this too? Sure there are other types of closures, but they pose potential choking hazards. Snaps, buttons, and velcro pieces can come loose if not applied properly. What to do? Feed the baby naked and hose them down afterward?
Other products that can cause concern:
I have had employers and DE's ask me (I question myself) about products on the above list. I don't have an easy answer for them. The first place I turn to is the CPSC website. There are no further guidelines other than the drawstring guideline issued in 1996. The next place to look for industry standards is ASTM. ASTM has the same drawstring standards as the CPSC, but charges you $30 for a licensed copy (read ASTM licensing requirements before purchasing anything from them. You might be surprised at the kind of restrictions you will be under). Another option (not necessarily the best) is to look and see what other companies are doing. How long are their waist ties on dresses, for example? The concern is that even major retailers have trouble following their own internal guidelines (and yes, most of them do have internal guidelines regarding drawstrings). Finally, your company can come up with your own company standard.
I would prefer a voluntary industry standard for the above listed products. I think this is something that can be done. In this endeavor, I am currently working on a letter to send to the CPSC, and possibly ASTM. I will be requesting further clarification on drawstrings and ties in children's clothing, especially for infants. The drawstring conversation is just beginning. Post any comments or questions you might have about this issue.
Other products that can cause concern:
- Bibs with ties made of bias binding, ribbon, or fabric.
- Girls dresses with waist ties made of fabric or trim. The ties may contribute to the design of the dress, but also provide a fitting mechanism.
- Dresses with detached sashes. Some sashes may measure 60-72 inches and are not permanently affixed to the garment.
- Dresses, tops, or pants with added trim that may be loose, especially ribbon dangles.
- Hats with ties made of ribbon or fabric.
- Hats with straps, either attached on both ends or attached on one end with some type of closure on the other.
I have had employers and DE's ask me (I question myself) about products on the above list. I don't have an easy answer for them. The first place I turn to is the CPSC website. There are no further guidelines other than the drawstring guideline issued in 1996. The next place to look for industry standards is ASTM. ASTM has the same drawstring standards as the CPSC, but charges you $30 for a licensed copy (read ASTM licensing requirements before purchasing anything from them. You might be surprised at the kind of restrictions you will be under). Another option (not necessarily the best) is to look and see what other companies are doing. How long are their waist ties on dresses, for example? The concern is that even major retailers have trouble following their own internal guidelines (and yes, most of them do have internal guidelines regarding drawstrings). Finally, your company can come up with your own company standard.
I would prefer a voluntary industry standard for the above listed products. I think this is something that can be done. In this endeavor, I am currently working on a letter to send to the CPSC, and possibly ASTM. I will be requesting further clarification on drawstrings and ties in children's clothing, especially for infants. The drawstring conversation is just beginning. Post any comments or questions you might have about this issue.
November 09, 2007
Standard Pattern Blocks- Flat vs. Classic
Tiki left some questions in comments and I thought I would address them in a separate blog entry.

My basic blocks are a variation of the flat method. The armholes and shoulders of the front and backs pieces are identical. The body widths match (the long vertical line indicates the center back/front). The flat fit is a little more boxy and loose. My fit is not too boxy, but it does allow for some growth. You can see the fit of this bodice on one of my dresses. The patterns are not too boxy because the side seams do taper inward and my front waist has some curve. Aldrich's patterns have a straight side seam and waistline. BTW, I am not done refining the shape of this pattern - I am considering narrowing the shoulders and reducing the armhole. You have to start somewhere with your patterns, and they will evolve as you refine your fit.
 This is a set of classic bodices sized three month. You can see the small armhole - there is little room to draw a nice curve. The back armhole is nearly a straight line. These drafts are based off of Aldrich's book. A classic block would be more appropriate for larger sizes.
 This is a corresponding sleeve with an asymmetric sleeve cap. The sleeve cap seems really high and the curves are abrupt, IMO. These blocks could certainly work, but they require more refining. I opted to modify my blocks so they were semi-fitted and flat. The curves are easier and sewing is easier.
There is a relationship with children's body shapes and the flat method. Young children are simple round cylindrical shapes until about the age of 5 and it makes sense to keep the patterns simple.
This is a topic I am still researching and trying to understand. I hate to label flat blocks as a standard because there are several possible methods that may be considered "right" or the "standard". Pattern making is considered a technical, rigid system, but don't be afraid to do things your way. I learn things from those who do not have formal training and are not afraid to do things a little different. Sure there are certain accepted standards for labeling patterns or placing notches. Acceptable shaping and fit is open to interpretation.
I am reworking some of my patterns and have both Aldrich's and Armstrong's books as well. As you mentioned, I have noticed that my own kids' clothes from various manufacturers are drafted "flat" as Aldrich describes it, with the front and back patterns basically identical except for the neckline, but was wondering if you could explain more why that is the standard.Here is a picture of what Tiki is talking about. Aldrich is the only other person I know of that addresses this topic. It is true that most childrenswear manufacturers work off of flat blocks, especially for infants. Aldrich only presents it for infant casual clothing. But I have seen variations of the idea spanning all children's sizes.

My basic blocks are a variation of the flat method. The armholes and shoulders of the front and backs pieces are identical. The body widths match (the long vertical line indicates the center back/front). The flat fit is a little more boxy and loose. My fit is not too boxy, but it does allow for some growth. You can see the fit of this bodice on one of my dresses. The patterns are not too boxy because the side seams do taper inward and my front waist has some curve. Aldrich's patterns have a straight side seam and waistline. BTW, I am not done refining the shape of this pattern - I am considering narrowing the shoulders and reducing the armhole. You have to start somewhere with your patterns, and they will evolve as you refine your fit.
I have read the discussion of armhole and sleeve shaping from Kathleen's blog and book and was wondering if the standard in the children's wear industry is due to simplicity in drafting, etc (perhaps because there is more ease built into the design of the garment itself) or if there is a specific anatomical/physical reason that makes drafting the asymmetrical sleeve/armhole unnecessary in children's wear. I guess, in other words, is that only the standard in loose children's garments or would drafting a more fitted children's garment with the same symmetrical sleeve still be correct/standard?I can't say for sure why this is the standard. It is definitely not something I learned in school, but rather on the job. Tiki's instincts are probably right. There is a simplicity in the drafting of flat pattern blocks, and it does save some time. There is a physical limitation too. The smaller the size, the less practical it becomes to draft a classic block. A flat block gives some wearing ease and allows for growth. Children, after all, grow and a little extra ease allows the clothing to be worn longer. And yes, you can draft a more fitted bodice block with symmetrical armholes/sleeves. That is what I did with my patterns because it is what looked right to me. Here are some pictures of a classic, fitted block with asymmetric armholes (click on images for a better view).
 This is a set of classic bodices sized three month. You can see the small armhole - there is little room to draw a nice curve. The back armhole is nearly a straight line. These drafts are based off of Aldrich's book. A classic block would be more appropriate for larger sizes.
 This is a corresponding sleeve with an asymmetric sleeve cap. The sleeve cap seems really high and the curves are abrupt, IMO. These blocks could certainly work, but they require more refining. I opted to modify my blocks so they were semi-fitted and flat. The curves are easier and sewing is easier.
There is a relationship with children's body shapes and the flat method. Young children are simple round cylindrical shapes until about the age of 5 and it makes sense to keep the patterns simple.
I'm having difficulty understanding from Aldrich's book what makes the "flat" block or "classic" block more appropriate for a particular style, so I wondered what was standard practice here in the industry. I hope this makes sense.I look at it this way. Flat blocks are good for casual styles, like t-shirts. Classic blocks are good for more formal looks. Flat blocks are good for infant sizes, classic for older. Your fit and look defines your design and you can opt for either method. Usually I see a modified classic block for fit, but with symmetrical armholes and shoulders (perhaps more of a convention rather than a standard). I have seen some designers use only classic blocks and others only flat. Really, the decision is up to you.
This is a topic I am still researching and trying to understand. I hate to label flat blocks as a standard because there are several possible methods that may be considered "right" or the "standard". Pattern making is considered a technical, rigid system, but don't be afraid to do things your way. I learn things from those who do not have formal training and are not afraid to do things a little different. Sure there are certain accepted standards for labeling patterns or placing notches. Acceptable shaping and fit is open to interpretation.
November 01, 2007
A Problem With Cap Sleeves
Over the last couple of months I have struggled with drafting a toddler cap sleeve. For whatever reason, my infant cap sleeve came off without a hitch. I tried some quick and dirty pattern making by grading the infant sleeve up to 24M and using it as my toddler base. The shaping just didn't work and I had to actually draft a 3T sleeve. I used the opportunity to compare draft instruction between Aldrich and Armstrong and these are my results.
The actual draft instructions for either cap sleeve are fairly simple and easy to draft. Even so, I didn't like the shaping and resultant styles of either sleeve. I'll try to explain the differences of each. I had a stronger preference for the Armstrong version, but I still modified hers considerably.
The top sleeve is the Aldrich version, the bottom my modified Armstrong sleeve. The Aldrich sleeve is very straight - such a sleeve results in a large sleeve cuff opening. Her sleeve is not a fitted cap sleeve. The instructions were easy to follow, I just had a styling disagreement.
I much prefer a fitted cap sleeve. The basis of the sleeve draft must start with a regular sleeve block. Just draw in a style line similar to what you see in the photo for the shaping at the hem. There are some minor refinements detailed in the Armstrong book. The problem with the Armstrong draft is that the sleeve cap height was too high for a toddler. I decreased the cap height by about a good 1/2". Walk the sleeve cap along the armscye and adjust any length differences. Armstrong states there should be 1-1 1/2" of ease in the sleeve cap, which is simply too much. My sleeves have virtually no ease because I removed it. Sometimes the fabric calls for 1/4-1/2" of ease, but not anymore. A sewing operator will return a bundle with too much sleeve cap ease. It is just too difficult to sew in an industrial sewing. And in IMO, it doesn't do anything for fit or wearing ease. Armstrong's draft instructions are easy to follow and you can make any adjustments you prefer after you have the shape you want.
If you look closely, you will notice that my sleeves are symmetrical. This is because my bodice armhole shapes are identical for the front and back. This is typical in the industry for infant and toddler styles. In older children, this is not true and Aldrich's basic sleeve drafts illustrate the differences very well. Kathleen Fasanella has blogged much on the proper shaping of sleeve caps.
 Here is a sewn sample. On the right is the Aldrich cap sleeve and my modified Armstrong sleeve is on the left. Can you see the difference in the sleeve shaping and cuff openings? The sleeve on the right is good for t-shirts and casual styles. The sleeve on the left is better for more formal, fitted styles. I have a few minor refinements to make and at least one more sew test and I will have my toddler cap sleeve done! (I am debating on adding 1/4" back to the sleeve cap height, overall I like it).
Either book will get you a basic cap sleeve. My eyes prefer the fitted style. Any questions? Anyone need draft instructions?
The actual draft instructions for either cap sleeve are fairly simple and easy to draft. Even so, I didn't like the shaping and resultant styles of either sleeve. I'll try to explain the differences of each. I had a stronger preference for the Armstrong version, but I still modified hers considerably.

The top sleeve is the Aldrich version, the bottom my modified Armstrong sleeve. The Aldrich sleeve is very straight - such a sleeve results in a large sleeve cuff opening. Her sleeve is not a fitted cap sleeve. The instructions were easy to follow, I just had a styling disagreement.
I much prefer a fitted cap sleeve. The basis of the sleeve draft must start with a regular sleeve block. Just draw in a style line similar to what you see in the photo for the shaping at the hem. There are some minor refinements detailed in the Armstrong book. The problem with the Armstrong draft is that the sleeve cap height was too high for a toddler. I decreased the cap height by about a good 1/2". Walk the sleeve cap along the armscye and adjust any length differences. Armstrong states there should be 1-1 1/2" of ease in the sleeve cap, which is simply too much. My sleeves have virtually no ease because I removed it. Sometimes the fabric calls for 1/4-1/2" of ease, but not anymore. A sewing operator will return a bundle with too much sleeve cap ease. It is just too difficult to sew in an industrial sewing. And in IMO, it doesn't do anything for fit or wearing ease. Armstrong's draft instructions are easy to follow and you can make any adjustments you prefer after you have the shape you want.
If you look closely, you will notice that my sleeves are symmetrical. This is because my bodice armhole shapes are identical for the front and back. This is typical in the industry for infant and toddler styles. In older children, this is not true and Aldrich's basic sleeve drafts illustrate the differences very well. Kathleen Fasanella has blogged much on the proper shaping of sleeve caps.
 Here is a sewn sample. On the right is the Aldrich cap sleeve and my modified Armstrong sleeve is on the left. Can you see the difference in the sleeve shaping and cuff openings? The sleeve on the right is good for t-shirts and casual styles. The sleeve on the left is better for more formal, fitted styles. I have a few minor refinements to make and at least one more sew test and I will have my toddler cap sleeve done! (I am debating on adding 1/4" back to the sleeve cap height, overall I like it).
Either book will get you a basic cap sleeve. My eyes prefer the fitted style. Any questions? Anyone need draft instructions?
August 31, 2007
Too Many Sizes pt. 2
In my previous blog entry on this subject I discussed combining sizes to reduce the overall number of sizes produced. As I have been developing patterns for my new line of dresses, Prairie Roses, I have attempted to practice what I preach.
I have been doing all of the pattern making and grading for my new dress line entirely by hand. I do use CAD, but only for my employer who actually owns the system. I try to keep everything separate so there are no ethical questions (My patterns have different shaping and grading anyway). Also, I want to experience what most new designers experience since so few DE's can afford a CAD system. It takes soooo much time to do it all by hand, especially the grading. I am getting faster on the grading, but it is very time consuming. I have been using Jack Handford's book on grading and my graded patterns have turned out really well. The grade rules are beautiful - there is no other way to describe it. They are nice and consistent and all of the pattern measurements fall into an acceptable range.
My patterns fall into the infant-toddler size range and I have chosen to combine the 24M and 2T. I also added a 9 mo size, which is considered a half size and not usually included. I decided to let customers tell me whether they want a 9 mo or not with sales. It isn't that big of a deal to split the grade between the 6 mo and 12 mo. If it doesn't sell, it is easy enough to drop it. Anyway, my sizes break down like this.
3 - 6 - 9 - 12 - 18
24M/2T - 3T - 4T
You will notice I combined the 24M with the toddler group. This means my 24M/2T patterns will be based on grading from the 3T. I decided a 24M child has shaping more closely related to toddlers than infants.
In my infant grouping, the sample/base size turns into the 9M. Since the 9M is something I may not keep around, it doesn't make sense to sample in that size. I prefer to use a 12M as a sample size. If you move the 24M back up to the infant grouping and drop the 9M, then the 12M is the right sample size. Also, it is easier to find a more willing 12M child model than younger.
Now here is a dirty little secret in the childrenswear industry. Many childrenswear companies actually sample in the smallest size, 3M. This is because they end up making A LOT of samples and the samples are made from actual production fabric, not muslin. Sampling in the smallest size saves fabric. The dress form I made is actually a 3M, so that is my sample size too. It causes problems with drafting first patterns and grading. As soon as I can afford it, I will be buying a 12M form and sampling in that size.
August 22, 2007
The color purple for children's clothes

For years I have heard rumors about the color purple and children's clothing, and more specifically girls dresses. Specifically the rumors suggested that purple was associated with death. That children who pass away are buried in purple in certain countries. Sales of purple dresses seemed to lag behind other colors, and some retailers refused to carry the color. If you shop the market you will probably not see much purple in the infant/toddler range.
Purple is an odd fashion color. It seems to run through the fashion cycle rather quickly. Either you love it or hate it. Of course a designer must consider the shade and intensity and other such things. And yet one hot color combo for girls is orange and purple. I haven't figured it out.
Read more about the color purple at Wikipedia and Sensational Color.
July 26, 2007
Toddler Sweater Update
I started this sweater project over a year ago and it is still not finished. I finally blocked the pieces -- I doubt it was helpful when the sweater is made of synthetic yarn. One thing I noticed during the blocking process is how different the pieces looked from regular toddler patterns. There are several things I noticed that made me wonder...
 The front piece has a t-shirt, boxy shape. The shoulder length looks too narrow and the front neck drop and width too big. I need to take measurements to see what toddler size this compares too.
 The back piece has no curve on the back neck. It is straight. I imagine a back neck curve is difficult to achieve in a knitted sweater. I wonder if this is typical in knitted garments? I don't knit enough sweaters to know. It could account for why the front neck is so big.
 The sleeve shaping seems fine, although they do bow out on the sides.
I have read books on knitwear design. One of these days I will draft my own basic knitwear design and try to knit up a sweater. In any event, all that's left on this sweater is to sew the pieces together and knit the neckband. I still haven't decided on the embellishment. Any ideas?
July 24, 2007
Boy's dress pants - an analysis
Here is a look at a pair of budget dress pants sized 24M. These were most likely sold by a big box retailer as part of a set that included a dress shirt and vest. They are 65% polyester, 35% rayon, made in Taiwan. Since these were likely sold as a set, it probably is not necessary for them to have all of the same details as an adult pair of pants. I call these pants budget because they would have sold for a low price point and were made from an inexpensive fabric. Still, there are some nice quality features.
 The pants have 4 pleats in the front. 1" cuffs on pant legs. There are no pockets or other trimming details. (Click on the images for bigger close-ups). The front waist band is flat.
 The back waistband has 1.25" stitch through elastic. Most infant/toddler pants or skirts have an elasticized back waist. This age group has a longer front waist than back waist. Combine this with a large seat (padded with a diaper) and it becomes necessary to take up the extra back width of the pant waist with elastic. The elastic is applied with a specialized machine that stretches the elastic while it is stitched on. Be sure to spec out the finished elastic measurement (the measurement of the elastic after it has been stitched). If you don't, the elastic will end up being too big or too small. A quality auditor (or you) should do in-line inspections during production. This is the one area that is the easiest to mess up.
 You can see the nice neat finish of the waist side seam. The front waist band is stitched onto the front pant. The back waist has the elastic applied, turned to the inside and top stitched down. Some manufacturers will have a separate back waistband piece, but I like the nice smooth back waistband of this pant. The side seam is stitched by folding the front waistband to the front over the back elastic waist band. When the front band is turned out, the back waist is enclosed. Lower quality pants do not enclose this seam. Even though these pants are budget, the topstitching of the front waist band runs even with the lowest line of stitching for the elastic.
 This is the only place where I could find the manufacturer truly skimped. The inside leg hem has a 1/2" hem which is topstitched down. This is a quicker finish than a blind hem and it can be hidden underneath the 1" cuff. To allow for future growth, you can add to the hem depth and do a blind hem instead. I wonder if there are many that would actually take the time to let the hem and cuff down, as simple as it is. Most parents would probably just buy another pair of pants.
July 03, 2007
A boy's shirt pattern fix for Butterick 6030 pt. 3
A boy's shirt pattern fix for Butterick 6030 pt. 1 is here
A boy's shirt pattern fix for Butterick 6030 pt. 2 is here
A continuation of my boy's shirt pattern fix....
4. Finish collar. Clip neck seam allowances near shoulder seams. Turn seam allowance of top collar under and push the remaining neck seam allowances into collar. Topstitch. Tack facing down along shoulder seams. Notice I included my care/content tag when I topstitched the collar closed.

5. Hem the sleeve. Attach sleeve to armhole flat. Close the side seam and sleeve. At this point I noticed the sleeve cap didn't match up to the armscye. So one more pattern fix to make - I made do for the sample.

At this point I decided not finish up the sample. Instead I put the shirt on the form to look at the overall proportions. The collar area looks nice and right on target.

The overall proportion of the shirt still looks too big for a size 24 months. I didn't make any changes to the original pattern in body width or length and I should have. I will double check those measurements on my pattern and make adjustments. At this point, there is little of the original pattern left and I really should have just drafted my own pattern. The original Butterick 6030 pattern is heading to the trash. BTW, anyone like my two tone work room? I desperately need to repaint it.

Subscribe to:
Posts (Atom)