Showing posts with label Patternmaking. Show all posts

January 08, 2007

Points of Measure and Grading

In a previous grading blog, I showed the first step in developing grade rules. I usually break my measurement and grading charts into two charts. Here is an example:

An example of developing a grade rule

I usually stop at the middle chart and work the rest of the math out in my head as I grade. Some of you may want to break your measurements down even further. If a pattern piece is symmetrical, you can grade half of the pattern at a time. The third chart shows the grades for half of the pattern width.

My charts have a column on the left titled POM, or point of measure. Those points of measure should correspond to a drawing like this:

Points of measure on a pattern piece

The measurements in the top chart above are based off pattern measurements (which are made up for this example), rather than body measurement charts. The grades are developed from body measurements. To grade successfully, you will need to take a lot of measurements off your base size patterns. For a bodice pattern, you will need armhole circumference, across the shoulder neck circumference, neck width, neck depth, and possibly more. Work between your body measurements, pattern measurements, grade, and ease requirements to develop appropriate grade rules for each point of measure. BTW, if your pattern measurements are finished measurements (minus seam allowances), you can use these charts to measure finished garments while doing quality assessments.

There are standard reference grading charts available from various sources. You can refer to them to develop your grade rules, if you like, and it may save you some time. Standard grading charts are usually available for adult, most often, women's clothing. Children's grading charts are available, but I have found them less useful. There are too many variations in children's body measurements, and every company has their own set. I usually have to develop grading charts that are unique for each company. When a designer asks me to grade a pattern, I have to work off of their measurement charts and basic pattern pieces for the grade to make sense. I will compare their measurement charts with my own to make sure their measurement and grades fall within an acceptable range.

If you do use a standard reference grading chart, you will need to double check your pattern/body measurements across the range. Standard grade charts do not accommodate variations in body type that your company may try to fit.

In the next grading blog, I will begin to explain the actual process of grading.

December 28, 2006

Grading Rulers

Kathleen Fasanella posted a blog back in Feb 2006 about grading rulers. Imagine my surprise when I opened a book I picked up at a thrift store. Inside the front cover was a little used hinged grading ruler in it's original packaging with instructions! The ruler was stashed in an older edition of the Price/Zamkoff grading book. The book was priced at a measly $2 - the original price sticker for the ruler was still on the packaging of $5.35. Funny thing is, I bought the book about 3 years ago and stuck it on a shelf. I only opened it up a few days ago as I was working on my new infant grading charts. I wanted the book as a grading reference, but rarely use it because of how poorly it explains grading. What a great bonus to find the ruler!

A hinged grading ruler About 98% of the grading I do is in a CAD program. Grading on the computer is so easy! Select a point and tell the computer how much growth should occur in the X,Y directions. It redraws the curves automatically. It is easy to double check the grade in the larger sizes by laying the pieces on top of each other or walking the pieces along side.

Every CAD program varies in ease of use. I have done computerized grading using Gerber's Accumark, Autocad/Betacad and Optitex. I will blog in the future about the differences between the three. Suffice it to say, Optitex is the easiest to use thus far, and quickly becoming my favorite. Grading by hand, is another story. It is tedious and takes a lot of time. I can see why grading is considered an art form. I am grading my personal patterns by hand and it is a big learning process.

In design school, I learned to grade with only a ruler. My 18" clear ruler with 1/16" increments, is photographed above. Grading with only a simple ruler is fairly straightforward. You measure out the changes and re-draw your pattern for each size step. Using a grading ruler makes the process so much simpler! I graded my infant flat block patterns with the grading ruler in a couple of hours (I was re-working some of my grades at the same time). The ruler is marked in 1/16" increments. Your grade rules need to be in 1/16", 1/8", 1/4", 1/2" increments to use this ruler effectively, which means you may need to re-work some of your basic pattern measurements to make grading easier.

I hope to demonstrate the process of actual grading, but for now I am enjoy playing with my lucky find!

Comparing Butterick 6030 neckline measurement

An example of a well fitting boys shirt

I didn't realize I had so many boys' shirts in my stash! Each shirt has a slightly different construction technique. They range from casual to dressy. Some have a convertible collar with a facing and others have a traditional 2-piece collar. This is a great resource for me to figure out more of what is wrong with the Butterick pattern.

The first thing I did was take some key measurements off of the size 24M shirts. The button bands averaged 1.125" and I adjusted my new pattern accordingly. The second measurement was the necklines. Both 24M and 2T shirts measured 12 inches, which I think is right on target. Compare these numbers:

Actual neck measurement = 10.125"
Butterick neck measurement = 15" (4.875" of ease!)
My pattern measurement (1st attempt) = 14" (3.875" of ease)
Both RTW shirts neck = 12" (2" of ease, right on!)

To draft the neckline of the pattern small enough, I need to have a basic 24M block made up. I am not going to keep guessing -- it just wastes too much time. This is enough motivation for me to work on my basic blocks again (My New Year's Resolution!). I pulled them out yesterday and made some important decisions. I can officially announce I have a basic bodice block that I like. The next step is to figure out my grade rules and grade my basic block up to a 24M.

Figuring grade rules and grading my blocks will take me some time, so the shirt project will be put off for a little while. In the mean time, I may get back to my promised grading blogs. Hopefully, you won't get too bored by it. Grading is as dry and boring as a topic can get.

December 26, 2006

Fixing the neckline on Butterick 6030 sewing pattern

Sewing pattern shoulder alignment
I started to deconstruct the Butterick 6030 pattern for my boy's shirt pattern fix. At this point, I am thinking it would be so much easier to start from scratch. More glaring problems showed up after looking closer. In the picture on the right, I lined up the shoulders of the shirt. I know, I did not align the pattern pieces along their true seam lines. In production sewing, though, the pieces are lined up along their cut edges, not sewing lines. If I did this, the sewing operator would bring this back to me as a mistake. Those edges should meet.

Also, look closely at the armhole shaping. The front armhole has a nice curve and the back is rather straight and flat. This was how I was formally trained in classic pattern making for adults. Adults require more shaping in front than in back around the arm. In children's pattern making, the patterns are made the same front to back, except for the neckline. This means the side seams, shoulders, and armhole shapings are exactly the same. Children do not require the extra shaping front to back. This is a typical industry method for children's patternmaking, especially infant and toddler. It is called the flat method by Aldrich.

Another problem not shown in the picture above are the side seams. The side seams swing out at the hem. I am guessing the patternmaker did this to accomodate an infant's protuding belly. Many babies have a belly until they get older. The assumption is that width must be added to accomodate the extra girth. The problem with Butterick's pattern is that it creates an a-line shirt. The photo on the pattern cover shows a plaid shirt. The side seams should be straight in order to match stripes and plaids. A basic shirt block already has extra wearing ease at the chest and waist. There is no reason to add even more room at the waist. I drew my side seams straight.

Here is my modified neckline. You can see the v-shaping more clearly. I rounded the neck, raised it at center-front, and made it smaller (my changes are in red). Corrected neckline shaping in sewing patternA 24 month old's neck measures about 10.125 inches. Butterick's neck measurement for a 24M is 15" - my modified neck is 14". I am thinking it is still too large. This is just my first rough pattern - I have a long way to go. Later, I will trace these off, with seam allowances. You can see I removed the cumbersome facing and created a double fold facing. Also, my back pattern is going to be exactly the same as my front, except for the neckline. You can see my back neckline above my front (red) neckline. I am going to double check neck measurements by measuring some necklines on some RTW shirts. When all else fails, see what your competition is doing.

December 20, 2006

A boy's shirt pattern fix for Butterick 6030


About a year ago I was asked to make a a white shirt for an infant boy's christening. I didn't have the time to draft the pattern myself, so I turned to a ready-made pattern. Out of the big 4 pattern companies only one had a "traditional" woven shirt pattern. I could have saved myself a lot of stress by drafting the pattern anyway. I didn't really have time to fix the problems in the pattern either and I was disappointed by the results. Here is a picture of the pattern envelope. Maybe you can spot the problems too.

The first obvious problem is the collar and neck. The collar points splay apart too far. The collars don't meet at the center front neck and the front neck seems too low. On top of that the collar looks proportionally too large. Compare the drawings with the actual pictures. The drawings show a convertible collar with a stand in the back.

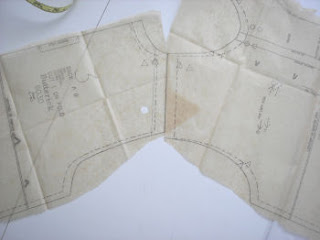
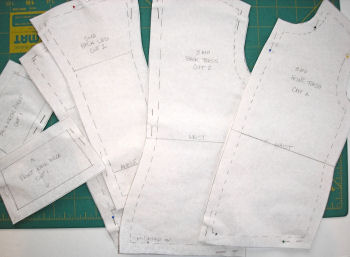
The problems become more obvious when you study the pattern pieces (sorry the pictures are fuzzy - tissue paper is hard to photograph).


1. On the front bodice piece the front neck is a V-shape and the neck is too low at center front. The front neck is just too big. To correct this problem the neck needs to be raised at center front and the front neck needs more curve.

2. Notice the large, built-in front facing. It is at least 2" wide, way too large for an infant shirt. This should have had a traditional built-in, double fold facing found in adult shirts. I will illustrate this later.

3. The collar is too wide. Of course, this piece has the obligatory 5/8" seam allowances. The collar has little shaping, except for a slight narrowing at the back neck. It is essentially a rectangle.

4. When I sewed the sleeves in the first time - there was too much ease. The shirt has dropped sleeves. There should be no ease in this style of sleeve at all. Also notice the strange jog on the right side seam. I have no idea why the sleeve turn back would be extended longer on one side than the other. I drew a red arrow down to indicate that the sleeve cap needs to be flatter.

5. The other major issue is the sizing used by the pattern company. The infant patterns are sized S-M-L-XL, divided up by height and weight. To me, those size labels are almost meaningless. I had to pull out my size charts to figure out what size matched up with the appropriate ages, heights, and weights. The sizing doesn't break-down very well because their height-weight measurements didn't match up with any of my industry charts. This is my best guess on Butterick's sizing:

Small=3-6M
Medium=6-9M
Large=12-18M
X-Large=24M

I have wanted a basic infant shirt pattern for a while, so I am going to take this pattern and fix it. The first step is to trace off the pattern pieces, minus the seam allowances. Normally, I do my pattern drafting with the seam allowances on - typical of the industry. In this case, I want to redo the seam allowances so they are appropriate for the seam. I will add 1/4" seam allowances for the neck and collars and 3/8" for everything else. The hem will have a 1/4" rolled hem - 1/2" hem allowance. I will fix the neckline and correct the sleeve. Finally, I will redraft the collar completely - the original is useless.

Once the pattern is fixed, I will re-sew it up. The hope is, it will look better and be easier to sew.

November 15, 2006

Creating a grading standard pt. 3

2019 notes - The original images for this blog entry have disappeared and I haven't had time to recreate them. I do have more complete examples in my ebook, The Organized Fashion Designer.  
 
I finally made my example measurement/grading charts. It took a little dancing as I had to create them in a spreadsheet, export them as a PDF and then convert them over to a jpg. Before I get too far, it may be helpful to review my previous blogs on grading: Creating a grading standard and Creating a grading standard part 2. You should have your own measurement charts handy. BTW, the measurements in my charts are real. I found them from the Sears website. I do not necessarily endorse Sears measurements as the industry standard - they were just handy (To be fair, their measurements are pretty good). Your own measurement charts should be far more complete and detailed than these for pattern development and actual grading anyway. This is the first step I take in developing actual grade rules.

Right off, I hope you notice a few important things. First, I have clearly marked my sample sizes. In this example they are sizes 10 and 10+. Each chart is labeled clearly. You would think these things should be obvious, but you would be surprised at what I have seen. Hanging off of the left side are numbers. These numbers are points of measure and should correspond to a How to Measure diagram (a future blog) and are not relevant for the immediate discussion. Also notice that my size ranges differ. The regular sizes run 7-16 and the plus sizes run 8+ to 18+. This is a fairly typical difference between the two groups. Also notice the difference in the measurements. There should be some obvious differences between a Misses and a Plus sizes chart too.

Usually, I have my grading chart separate from my measurement chart. I combined them here so you could more easily see how I am developing my grading rules. In the column for my sample sizes, I have placed a zero. A sample size is also called a base size in grading. It is your starting point and each subsequent size will grow or shrink proportionally off your base size. Next I subtract the difference between the base size and the next largest size. In the regular size chart, you will notice there is a 1.5" difference in the chest measurement from a size 10 to a size 12. This difference is called a grade step. Next I subtract the difference between a size 14 and a size 12. I don't subtract Size 14 from a size 10 because that is not the next grade step. Continue to subtract the next larger size with the previous size.

To calculate the grade for your smaller sizes, subtract your sample size from the next smaller size. Be sure to add the negative sign, which indicates the grade is getting smaller. Repeat by subtracting each size with the next smaller size. Create a grade for each measurement on your chart.

You will notice that the measurements and grades all have beautiful numbers. The measurements increase or decrease proportionally causing the grades between sizes to be relatively the same. This is where the art of grading and measurements come into play. I can guarantee that actual body measurements are not this pretty or consistent. These numbers have been averaged and rounded and are based on a large body measurement sampling. The numbers have been intentionally made easy to work with. Your measurements should be easy to work with too and you can adjust them as necessary.

What about accuracy? Rounding does introduce inaccuracies in your measurement charts, but only a little. If you look at growth charts, you will find that certain measurements will fit 50%, 80%, 95% or 97% of girls. If you adjust your numbers up or down, you will want to make sure those numbers fall into the 95% percentile. Adult measurements and sizing are similarly developed. Because these measurements are based off of measurement studies, it means a real girl will pick the size that most closely matches her measurements. Your measurement numbers just need to fall within the highest percentage category. You can round to the nearest 0.5" or 0.125", or whatever. Adjust your measurements so that you get a relatively consistent and even grade across the sizes. In my regular sizes I have a consistent 1.5" chest grade and a 2" grade for my plus sizes. Sure, you could throw in what ever grade steps you choose as long as you have justification for it.

Finally, I hope you can see the difference between the regular and plus sizes. Not only are plus size measurements larger, they are proportionally larger (the grade step is larger). This is why you absolutely cannot grade a plus size pattern from a regular sized pattern piece. Keep both categories, pattern pieces, measurements and grades separate from each other. I promise it will save your sanity.

I know this is a lot of explanation for this first step. If anyone has a question about this, just leave them in comments and I will try to answer them. In my next article in this series, I will explain how to create grade rules based off your first grading chart.

October 27, 2006

Creating a grading standard pt. 2

In a previous blog, I wrote about the first steps in creating a grading standard, but failed to discuss the details. It would be helpful to also review my blog entry titled Too Many Sizes! In this blog, I will try to explain grading terms and the rules by which grading can occur. In the future, I will show how to develop your actual grade rules and how I grade a pattern (which is different from any other method I have seen).

There seems to be a lot of confusion about grading. Some people view grading as a magical process that can turn your beautiful pattern in one size into any other size you desire. Before anyone can grade your pattern, you should have already done some homework. You should have chosen a category, size range, and measurement chart. Your category and size standard should be fairly simple. You should only be working in one category and your size range should not have more than 6 sizes. You may want to work in men and womens plus and regular sizes all at once, but it is just not possible.

Now, I have to stop here for a moment and explain the concept of categories. I don't know if this is the appropriate term or not. I work in a children's category, but you may work in Misses, Juniors, Mens, or whatever. Within those broad categories, there are sub-categories or classifications based on your sizing system. A classification is based on a specific figure type such as Misses, Petites, Plus, or Talls. Each of these designations have a separate and distinct sizing system. You can't magically start with a Misses size and turn it into a Plus size by grading it. That is not how grading works, so don't even attempt it. There is no magic formula.

Grading is a simple, yet difficult concept for people to grasp. Grading is a process by which a base pattern is proportionally changed to create smaller or larger sizes. Grading is always based on a set of measurements specific to a size range and classification. Successful grading does not change the overall proportions of the intended design as the size changes. This is why a size range should be limited to about 6 sizes. Any more than that and the largest or smallest size will be proportionally wrong.

Successful grading is all about having a good starting point. A base pattern is a pattern created and perfected to fit a sample size. From that base pattern, you will create the other sizes in your size range. Now some of you want to offer Plus sizes in addition to your Misses Sizes. It should be as simple as grading your base Misses patterns up to the appropriate plus size, right? After all, it would save a great deal of work. You already have a perfect pattern and why would you want to go to the work of creating a whole new set of patterns.

The reality is, you will have to create a whole new set of patterns in a new base size contained in a new size range and classification. I know this sounds like a lot of work. The truth is that it is, at least initially. You will have to develop a set of base patterns for your Misses sizes and a separate set for your Plus sizes. You may sample a new style in a Misses size initially. Once a style is approved, your patternmaker will then create patterns in any other size ranges you want to offer. The process required to create the plus size patterns will be very similar, if not identical, to the process required to draft the Misses size patterns. There may be a little tweaking for fit during sampling, but the process will be faster than the original style development. Your patternmaker will already know what should be done.

For example, one company I work for will create a new style in a size 5 (in a children's size range of 4-6x). They then decide they want to offer that style in the entire range 2T-16 and plus sizes. I have already broken up the sizes into ranges of 2T-4T, 4-6x, 7-16, and 8+ to 20+. I then make patterns in the sample sizes of 3T, 5 (which is already done), 10, and 10+. The patterns for each sample size are then graded within their range. It may sound like a lot of work, especially if done entirely by hand. Since I work in a CAD environment, I can accomplish this task in less than a day. By hand, it may take 2-3 days.

Going back to our previous example......Once your set of Misses patterns and Plus size patterns are finished, you will then send those off to be graded. And this is where you have to create your grade rules. To create grade rules, you will need your measurement charts. So here is your homework assignment. Read your measurement chart. If you are offering more than one classification, compare the two. How does a Plus size differ from a Misses? Do your measurements make sense? Do the measurements decrease for the smaller sizes and increase for the bigger? In the next blog, I will show how to create your grade rules from your measurement charts. Once you see the grade rules, you will then understand why you can't grade a Misses size into a Plus size.

June 27, 2006

Creating a grading standard for children's clothing

Before I can move on to the grading question, I must make a couple of comments on my previous post. The best time to determine a sizing standard is at the very begining of your company. If you have been in business for 30 years, for example, it will be very difficult to change things around. So please, please do your homework.

Another thing, you can make your sizing standard anyway you want. Even though I am suggesting a simplified sizing standard, it may not be appropriate for you. If your intended customer is a big box retailer, it may be too simple. In fact, they may not like it. They are accustomed to choosing from a lot of different sizes. If you become part of a private label program, they will tell you what the sizing standard should be anyway. If you have something similar already set-up, there will be less stress for your patternmaker. Again, the sizing standard suggested in the previous post would be more appropriate for a company targeting specialty boutiques and small retailers.

Ok. Now the grading questiong...

"Can't we use the 3mo size for our base size and grade everything up from there?"

The motivation for this question is to save some work. In essence you make your pattern only one time and let the grading take care of all of the other sizes. While the idea is good, it presents some problems.

First, it is important to know how a child grows. A very good description and diagrams are shown in the book Patternmaking for Fashion Design by Armstrong. In my second edition of the book, it is on page 674. Up to about age 3 children are cylindrical in shape. There is little differentiation between chest, waist, and hips. At about age 4-5, girls start to develop a waist. At age 8, there is more definition and curves. Boys and girls are similar in shape up to about age 8.

Because there is a change in body shape at regular intervals, a patternmaker will break-up the sizes like this:

0-3M to 24M, 2T-4T, 4-6x, 7-16

By breaking up the patterns into these size ranges, a patternmaker would then make base size patterns in a 12M, 3T, 5, and an 8 (or whatever sizes are chosen). You could sample your initial style in any size you prefer - hopefully a middle size. When the design is approved and read to go into pre-production, the patternmaker will then make patterns for your style in each of the other base sizes. Those patterns are then graded for each range.

Some manufacturers will go to the trouble of sampling their style in each range. Retailers like to look at more than one size range because they have to "see" how to merchandise their floor areas. It is possible you will end up making a lot of sales rep's samples if you plan on selling the whole range. These extra samples are called sisters or brothers.

Even with our simplified sizing standard, you would still break up your sizes like this:

0-3M to 3, 4-6, and 7-16

Now some design entrepeneur's may still insist on having only one base size and grading everything off of that. What will happen is you will introduce errors into your patterns in the extreme ends of the range. The grading will be more complicated. The fit will be off in the transitional sizes between infant to toddler, young child to older child. For organization sake, your patternmaker/grader will greatly appreciate having things broken down into simpler groups.

Also, you will be bucking industry standards and not playing by the rules. Walk into any department store and look at how the children's clothes are arranged. You will notice that the clothes are arranged together in the size ranges we talked about above - infant, toddler, young child (4-6x), and older child (7-16). Your order form should have your styles broken down similarly.

By this point you are probably thinking that it is still a lot of work to make that many patterns for each base size. If you have a CAD system with nifty pattern drafting and grading capabilities, it isn't really that big of a deal. Even if you had to do it by hand, it should only take a day or so. Your patternmaker will be just repeating the same drafting process over and over again. If you make dozens of styles every season, you may seriously consider investing in a CAD system.

June 26, 2006

Too many sizes!

I am currently in the process of rewriting this article for another project. A lot of what I wrote in 2006 is a reflection of my thinking back then. I have since refined my thoughts which will be published later. So please consider this article a bit out-of-date.

One designer asked me two fundamental questions. At the time I wasn't sure how to answer them. The first is really a grading question and the second a sizing standard. Both are related. To keep things simple, I will start with the sizing standard question.

"Why are there so many sizes for children's clothing?"

Because children grow. Ok. That is the easy way out. The truth is that children grow and manufacturers try to have a range of sizes to choose from.

The other half of the question was, "Can we have fewer sizes?"

This is a much more complicated answer. Because children's clothing can cover such a wide range, it is possible to have a lot of sizes. One company I worked for produced clothing from Preemie to a size 16 - not including the plus sizes. When you break this down it looks like this:

Preemie, NB, 3M, 6M, 9M, 12M, 18M, 24M, 2T, 3T, 4T, 4, 5, 6, 6x, 7, 8, 10, 12, 14, 16.

This is a whopping 21 sizes! This complicates bookkeeping and sales information incredibly. If you create a style in one colorway, then each size will have its own SKU (stock keeping unit). If you add a colorway, then each size in this style can have two SKU's - one for each color. The company wanted to try and reduce the number of SKU's each season. This particular company produced a new line every 4 months which consisted of dozens of new styles. Thinking about it can give anyone a headache.

To reduce the number of sizes, you have to either combine some of the sizes into ranges and eliminate some duplication. The duplication is the easiest to see first. There is very little difference between a 24M and a 2T. A 24 month old child is essentially a 2 year old. The T simply means that ease is added to the pant area for a diaper.* Most 24 month old children and 2T children are still wearing diapers, so there should little to no difference in the patterns there.

*I'm not sure where the idea that the T in the size 2T implied the size included diaper ease. I repeated this idea because it was all I knew at the time. After a lot of research, I now believe this idea is a myth that has been perpetuated around the internet. I have found no size study information that supports this idea. Rather it has become a standard custom to refer to toddler sizing in this way. As a pattern maker I always included ease for a diaper in the toddler sizes because they wear diapers! The ease is not much more than what is needed for wearing pants anyway. Diapers do not add much bulk these days. Perhaps in years gone past in the age of cloth diapering, it was more of a concern.

The other likely duplication is the 4T and 4. Again these sizes overlap with only a slight difference in the pant area for a diaper. Most four year olds are potty-trained, although it is possible that some are not. In any event, if you manufacturer girl's dresses, this is another area where sizes could be combined. Some companies have started putting out a 5T, but it would be unusual to find a five year old wearing a diaper.

The next size duplication looks like the 6 and 6x. In this case, there is a fitting difference introduced. There should be little girth difference in the patterns, but there will be a length difference. A 6x is a taller size for a 6 year old. Some retailers combine the 6x with a 7. This is where it would be important to know your customers before eliminating or combining sizes.*

 *(Please note that this paragraph has been modified. I made a big assumption that was just wrong stating that the size 6x is a plus size version of the size 6. This isn't true. It is a taller version of the size 6. In any event, the paragraph above has been edited with the correct information).

So now our sizing looks like this:

Preemie, NB, 3M, 6M, 9M, 12M, 18M, 24M/2T, 3T, 4T/4, 5, 6, 7, 8, 10, 12, 14, 16.

And this is where I have to interject. Retailers, and especially big box retailers, do differentiate the sizing of the patterns on the sizes we just combined. A 2T is just a little bit bigger than a 24M, even though it really shouldn't be. Consumers have become accustomed to this type of sizing system and so have the technical designers in the business. In other words, don't expect any big changes anytime soon. This proposal is a way to simplify things. You are more likely to find a simplified sizing standard in boutique or specialty stores.

Ok, back on track now. The next step is to create a range of sizes. This is simplest in the infant sizes and another grey area. Every major manufacturer has come up with their own size range break-down, and it really is all over the place.
I really like how JcPenney has broken down their infant size range:

Newborn, 0-3M, 6-9M, 12M, 18M, 24M/2T

The nice thing about this sizing standard is that there are no overlapping of sizes.
Some companies will create a range like this:

Newborn, 0-3M, 3-6M, 6-9M, 9-12M, 12-18M, 18-24M

As you can see, there is a lot of overlapping. This could cause confusion for a customer because it is difficult to pick just the right size range. Also, this doesn't reduce the number of sizes carried.

If we eliminate the newborn and preemie sizes and use the size range from JcPenney, we would get this:

0-3M, 6-9M, 12M, 18M, 2, 3, 4, 5, 6, 7, 8, 10, 12, 14, 16.

If you look carefully, you will see that I eliminated the 24M size and the T's on the 2, 3, and 4. This is where you have to decide how the size will appear on the care/content tag or hang tag. It would be best not to confuse customers - keep things simple and logical here.

You will also notice that there seems to be a size missing in the infant sizes. The size 6-9M is often combined because either the 6M or the 9M is considered a half size between the 3M and the 12M. This is obvious when you study measurement charts, so just take my word on it for now.

The other thing to consider when generating a size standard is the patternmaker/grader. The size 0-3M, for example can be created in one of two ways. The measurements of the Newborn and 3M could be averaged out or the patternmaker could just make the patterns a true 3M. In order to fit the most children, it is best to make the patterns fit the high-end of the range. In our example, the patterns would be made in a 3M. The clothing will fit loose on the small end of the range, but kids grow fast. The only exception might be sleepwear which needs to fit snug to the body in all of the size ranges. This is another place where you need to know your product and customer well.

By following this example, we have gone from a whopping 21 sizes to 15! While this still creates a lot of sizes, it is so much simpler and easier to understand.

0-3M, 6-9M, 12M, 18M, 2, 3, 4, 5, 6, 7, 8, 10, 12, 14, 16.

The next question to address is the grading question. And that will have to wait for tomorrow.

June 18, 2006

Making a dressform pt. 6 : More dressform pictures!

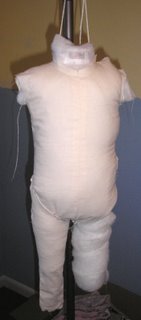
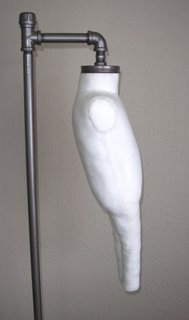
I realized I should have posted picts of what my form looks like under the dress. So here they are. At this stage I was still trying to figure out the top cap piece. All that is left is adding the tape to indicate the waistline and ankle. These pictures aren't great. In the top one, it looks like the shoulders are uneven. I think the form was still swinging when I snapped the shot. In the second, it looks like the form's legs are angled toward it's support. I think I was holding the camera at a funny angle. It does hang straight and even....

June 16, 2006

Making a dress form pt. 5 : Finished!


When I started this project, I assumed it would be rather simple. Draft a pattern with no ease and stuff it. Instead, I had to adjust my pattern many times. Plus I had to solve problem of creating an inner structure and stand. Wow, it was a lot of work!

I am generally pleased with how my form turned out. As in all experiments there are many lessons learned. The first, the form companies are charging a fair price. I saved money in materials, but it took me a lot of time and two attempts to get my form right. Second, my form may have a short life. Not all of the materials are the most durable. I imagine I will have to do repairs in the future. Just in case I decide to do this again, I am keeping my patterns!

Earlier I had posted about Aldrich's neck-base measurement being too big. I ended up not altering my form pattern - forgetfulness on my part. I still think her measurement is still a little too big, but as you can see my dress does fit. My earlier problems were from over-stuffing. I kept tight control of the stuffing of my final form.

Someday, I will purchase a real form. For now this one works well. It matches my measurement requirements fairly close. And it does fit my dress!

June 06, 2006

Making a dress form pt. 4 : padding the form with batting

From the picture below, you can see I have made some progress. I have started to pad the papier mache form with batting. I used my original draft from my first form and modified a few seams. In this picture I am trying on the leg - it needed further adjustment, along with the front torso. I also took note on what areas needed a bit more padding. The form is suspended from the stand by a cotton yarn. I will be putting weights into the bottom of the legs to help give it more stability. Already, this version is much better than my previous one, but still not as good as the professionally made forms.

May 27, 2006

Making a dress form pt. 3 : Starting with a good base

I hit upon a bit of inspiration while searching the net for info on how to make a dress form. I kept running into the terms papier mache. The professional forms have a papier mache center. At Vintage Sewing (link no longer works) there is a demonstration on how to pad your own form.

Papier mache is a simple medium to work in, just messy. I bought an all vinyl doll to use as a base. It has smaller measurements than I need - which is perfect to later pad it out. I pulled the doll apart, sprayed it with oil and wrapped plastic wrap around the body. Next, layers of paper and glue. I then cut it off the body and slashed and spread it apart to get better proportions. More layers of glue and paper....

I have the body, done and I am now working on the legs. No pictures yet, but soon. Hopefully, I can start doing the padding next week!

May 18, 2006

Making a dress form pt. 2 : How to suspend it and checking measurements

I made some more progress this week on my infant dress form (sized 3mo). I created a stand from bits and pieces from the hardware store and spray painted it to make it uniform. I love my stand! The form, on the other hand, has presented some problems - ones I am not quite sure how to work out.


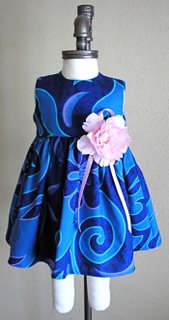
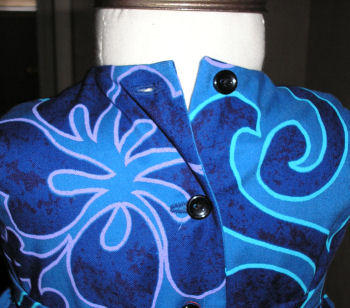
From the front, the form actually looks ok. The dress is one of my Hawaiian dresses, sized 3 mo. I know this dress fits because I have tried it on children. It may be hard to tell in these pictures, but my first problem is the neck size. I drafted my pattern from Aldrich's measurements. Her neck base is at least 1" larger in circumference than all of my other size charts. IMO, it is too big and I will be making it smaller in my next draft. The neck of my dress is on the small side, however, and I will be adjusting it in my next line, although not much. When I did my fittings, the moms actually commented on how the neck fit better than most RTW (which are usually too big!).


In these pictures, you can see how my form swings out from the bottom. The only adjustment I can think to make is to drop the back of the neckband at least 1/4", thus pulling the form into a straigher line. You can see how this may cause problems with checking the skirt.

You can see how large the neck size of my form is in comparison to my dress in this picture.


Another BIG problem is my measurements are all off. The girth measurements match a 12mo. The vertical trunk measurement matches a 6mo. I drafted my pattern in a 3mo with no ease. I can only assume that my measurements were thrown off from the fabric stretching while stuffing. This is probably why the professional forms use a heavy-weight linen fabric.

I think this project still has potential, but it is back to the drawing board. Plus, I need to try and find a medium/heavy-weight linen. I would appreciate any suggestions that you patternmakers may have out there?!

My other big project is designing my Fall/Holiday dresses. I am thinking about some red silk holiday dresses, just need to order some fabric and try not to fall too behind...

May 10, 2006

Making a dress form pt. 1 : Start by drafting a pattern

Dress forms are expensive - at least the ones used in the industry. You can purchase retail display forms but they will not hold up in the work room. The average professional form averages $1,000. Not many of us have that much cash laying around and I certainly do not. I began to think about making my own dress form. This is an idea that I have seen floated around in vintage sewing books. One of my previous employers also did the same thing and it made me wonder if  I could really do it.

Well I plunged in and drafted Aldrich's classic bodice using metric measurements without ease (size 3mo). I then drafted her sleep-suit block without ease. I had fairly good pictures of a child's full body dress form, so I used that picture to create a more anatomical form. I added shaping for a tummy and rear end. I added 1/2" seam allowances. Here are some of my pieces:


I have already sewn most of it together and stuffed it. I have already discovered some further pattern adjustments for the future. Especially the seam between the front leg and front torso. You can see the wrinkles in the picture below. I think I will angle this line more. The second thing I learned is that to get a truly smooth, surface, you need to create a cardboard body to put inside. I managed to find a piece of lightweight cardboard to put into the torso. I wrapped the cardboard in some pieces of batting and it made a huge difference. Next time, I will add some cardboard tubes to the legs and use a heavier weight of linen, like the professional forms. In this test form, I used muslin. So far, I am fairly pleased.


I have to finish sewing on the armhole pieces and finish up the neck. And then I have to figure out how to suspend this form. I will likely have to create my own stand...

May 04, 2006

The golden mean and pattern making for children's clothing

After studying measurement charts until my eyes about popped out of my head, I finally took the plunge and drafted my first bodice using Aldrich's method. After working for many years in the childrenswear business, I have never actually drafted my own blocks. There was never a need - I just used whatever the company had. I drafted the flat infant blocks and immediately it didn't look right. I have been a bit confused by her use of flat, jersey, and woven bodices. Later in the book, she has a classic bodice. I picked the flat bodice block because it was in the front of the book.

The problem I encountered with the flat block is it looked too long in the length, especially the scye depth. This is partly where art meets technical design. Most infant bodices are drafted intentionally above the waist. Proportionally it just looks better. Until about age 3 a child's waist falls half-way on the body. Interior designers, architects, fashion, etc., use the golden mean or 1 to 3 proportion. This is something that is almost never mentioned in any pattern drafting instructions for childrenswear. The instructions always have you draft the back neck to the true waist I am sure they neglect to mention this because every designer decides where exactly their waist line will fall. Generally speaking this waistline can fall anywhere from 1-2" above the natural waist. This practice is used on nearly all childrenswear up to age 16, especially on any infant casual clothing and girl's dresses. Casual boys wear mimics the proportions of adults as they get older. Confusing, huh!

When drafting the basic blocks it is important to decide on what kind of product you are going to make. Who knew so many decisions have to made so far ahead in product development?!

I don't really like Aldrich's flat blocks. Even with adjusting the waist line, the scye depth is too long, IMO. Instead, I flipped ahead and drafted her classic block. The classic block is drafted to fit closer to the body and is used in formal wear. To me this is a better place to start. The armhole and neck shapes look better. The flat block can later be extrapolated from the classic. If I understand Aldrich correctly, the flat block is a method used in the children's business where the front and back bodice pieces are essentially the same shape, except for the necklines. By starting with the classic block, you can then add your own additional ease and modify the neck and armhole shaping that makes sense to you.

My next project is to draft the classic block without ease and make my own children's dress form. I read about a similiar proceedure at Vintage Sewing. With the cost of dress forms, I thought this might be a more economical solution and I would have a form with my measurements. I'll let you know how it turns out.

April 27, 2006

Children's Sizing and Measurement Standards Vary by Company

After studying and comparing all of my size charts collected from various sources I have come to realize the search for a good standard may be in vain. Here is just a brief example of one meausurement and how it varies among pattern drafting manuals and retailers.

Size 8 child: Major US Retailer
Bicep (inches) : 7.75
Recommended Ease : 1.5-2.0
Draft Line : 9.25-9.75

Size 8 child: Armstrong
Bicep (inches): 8.125
Recommended Ease : 2.875
Draft Line: 11

Size 8 child: Mortimer-Dunn
Bicep (inches): 8.75
Recommended Ease: 1.5-2.0
Draft Line : 10.25-10.75

Size 8 child: Dressform Co.
Bicep (inches): 7.75
Recommended Ease : 1.5-2.0
Draft Line : 9.25-9.75

As you can see there is quite a range in measurements. To fit the most average child, it is best to fall in between the range. But it still begs the question of who is correct? The Armstrong measurement is especially suspect because she recommends far too much ease in her drafting measurement.

For my new blocks, I have decided to use the Aldrich charts. She has statistical data to backup her charts. The US retailer and dressform co. charts are based off of the 1977 study and have been adjusted/updated over the years. I don't know where Armstrong and Mortimer-Dunn got their measurements, but their numbers seem odd. As far as I can tell, Aldrich is fairly close to the Major US Retailer. I am currently in the process of converting her measurements over to inches, to the nearest 1/8". This introduces an error into her measurements, but I am most comfortable using those units. Once I fine tune and tweak the numbers so they look right and are easy to work with, I will then compare my charts to those above and make sure I fall somewhere in the range. And I am still toying with the idea of working in metric anyway. I am unsure how my US customers would respond...

The next step is to draft some basic blocks and sew-up a fit sample.

My sources:
Major US Retailer - Kept confidential. Their size charts were last updated in 1981.

Patternmaking for Fashion Design by Helen Joseph Armstrong (5th edition) - her third edition has an even larger measurement for a Size 8 bicep and still too much ease. I have no idea about the fourth and fifth editions.

Pattern Design for Children's Clothes by Gloria Mortimer-Dunn - the book shows basic pattern drafting skills but her size charts are a bit odd.

Dressform Co. - kept confidential, but they have one of the better charts I have seen for infants.

Metric Pattern Cutting for Children's Wear and Babywear (4th edition) - the best book by far. I have not cited her bicep measurement because I am still studying her charts.

April 21, 2006

A brief review of Metric Pattern Cutting for Children's Wear and Babywear


I finally received a copy of Winifred Aldrich's book on pattern cutting for children. I have never created my own blocks for children as I relied on my employer's existing pattern blocks. In college and in my first employment, I used Helen Armstrong's patternmaking book. The Armstrong book completely skips over infant sizes - at least in my edition of the book. Just about any patternmaking manual will give basic instructions on how to draft a pattern. The problem is the drafting instructions do not give you the correct measurements or proportions for an infant. Aldrich's book is an exception and starts off with basic drafts for infants. So now that I have this book, I finally feel like I can make progress on developing my own pattern blocks for children.

I am accustomed to American sizing and Imperial measurements. Aldrich is from Great Britain and she uses British fashion terms and metric measurements. I have to read things very closely and study the charts carefully to understand the things she is talking about. Despite that, the book is excellent. I can sit at the feet of a master pattern cutter and learn from her years of experience and wisdom.

I have yet to decide on making my blocks using the metric system or not. I may use her drafting methods and substitute my own imperial measurements. I have one measurement chart based off the US measurement study done in 1975 and I keep going back to it. Plus, I like the way she has broken down infant/toddler sizing to reduce redundant sizing. I will blog more about this topic later.

The book includes data from Aldrich's own measurement study on children's sizes. And surprisingly, her measurements are not dissimilar from a British government study released in 1988-1989. The British (and really the EU)  designate children's sizes based on height with age being a reference. There are many advantages to such a system. Again, more about that later.

2019 note: Links are Amazon affiliate links. When I wrote this, I referred to an earlier edition of both Winifred Aldrich and Armstrong's books. Links are to newer editions for the reader's convenience.

April 19, 2006

Sizing Up Children pt. 2 : How to find size charts for children

"The problem is children’s clothing manufacturers cling to their 30+ year old size charts. They protect their sizing information like a trade secret (not uncommon in every segment of the fashion biz). And while major studies are being done on men and women, they are not being done on children. (If I am wrong, please let me know)."
After doing some more reading at fashion-incubator, I discovered I am only half right. The 30 year old study on children's measurements done in 1975/1977 is publically available here: Anthropometric Data of Children. This is the data that most manufacturers continue to use. Since it is freely available, there is not much incentive to change. I have been using size chart information based on this data for at least 10 years because this is what the companies I worked for used. To be fair, it is still fairly good information.

Another source for sizing information is available from ASTM International. Kathleen Fasanella at fashion-incubator.com lists the documents to search for at her blog: How to obtain sizing and grading info. This data set is updated about every five years or so. Even though the data information is priced fairly, you still need to buy 3 charts to cover all children infant through teenagers, a price of about $90. The other thing to consider when purchasing from ASTM is that you only license the information. Be sure to read the license agreement! You are given permission to download on one computer and print out only ONE copy of the charts. You also give permission to ASTM to come and inspect your company computer and materials at any reasonable time to ensure you are complying.

As a small company, I do not like this license agreement. What if I have two or three technical designers who need access to this chart? My costs for this information multiplies! Plus, who wants to allow some other company/organization to come in and inspect your premises at will?! I wonder if ASTM has ever tried to enforce their license?

I also don't like the propriatary nature of the data. The only way to get cooperation from businesses to standardize is to make the information available for free. I realize as an organization they need to make money to support a needed role. But they could take a hint from other opensource projects and raise money by donation or some other model.

Because of the difficulty with ASTM, I now understand why companies continue to use 30 year old data.

April 18, 2006

Sizing Up Children and shopping difficulties

In the March 2006 issue of Redbook magazine, Melissa Schweiger attempts to explain the difficulty of creating women’s fashion. The disparity in body shapes, weights, and sizing is an evolving and complex task. Fashion companies each create their ideal customer and manufacture clothing based on specific sizing. But all too often women fall in between sizing or have different proportions. Many women have to try on a mountain of clothes to find something that finally fits.

Schweiger makes some interesting points about the changing shape of American women. Many of these ideas also apply to children’s fashion and sizing. Below, I highlight some key points:

Arbitrary Sizing

Each manufacturer develops their own sizing system. In women’s fashion the sizing numbers are relatively standard. For example, the sizes run 2, 4, 6, 8, 10, 12, and so on. In infant clothing, the sizing varies from label to label. One place will size 0-3, 3-6. 6-9, 9-12, 12-18, 18-24. Another will size 0-9, 9-12, 18-24. Some simply place a label with corresponding weight such as 19-26lbs. Stores like the Gap hand out info cards to help the consumer determine the right size.

After determining one size for one label, you will be out of luck at the next store. A 6-month-old baby can easily wear any size labeled 6-18mo. The added difficulty of fitting a baby is that they get fussy. If you can’t stand trying on 10 pairs of pants, imagine an infant after one pair.

Changing Shapes

According to this article, American women have changed. They are a bit taller and heavier. American women are more ethnically diverse. The challenge for manufacturers and designers is to design a product that fits a more diverse range of people. Some are making attempts, some refuse.

The general consensus among children’s fashion professionals is that children are changing along with their parents. They are taller and heavier, and more ethnically diverse. Childhood obesity and inactivity play a part in changing shapes.

The problem is children’s clothing manufacturers cling to their 30+ year old size charts. They protect their sizing information like a trade secret (not uncommon in every segment of the fashion biz). And while major studies are being done on men and women, they are not being done on children. (If I am wrong, please let me know).

Shopping for children who fall outside of the norm has tremendous difficulty. Plus sizes for children are not stocked in many stores, despite the apparent increasing demand. And if there is truly a demand for children’s plus sizes, it is hard to gauge. Children in this category move to adult sizes much more quickly.

Overall, this magazine article was an interesting review of the difficulty faced by clothing manufacturers. Well worth the read if you have wondered why you can’t find anything that fits.
Additional ideas and fitting information can be found at http://www.fashion-incubator.com.