Showing posts with label Patternmaking. Show all posts

October 25, 2007

Stewart Girl's Dress pt. 3

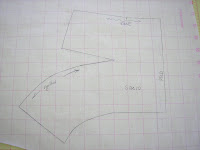
I have made some progress with the pattern. I still believe the greater challenge is coming up with a mass construction technique. No matter how I twist my brain around the style, it still requires hand manipulation of the gathers. So per Kathleen's suggestion, here is what the pattern would look like. I realized after I took the pictures that I had left off the seam allowances for the dart - must add that before sewing up the samples. This is a quick and dirty pattern, and I know it is not production ready. The style is going to work for girl sizes 8-16 and older. Younger sizes do not have (or need) darts in the skirt, although they can be added for a style detail.

Skirt sewing pattern with dart detailsThis is a basic skirt block for a girl's size 10. A style line is drawn on the pattern where the gather detail is to be placed.


Adding fullness to a dart on a skirt patternLines are drawn from the dart point and the style line until they intersect. The skirt is slashed along those lines to the point of intersection. The dart is partially rotated closed. The original style had some fullness in the waist. The dart equivalent fullness only adds about a 1/2" to the waist front. I suspect the original style had more. The original style was probably for an older teenager rather than a young girl. Anyway, slash lines are drawn from the lower dart leg to the hip line (On a full length skirt, the slash lines would go to the hem. For ease, I am only working to the hip line).

Added fullness to a side dart on a skirtSlash the skirt along the new slash lines to the hip and spread to the desired fullness. In this case, I spread for a 2:1 gather ratio. The finished pattern would look something like the one to the left. Like I said, I forget to add seam allowances to the dart opening. If you try this yourself, don't forget to add them.

Fabric samples will have to wait until later - too many pressing projects.

October 19, 2007

Stewart Girl's Dress pt. 2 : Testing the idea

As a continuation from my first entry on this topic, I made up some samples to illustrate the sewing problem. (Click on the images for a better view).

This is how the pattern might look. I suspect the slit would be similar to a dart. The top of the slit is angled upward. I left the bottom of the slit on grain, but it probably should angle down too, making it a true dart, and not a slit.


Sewing a partial seam in skirt with a gather detailThis is how the sample looks sewn. The yellow arrows indicate the direction of sewing each dart if sewn with a 4/5 spool industrial serger with a shirring arm (my sample is not, so this is an approximation). At the end of each dart is a flat spot because of the physical limitation of the foot and shirring arm getting in the way. Even with my straight stitch machine you can see similar problems. On the left, a pretty little tuck and dimple show up. On the right, the flat spot is more pronounced because the gathers can not start at the end of the dart opening. I also ended up with an open seam where I failed to catch one side. I could easily see these sewing errors occur in an industrial setting.

I suspect there may be more to the pattern than I am thinking.

October 04, 2007

Tag Board for pattern making


I have needed to order tag board (manila folder paper for patterns) for a while. Up till now I haven't needed very much. My patterns are small and a large, heavy roll of the stuff seemed excessive. I think I have found a reasonable alternative until I need larger quantities.

I did a search for tag board among the big box office supply houses. Sure enough I found one that sold it in large pieces (24 x 36) in a box of 100 sheets. The pieces are big enough that I can cut out quite a few pieces at one time and still have left overs. I further economize by not cutting out square or rectangular pieces. Technically, every pattern piece should be cut out of tag board and if I were to send them to a contractor, I would. Square/Rectangular pieces are cut using cutting guides & charts. I have a cutting guide for sleeve cuffs and skirts indicating the dimensions for each size, for example.

September 12, 2007

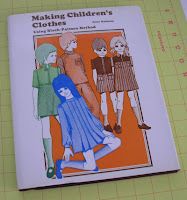
Making Children's Clothes by Joan Moloney

Making children's clothes using block-pattern method 1971I received my copy of Making Children's Clothes Using Block-Pattern Method (1971) by Joan Moloney today.

Just so you know, this book has no measurement charts, detailed drafting instructions, or sewing instructions. Think of it as looking on the back of a home sewing pattern envelope. The author shows the pattern pieces that make up a style next to an illustration or photograph of that style. The text is full of ideas but little how-to.

On the positive side, this is one of the few books I have seen that show all of the pattern pieces that make up a complete style. This may help designers who struggle with the complete design. Also, the book clearly illustrates the shapes of the pattern pieces. Sometimes that is all one needs to draft your own version. The illustrations are charming and I will add this book to my collection as a possible source of inspiration.

Homemade child's dressformThe author does describe how to make your own children's dress form, although briefly. Her version made me laugh for a second and then I wondered if I should be scared. It may give you an idea of how to make your own dress form. I did make my own, which I am using now. Children do not have the patience to be fit models for very long - so I do recommend obtaining dress forms at some point. Still, it is worth the time to try clothing on a child because you may notice differences in how the fabric drapes on a moving child.

This is not a must-have book to add to your reference collection. Used copies are available through Amazon for as little as $1 plus shipping so there is really no reason to not add it either.

August 31, 2007

Too Many Sizes pt. 2

In my previous blog entry on this subject I discussed combining sizes to reduce the overall number of sizes produced. As I have been developing patterns for my new line of dresses, Prairie Roses, I have attempted to practice what I preach.

I have been doing all of the pattern making and grading for my new dress line entirely by hand. I do use CAD, but only for my employer who actually owns the system. I try to keep everything separate so there are no ethical questions (My patterns have different shaping and grading anyway). Also, I want to experience what most new designers experience since so few DE's can afford a CAD system. It takes soooo much time to do it all by hand, especially the grading. I am getting faster on the grading, but it is very time consuming. I have been using Jack Handford's book on grading and my graded patterns have turned out really well. The grade rules are beautiful - there is no other way to describe it. They are nice and consistent and all of the pattern measurements fall into an acceptable range.

My patterns fall into the infant-toddler size range and I have chosen to combine the 24M and 2T. I also added a 9 mo size, which is considered a half size and not usually included. I decided to let customers tell me whether they want a 9 mo or not with sales. It isn't that big of a deal to split the grade between the 6 mo and 12 mo. If it doesn't sell, it is easy enough to drop it. Anyway, my sizes break down like this.

3 - 6 - 9 - 12 - 18
24M/2T - 3T - 4T

You will notice I combined the 24M with the toddler group. This means my 24M/2T patterns will be based on grading from the 3T. I decided a 24M child has shaping more closely related to toddlers than infants.

In my infant grouping, the sample/base size turns into the 9M. Since the 9M is something I may not keep around, it doesn't make sense to sample in that size. I prefer to use a 12M as a sample size. If you move the 24M back up to the infant grouping and drop the 9M, then the 12M is the right sample size. Also, it is easier to find a more willing 12M child model than younger.

Now here is a dirty little secret in the childrenswear industry. Many childrenswear companies actually sample in the smallest size, 3M. This is because they end up making A LOT of samples and the samples are made from actual production fabric, not muslin. Sampling in the smallest size saves fabric. The dress form I made is actually a 3M, so that is my sample size too. It causes problems with drafting first patterns and grading. As soon as I can afford it, I will be buying a 12M form and sampling in that size.

August 28, 2007

Fussy corners on a slip cover for a sofa


Here is a quick update on my couch slip cover. So far it has come together beautifully. I spent some time perfecting the pattern after pulling it off of the couch and added seam allowances. I managed to cut out all of the pieces and match important stripes (Striped fabric is probably not the best choice on a first attempt, btw).

A corner of a couch slip coverOne thing I learned is that couches are NOT symmetrical. I have a hard time with asymmetry when something is supposed to be symmetrical. Anyway, this back corner doesn't fit, but the opposite one does. This will be an easy fix though.

When I was perfecting the pattern, I should have pulled out my library book. The author has you add extra ease for the tuck in allowance in the corner where the deck and the inside back meet. I didn't allow extra ease and just drew a nice, easy to sew line. You can see the result in the second picture. Funny pulls. This will require a bit more work to fix. I ripped out that inner corner and I will have to add in a tuck-in gusset (which will never be seen).
Inner corner of a couch slip cover.
For the most part, I am fairly pleased with how it fits. The unfinished slipcover has been on my couch for the last few weeks and the most amazing thing is it doesn't move. You know how most store bought slipcovers shift and move the second you sit-down. It requires constant straightening. The extra effort to make a fitted slipcover is worth it!

After I fix those fussy corners, I will just need to do some finishing work and cover the cushions. The project will need to wait until the deep, dark days of winter. Harvest is around the corner and I have to get the garden beds ready.

August 03, 2007

Are you a draper or a drafter?

In design school the teachers always told us that some students are natural drapers and some are natural drafters. Some students work better with a pencil and paper and others work better with a piece of fabric on a form. I leaned toward the pencil and paper because I prefer to work with numbers. Draping was was more difficult because it seemed less precise. My brain couldn't wrap itself around the concept of turning a drape into a pattern.

Over time draping has become less difficult, but still a challenge. I am getting a good draping exercise by making a slip cover for my old couch. Newer couches have the over-stuffed arms that curve. My couch doesn't have this and I couldn't find a slip cover to fit. A custom cover is $$$. Why not do it myself (with help from a library book on slipcovers)?

I am draping the cover with a "muslin" of green broadcloth and an old sheet.

Creating a pattern for a sofa slip cover
I just draped the arm and will be moving onto the deck next. This couch has the added difficulty of being a sleeper sofa. We would never have bought a sleeper sofa in a million years but it was given to us and so we use it.

Draping a couch arm for a slip coverThis is the fabric for the couch, a great buy from Wal-Mart. Wal-mart carries upholstery fabric and the price is usually great. BTW, that is our gold rocker. Isn't it lovely?! Unfortunately, the style is too difficult to slipcover and will have to be re-upholstered by a pro.

Upholstery fabric

July 25, 2007

When do you grade sewing patterns?

Amanda left a comment/question on a previous blog about grading. I thought the answer deserved its own blog entry.
I have what is probably a stupid question. Do you do the grading before or after you add the Seam Allowance to the sloper? Part of my brain says before because you are likely to get a better line, the other says after as it would be easier. I am loving your blog, thank you so very much.
Amanda, not a stupid question at all. The only stupid question is the one not asked. There is a lot of confusion about grading and the difference between a sloper and a block. Let's throw some definitions out and then I'll answer your question.

Sloper - a basic fitting pattern used by costumers and home sewing enthusiasts. The pattern does not have seam allowances, which are added later. People who use slopers do all of their pattern making without seam allowances.

Block - A pattern used by fashion designers and pattern makers which forms the basis of future styles. A block is a perfected pattern that has seam allowances. During the pattern making process the seam allowances remain on the pattern.

Many people believe that using blocks (vs. slopers) is an advanced pattern making technique. It's not really. The pattern making process is no different when using blocks, except for not having to add seam allowances. If anything, it saves time in production settings. It is important for the pattern maker to know what the seam allowances are - which are usually drawn onto the pattern anyway. The exception might be CAD patterns which may or may not have the seam allowances drawn. My CAD patterns do not show seam allowances even though they are there. I do all of my pattern making with the seam allowances already on the pattern. Occasionally, I will turn the seam allowances off to check measurements or to match up seam lines of complex pieces. CAD has greatly simplified the manipulation of seam allowances.

Now to answer the question.... Grading should only occur after the pattern has been perfected and the seam allowances have been added. If you add seam allowances after grading you just add more work to your project and you could introduce errors. This is especially true in a factory setting.

Now in theatrical settings, I know this would never occur. A cutter (aka pattern maker) does their pattern making in the size they need and then adds seam allowances during cutting. If they need two sizes of the same style, they will grade the "slopers". Finally, they trace the pattern onto fabric and add the seam allowances while cutting. This system works in the theater but is not precise enough for apparel production.

July 03, 2007

A boy's shirt pattern fix for Butterick 6030 pt. 3

A boy's shirt pattern fix for Butterick 6030 pt. 1 is here
A boy's shirt pattern fix for Butterick 6030 pt. 2 is here
 
A continuation of my boy's shirt pattern fix....

4. Finish collar. Clip neck seam allowances near shoulder seams. Turn seam allowance of top collar under and push the remaining neck seam allowances into collar. Topstitch. Tack facing down along shoulder seams. Notice I included my care/content tag when I topstitched the collar closed.

Neckline finish for a shirt
5. Hem the sleeve. Attach sleeve to armhole flat. Close the side seam and sleeve. At this point I noticed the sleeve cap didn't match up to the armscye. So one more pattern fix to make - I made do for the sample.

Attach sleeve to shirt
At this point I decided not finish up the sample. Instead I put the shirt on the form to look at the overall proportions. The collar area looks nice and right on target.

Checking a shirt for fit
The overall proportion of the shirt still looks too big for a size 24 months. I didn't make any changes to the original pattern in body width or length and I should have. I will double check those measurements on my pattern and make adjustments. At this point, there is little of the original pattern left and I really should have just drafted my own pattern. The original Butterick 6030 pattern is heading to the trash. BTW, anyone like my two tone work room? I desperately need to repaint it.

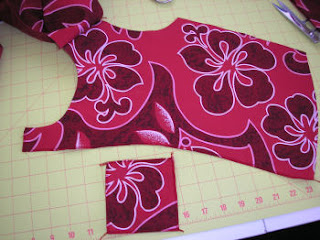
Hawaiian boys shirt

June 28, 2007

A boy's shirt pattern fix for Butterick 6030 pt. 2

A boy's shirt pattern fix for Butterick 6030 pt.1 is here

Well I spent a few hours working on this pattern and sewed up a sample. I decided to go ahead and do a style similar to the original. My sample is a basic shirt with a convertible collar. Once the patterns are completely worked out, endless style variations can be developed. So far I have corrected:
  • Neckline smaller
  • Reduced and reshaped front self-facing
  • Reduced seam allowances. 1/4" s.a. for the neckline, 3/8" everywhere else.
  • Drafted a new collar - a one piece collar that folds in half.
I thought it might be useful for my readers to see how I construct a simple, casual shirt. This is not a finely tailored shirt, by any means - just the basics to test the pattern. These steps are production-style but allow for use of home sewing machines. At this point, I assume the pieces have been cut and markings and notches have been transferred. BTW, I reduced the number of notches and only used two drill holes (could use chalk) for the pocket placement. Also, you'll notice I did not use any interfacing. Interfacing is often eliminated in children's clothing from budget to high-end clothing. Firmly woven fabrics may not need any stiffening. During product development test and see if you really need it.

1. Prep work - edge finish the the pocket edges and long edges of facing. Fold collar in half and stitch collar ends (called "close" in the industry). Sew shoulder seams.
Edge finish a pocket before attaching to front
Sew collar ends
2. Details. Turn and press collar. Use a pocket template and press pocket. Stitch pocket hem. Topstitch pocket to left shirt front. Edgestitch collar. I think collars look best edgestitched 1/8" from edge. Further away can look homemade - but depends on style.

Edgestitch collar
3. Attach collar. This looks more complex than it is. This fabric is hard to see but there are three notches on the collar. Two match up with the shoulder seam and one for the center back neck match-up points. Sandwich the collar between the front facing and neck (notches on shirt front indicate center front neck where collar starts and and another for the fold back of facing). Clip the top collar at the shoulder seam point a little less than the seam allowance depth 1/4". Stitch the collar on using a 1/4" seam allowance, flip the seam allowance of the top collar out of the way. Notice there is no grading and clipping (my least favorite thing to do).

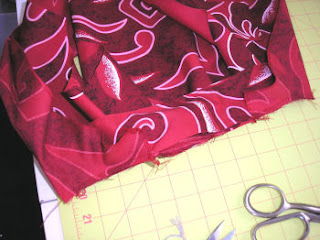
Attaching the collar to the neck edge
Tomorrow I'll show how to finish the collar, attach sleeves and give a review of the results.

June 13, 2007

Resizing Vintage Patterns versus Grading

Sewing pattern and notions

The same reader from the previous post also asked:
Also, I found some info on resizing vintage patterns http://www.sensibility.com/pattern/resizepattern.htm thought it might be of interest.
I checked out the link and I do like the website. However, Jenny's pattern resizing tutorial is mis-named. She actually is describing a grading process. It is not a very precise method, but perhaps it would work for a custom or one-time project. I would still encourage my readers to learn a better method, especially for preparing patterns for production.

The idea of re-sizing patterns implies there is an inherent sizing problem which should be solved. If you buy a commercial pattern and you need a longer waist, then you would resize the pattern by slashing and spreading it longer to the required measurement. Jenny does describe such a process at the end of her tutorial.

Jenny goes one step further and shows how to alter an adult pattern into a children's pattern. The method probably will work, but it will require too much fiddling. Why not take a basic block the size you need and draft the same style?

I don't think I am being too hard on Jenny. She does have a nice website. Just realize her perspective is geared more to costumers and others who don't want to be bothered with details.

June 11, 2007

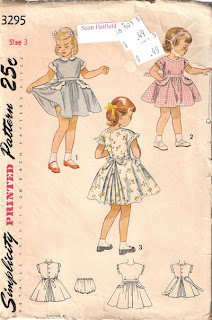
Simplicity 3295 and vintage pattern measurements

A reader asked a very interesting question

I have started sewing for my 20 month old son and some of his friends and was wondering if you have any experience with vintage patterns (1940's, 50's, 60's). Specifically I'm wondering if you have any thoughts on size variations. I'm sure you are familiar with the dramatic shifts in women's pattern sizes (the 1940's pattern size 12 is very different from the current pattern size 12)...I'm wondering if the same shifts occurred in children's sizes. Any thoughts you would be willing to pass on would be much appreciated!

This question was a little difficult for me to answer because I don't use home sewing patterns very often (not for children, anyway). They require too much work to correct. They have a lot of sloppy patternmaking. It is easier to pull out proven blocks and draft whatever style I want. I will buy a commercial pattern only when I have difficulty figuring out a more difficult design, such as a sleeper and then I only refer to it. I almost always draft my own patterns.

At one time, I thought a collection of vintage children's patterns would be pretty neat to have. I started collecting a while a go, but haven't added much to it. See, I don't actually look at the pattern pieces. Instead, I collect the patterns for design inspiration - in other words, I like the pretty pictures. I can draft patterns with the same style using my own personal blocks. This is one of the few vintage patterns I have from 1950.

Vintage Simplicity 3295 girls dress pattern

I liked this pattern because it has an unusual skirt, pleated fullness in back and a gathered front waist. The bodice has a built-in cap/kimono sleeve. Besides, it is cute!

Now the question of sizing differences between then and now is also a difficult to answer. I haven't really done the research to be able to supply a truly adequate answer. I checked the measurements on the back of this envelope against my collection of measurement charts and the 1950 measurements fall within an acceptable range of contemporary measurements. In fact, the body measurements for this pattern were a little larger than today's measurements. I found this surprising considering the extensive reporting about childhood obesity. Of course, this is one style, in one size, from one company. I don't know how other vintage patterns may measure up. The best thing, of course, is to measure your own child and compare the measurements with the pattern envelope charts.

One difference that may exist between vintage and contemporary patterns is the amount of ease, design and wearing. Styles from the 1960's may fit closer to the body versus styles from the 1980's. This may cause one to think the patterns from the 60's were made to fit smaller people versus larger people in the 80's. The reality is that the prevailing styles influenced fit. It is helpful to try and look at the patterns from the correct perspective. Unless you are striving for authenticity, it is worth the time to draft your own patterns.

I haven't really seen a "vanity" sizing shift in children's clothing that is comparable to women's clothing. US Children's sizes are based on age designations. If anything, the sizing has become more specific. The 1950's may have had one infant size and then start with toddler sizing as 1, 2, 3, etc. Now, infant sizing is broken down by age too -- 0-3M, for example. Measurements are derived from the average measurements of children in each age grouping. Some consumers become frustrated by this sizing system because their children may vary from the norm (not to mention every manufacturer sizes differently). They may have a 2 year old child that actually wears a 4T. Trying on multiple sizes of one style can cause frustration in a changing room, if parents even take the time to try clothes on.

European sizing is evolving to a more intelligent sizing system. The Europeans are basing their sizing on height and weight measurements, available on hang tags and labels. Body size measurements are broken down by age grouping too, but they are not given age designations. This concept enables the consumer to buy the most appropriate size regardless of the age of the child.

May 17, 2007

A Word on Handford and Children's Sizes


I have previously blogged about Jack Handford's book Professional Pattern Grading (I like this grading book!). I just graded my basic infant bodices using Handford's grading charts and I just wanted to pass on a few insights.

If you read my blog on children's sizing (Too Many Sizes!), then you will know that there is a lot of variety in how manufacturer's lay out their size ranges. Handford is not really any different. His sizing breaks down like this:

3M, 6M, 12M, 18M, 24M, 36M

You will notice that the 9M size is missing. A 9M is considered a half size between 6M and 12M. Some manufacturers include it and others skip it. After studying dozens of measurement charts, I tend to favor skipping it. Children grow really fast in the first few months of life, so there is no need to include lots of possible sizes.

Another thing to consider is his 24m and 36M sizes. His toddler sizes break down like this:

1, 2, 3, 4

Except for boutique/specialty shop stores, you don't really see toddler sizes denoted like this. Normally, the toddler range is 2T, 3T, and 4T (some throw in a 5T). Anyway, there may be some overlap between the infant and toddler sizes with your patterns. This doesn't mean you can grade all of the infant and toddler sizes together. You will still need an infant block and a toddler block. You may have some shaping differences between the two.

It took me some time to wrap my brain around his grading instructions. I could look at the diagrams and see that this was the type of grading done in the industry. Even computer grading takes it's cues from this method. The actual grading process, however, varies from computerized grading.

I am accustomed to working with all of the pieces nested together. I can select a grading point and enter in the X,Y changes. It really is pretty simple. Handford has you grade one size at a time. After grading one size, you cut it out and use it to grade the next size. Precision is absolutely key because mistakes gradually increase with each size. I eventually got the hang of it and found it to be pretty easy. Once I had all of the sizes, I nested them on top of each other and I could see how well it worked. And it did work well.

So now I have two sets of infant bodice patterns using the Handford method and an adaptation of Aldrich's measurement charts. I am going to compare the two to see which I like better. So far, there doesn't seem to be too much disagreement between them. I am also trying to decide if I should add in a 9M. Right now, I am leaning toward Handford.

April 25, 2007

Neck Opening Circumference

Please note: Body measurement charts for infants which include the neck circumference measurement are now available in my book The Essential Guide to Children's Clothing Sizes, available on Amazon.

Libetty left a comment on a recent blog entry and I think the answer deserves its own blog.

So I have a sizing question that you may be able to answer... What is the minimum neck opening circumference that a child needs to get a garment on over their head? I've always thought that it was 18". Is this correct???
Babies are very interesting. Most babies have the head circumference that they will have as adults. There is some growth that occurs between newborns and older babies as the bones in the skull begin to fuse and the head takes shape. Other factors that contribute to head size are genetics and weight. A newborn baby's head circumference may start as small as 14 inches but grow to about 20 inches by age 2. Proportionally, babies appear top heavy because the head looks too big in comparison to the rest of the body.

When designing clothing and patterns for babies, there are some other considerations. Babies do not dress themselves. This means someone else must be able to reach into a shirt, for example, and comfortably pull it over the head. With a dress, you have to reach down through the neck and pull a dress over the hips and ultimately over the shoulders. Some degree of space must be included to allow for ease in dressing (as quickly as possibly too!).

The recommended head opening for children's clothes is 20 inches for all infants and 21-22 inches for toddlers and up. This is a minimum measurement. Additional ease may be required depending on the fabric and/or style. This recommendation comes from my experience working with big box retailers - and they all seem to agree on this point. Over the years, I have seen that this is the measurement that is actually needed. BTW, this measurement refers to the extended neck measurement (see pictures below). There is no US government regulation that I know of - this is an industry standard. You can measure lots of product yourself to see most things follow this guideline.

Incorporating 20 inches into a neck circumference can be very difficult. The assumption is made that the neck circumference of the pattern must meet 20 inches. A neck circumference on a baby is 12-14 inches (measurement taken at the base of the neck). If your pattern has a neck circumference of 20", then your garment will probably fall off. The extra girth needed to meet the extended neck circumference can be added by the addition of a front or back placket, zipper, button placket, lapped shoulders, elastic, or stretchy neck ribbing. In other words, make the neck of the pattern where it should be and add extra length/girth somewhere else.

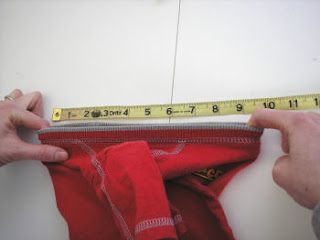
Here are few pictures of me measuring the extended neck circumference of a few different styles. Please note, I used a tape measure because it shows up better in the pictures. You should probably use a flat ruler instead. Plus, DH was taking the pictures off to the side, so it appears that I am not lining things up right, but I am. To measure the extended neck circumference, place one finger in the center front neck and another in the center back and stretch. Double the measurment from the ruler and you will have the extended neck circumference. If drafting a pattern, you can measure the pattern neck circumference plus any additional opening. It is best to double check a measurement after a garment is sewn up because things change.

Measuring a neck opening for a child's blouseThis shirt has an elastic neck. Stretch the elastic as far as it will go without damaging it. You can see this neck measures about 22" extended.


Measuring a neck opening for a child's polo shirtThis infant polo shirt has a front button placket. You can see this shirt stretches to 20".


Measuring a neck opening for a child's t-shirtThis infant t-shirt only stretches to about 18". It is a bit tight IMO. Part of the problem is the stretch of the ribbing and also how it is stitched to the neckline. The topstitching prevents stretching beyond this point and could actually break if I take it any further.


Measuring a neck opening for a girls dressTo measure the neck opening of a dress, measure from the center front neck to the bottom of the skirt placket opening. The extended neck measurement needs to be larger because the waistline needs to either slip over the head or the hips easily. This measures about 26 inches.

April 18, 2007

I like Jack Handford's book Professional Pattern Grading!


You know you might be a little strange when you do a happy dance after receiving a new book in the mail on pattern grading. That was certainly me yesterday when I received Professional Pattern Grading by Jack Hanford in the mail. This book has long been on my Amazon wishlist and I finally bought it for myself.

This is the BEST book on pattern grading. If you own the Price/Zamkoff book, just stuff it in a corner and get this one instead. The explanations are very clear and complete. And yes, this is how it is done in the industry. It was so gratifying to see that what I have learned on the job, some of it on my own, IS how it is done. The other book is too complex and ignores men's and children's styles completely. Jack Handford covers all three categories very well. And it is so nice to see that children have not been ignored. He covers infant, toddlers, boys, girls, and juniors.

This book describes manual grading with a paper and pencil. Still the concepts can be applied to computerized grading. Most of my grading is done on the computer and I will be using this book as a reference.

In fact, this book is so good, that I will not be doing my last installment on my grading series (a pictoral demo). Handford demonstrates the process well enough, there is no reason for me to duplicate it. Can I say buy the book? I will probably blog more about grading in the future, so no worries there.

I will be going back over my infant pattern/body measurement charts to see how they compare with Handford's grading. I probably will be making some adjustments. I am not too far along on developing my own infant/toddler patterns, so this is a great time to go back over them.

March 21, 2007

Big Box Technical Designers

Tape measure
Several years ago (was it really that long ago), I learned a very important lesson. I was working on a private label program for a Big Box retailer, company X. The technical specs they sent us were fairly straight forward. There were a few wonky measurements, but we forced our samples to spec.

As a patternmaker/pseudo tech designer, working on a private label program for a large account, I worked under the assumption that the BIG company knew what it was doing. Their specs were gospel and they could not be adjusted. You meet spec or you risk losing the account. This was true for another private label program for company Y. However, company Y's specs were superior (in other words they worked out of the box).

With any private label program, you take a selected sample and adjust the patterns to meet spec. You re-sew the sample in production fabric and submit it to the company's technical design department. The technical designers will go over every measurment and construction detail. They have the power to cancel the order if you don't meet spec. Usually, the first sample is rejected and you have to submit a second with corrections. (This is especially true if this if the first time on a new private label program). Needless to say, there is a lot of pressure to meet spec the first or second time. There is a lot riding on these samples.

So we submit our sample (with forced spec conformity) to company X. We received back our audit reports with required corrections. The weird thing was that the technical designers changed some of the required specs (now some were really wonky) and they insisted on construction/pattern changes. The construction/pattern changes would have affected several things, especially allocations and labor costs. Private label programs operate on slim margins, and our in-house manufacturer would not agree to the changes. The measurement issues didn't make sense, proportionally.

What to do? Here was a high dollar order and we wouldn't be able to meet spec. The only way to solve the problem was to call the technical designer at Company X and explain the situation. I expected them to reply, "Meet spec or we cancel the order."

To my surprise, the technical designers agreed to allow some of our measurments and construction details to pass. I don't think I explained too much. It was more like, "It would be easier for us to do things this way."

I learned something very valuable that day. If something isn't working, present an alternative - it just might be acceptable. I also learned that the technical designers for Big Box retailers don't know everything.

The reason this experience came back to me is because I am facing a similar situation, except I am the technical designer on the other end. As part of my consulting, I am helping to develop a new style in China. It is a difficult style, so I expected the first samples to have a few problems. Unfortunately, the samples had more than a few problems (some minor, some not). I wish the Chinese factory understood that it would be ok to present an alternative. I could see they struggled to meet my spec, so they forced it (and didn't really succeed). Not sure how this will be resolved....

January 26, 2007

Grading Stack Points

Grading stack point
I am going to try and get back to my grading explanations today. My head is a bit fuzzy after a long week and an especially late night. To review, just click on the grading category link to the right. Click on the picture for a bigger view.

The diagram on the left shows three possible grading examples. This is a basic front bodice pattern piece that is folded in half. Each example is called a nest meaning each size is stacked on top of each other from smallest to largest. The stars represent the point of origin for each grade. The numbers at each point correspond to a grade rule. I will briefly explain each of these items below.

By laying your graded patterns on top of each other in a nest, you can easily see if your pattern is grading proportionally. The stars not only show the point of origin, but the stack point. You can stack your patterns in three general areas and have the grade look different each time. In computerized grading, you can move your stack point anywhere you choose and the grading software will update your grades automatically. For consistency's sake, it is important to determine before you start grading where your stack point/grading point of origin will be.

Each stack point will cause your grading to look different. Most of the grading world uses Example 1. The point of origin is placed in the center of the pattern pieces and growth occurs in all directions. In Example 2, the stack point is placed at the center front waistline and growth occurs to the side and upwards to the neck. Example 3 is the same result as 2, but placed at the center front neck.

I prefer Example 3 and all of my patterns are generally graded this way. It makes the most sense to me and the grade rules are simpler. Most of the proportional changes between sizes occur this way in nature. A person's neck doesn't actually move upward in each size, but rather their waist moves down. Perhaps this is just how my mind works. In any event, you can choose which ever point makes the most sense to you.

I have been using the term grade rules rather loosely in my previous grading articles. Grade rules refer to measurement charts broken down into grade steps. Grade rules can also refer to the actual change that occurs at a point. In the drawings above, I have numbers assigned to each point. Those numbers can refer to a grade rule. For example:

Rule X,Y changes
  1. 0, 0
  2. 1/8, 1/8


You can create a chart like the one above, if you prefer. This method is used in computerized grading and each grade rule is placed in a grade library (specific to a size range). Once a style is ready to grade, you simply apply a rule to each point and the pattern pieces will stay graded regardless of pattern changes. It is less helpful when hand grading and may make things more complicated. To be honest, I rarely use grade libraries when computer grading. They can speed things up if you have consistently similar styles. However, things always need tweaking, so I prefer to manually manipulate the grade at each point. Most grading software will allow you to assign a grade rule from a library and still manually edit the point. The computer will begin a grade command by starting with rule #1 and working around through each point. Rule 1 is almost always set as (0,0) and it should always be your stack point.

When hand grading, you should start your grading at your stack point. Once that is set, you then move to the next point, say the neck-shoulder point and mark all of the changes there. Work counter-clockwise (or vice versa, if you choose), around to each point. Setting up a consistent method will help you keep things straight.

Ok. Enough explanation. Decide on your stack point and get ready to grade.

January 18, 2007

CAD 101 published at Fashion Incubator

I am being a lazy cross-poster today. Part One of my co-written articles on CAD can be found at Fashion-Incubator (part two should be published January 19th). My co-writer is Angela from Eve and Ellie. Check out Angela's website - it is beautiful! Kathleen did a great job pairing us up. Not only was Angela great to work with, but we both work with girl's special occasion clothing. My current special occasion work can be seen at One Small Child. Most of my work is technical design, but you can see some of my designs in the mix.

If there is interest, I can expand on some of my CAD drafting, grading techniques, pattern naming, organization, etc. In the mean time I am working on the back-end of my store, which is taking a lot of my time. I have been reading up on CSS, PHP web design and database management (for coding geeks only!). I decided that to truly get the website I want, I need to switch my store manager to something new. This is all behind the scenes and is in the building and testing stages. My current store continues to work and is secure. The new store will be 100% more powerful!

So my grading projects and boys' shirt pattern revision is still in the works, just slowed down. I have my base pattern graded up to my needed size 24M. And guess what! The neck measures a little over 12"! Now it is only a matter of applying that neck to the shirt pattern.

In other news, the consumer product safety commission has issued recalls on more children's jewelry, rattles, teethers, and magnetic toys. Be sure to read this page!

January 11, 2007

Sizing Studies for Children

A few weeks ago, a new mother complained about the variation in infant clothing sizes. She explained that her 12 month daughter wore clothes ranging in size from 6m to 18m. Some marked for 12 months were either too big or too small. Finding clothes that fit was a matter of trying things on a fussy baby.

She stated, "You can't trust what the size tag says."

Kathleen at Fashion-Incubator wrote an article about problems with sizing studies, especially for women. Children's sizing studies present some of the same difficulties. Children's sizing is complicated by the fact that children grow and at different rates. Ethnicity plays a part in proportions, weight, and growth rates. As a technical designer, I feel that I am only taking my best guess when drafting patterns. I have to synthesize about a dozen different size charts and methods to come up with something that works and fits! I firmly believe that even infant children deserve clothing that fits.

My concern with most measurement charts and sizing studies are that they are minimally useful for patternmaking for infants. Many measurement size charts either completely ignore or present limited info for infant sizing. The Armstrong book starts her charts at size 2/2T (some of her measurements are a bit funky too). The Gloria Mortimer-Dunn book is the same way. Childrenswear Design, has some basic information for infant patternmaking although the information is not complete. The best presentation of measurement info is from Winifred Aldrich in her book Metric Pattern Cutting for Children's Wear and Babywear: From Birth to 14 Years .

I have drafted basic blocks using Aldrich's charts and instructions. They turned out ok, but definitely needed refinement for style and fit. I thought the basic, fitted blocks need a little more ease and a lower neck. The flat blocks needed a better armhole shaping. Despite that, with some tweaking, you could have a nice set of infant blocks to work with. Part of my difficulty could be that the British are accustomed to a closer fitting block and the metric system. I had to wrap my head around metric conversions, which probably introduced some inaccuracies.

I haven't talked much about measurement charts available from ASTM. This is because I have not purchased a set of charts from them. I don't have the need at this point. Other government studies are interesting, but don't contain enough of the measurements needed to draft basic blocks. Growth charts and retail size charts (and a few in patternmaking books), list infant sizes by pounds and lengths. Those are interesting for comparison and not useful for drafting patterns.

I am not sure what new childrenswear designers are to do. Most companies develop their own measurement charts and some are better than others. Getting those first, good bodice block patterns are critical because every future design is based off of them. It may be easier to drape your first blocks off of dress forms rather than drafting from measurements. Or maybe a combination of both. This sizing study problem could explain why infant sizing is all over the place.

Over the years, I have settled with basic patterns that have proven to work. They continue to be modified for improvement and someday they will be what I hope is a great pattern.

Disappearing Ink Pens for the Sewing Room

These disappearing ink pens are among my favorite tools. I go through several of them every year. I use them to trace around a pattern directly on to fabric for cutting. I also use them to mark stitching lines like darts, fly-fronts, or even quilting lines. It is great for marking match points in the middle of a piece. I rarely make tailor tacks or sew-baste thread markings.

In this picture, you can see how well the line shows up, even on difficult to mark fabrics like blue. This drawn line came from a pen that is nearly dead (I use them until they are dead). It works on most light to medium colored fabrics. It has difficulty with anything that is pink, red and of course black. For those colors I whip out chalk pencils or soap remnants (soap usually works better). I have used these pens on a variety of fabrics from silks, satins, laces, flannels, broacloths, to denims. I use them on personal projects and in industry settings.

The back of the package says to test on fabrics before using. I have had very few problems with the ink not disappearing. If I were to topstitch a fly, I may test it. The last pair of pants I made, the fabric had a finish on it that prevented some of the ink from disappearing. But it all came out in the wash. I wouldn't iron over the ink until it has completely disappeared - the heat/steam from the iron may set it. It would be rare for the ink to become permanent. Most of my ink lines are from tracing around pattern pieces, so they would never be seen anyway. The package states the ink disappears within 24-72 hours. I find it disappears much faster than that, especially when exposed to air. The age of the pen also determines how long the mark will last.

I have difficulty finding this exact pen in the fabric stores. They carry disappearing ink pens, but they don't work as well. For some strange reason fabric stores (the ones near me) carry Dritz marking pens, but not this one. This pen is from Dritz and I can be ordered from Amazon.