Showing posts sorted by relevance for query sizing. Sort by date Show all posts

February 10, 2015

Size standardization for clothing

In academic circles there is the idea that we need one measurement and sizing standard to solve all our fitting problems. A top down approach with no allowance for variation. Customers often complain that manufacturers have no idea what they are doing because nothing ever fits. Manufacturers face an enormous challenge in trying to interpret size specifications while at the same time meeting the needs of their customers. The more I read about sizing the more chaotic it seems. At the end of the day there is more than one way to look at size standardization, and I think only one battle to fight.

One standard to rule them all

Yes, the idea that one standard can be established for everyone. By forcing compliance we will have peace on earth, and yes, our clothes will fit! Considering the variety of shapes and sizes in the United States alone, the idea is really a fantasy.

  • One standard guarantees that some of the population will not have any clothes that fit. One could argue this situation exists today, so why not try one standard. With no allowance to adapt to fit the wide range of shapes and sizes, then outliers will never have clothes that fit.
  • Our population is constantly changing. The most recent sizing study revealed that we are taller and weigh more than we did in the past. One standard would quickly become outdated.
  • Sizing studies are very expensive and labor intensive. Studies are not done frequently, so manufacturers will always be behind what is happening in the real world.

Loosely conforming to a standard while yet adapting to meet a customer's need.

Even if one standard to rule them all is unrealistic, we still need a standard. ASTM and the latest Sizing USA study have provided us with a standard that any manufacturer can use (for a price, of course). These measurement and sizing specs can act as a guide, a place to start. As a manufacturer develops their customer profile, they can adapt these standards to meet the needs of their customer.

Over the years, it's important to compare your product against these standards. I've seen patterns and sizing drift from these standards naturally through errors. These errors are not intentional, they just happen and can easily pass from one style to the next. So a careful study and comparison can bring things back. This includes measuring fit models and comparing them against the standard and analyzing customer returns due to fit issues. 

In-house size standardization

Once a sizing standard is established for a brand, it is important to adhere to that standard during product development. As an example, all new pants styles have the same finished length and waist sizes as specified. Variations in fit can come from multiple sources due to fabric variations (or problems), construction issues (taking too big/small a seam allowance, cutting errors), or variations in a pattern. You have to be careful not to draft a pattern from scratch every time. Pattern makers in the industry will use the patterns from an already proven style to develop the new style. This practice ensures consistent fit across styles. A quality control process through each step of development and production is necessary to find problems before they become big ones.

A few words on vanity sizing

Vanity sizing implies that a manufacturer wilfully chooses to ignore a size standard and relabel a size smaller than it actually is. I do not believe there is a vast conspiracy to do this intentionally. Instead I think manufacturers are trying to meet the needs of their customers while trying to conform to a standard.

*This blog entry was inspired from my reading in the book Sizing in Clothing and more specifically the article Sizing Standardization by K. L. LaBat. I made very few notes on this article and don't remember much of what I read. I did make a note that LaBat tried to prove the existence of vanity sizing by studying children's age-based sizing. I thought the argument was rather weak.

January 06, 2015

Book review : Sizing in clothing


This is one of the books I ran across while working on my own book on grading. Sizing in Clothing (Woodhead Publishing Series in Textiles) is a collection of scholarly papers edited by S. P. Ashdown on the current (as of 2007) issues related to sizing ready-to-wear clothing. It is a dense read and it took me every bit of time I had with the book to get through it. I'm glad I read it.

The audience for this book is very narrow in scope. This is not a book for someone starting their own apparel line. Do not run out and buy this book unless you have a real interest in sizing theory - it will not help you figure out the sizing for your line. If you did want to buy it, the book runs in the $200-$250 range. I obtained a copy through inter-library loan, which also proved a bit of a challenge. Only a handful of college libraries carry a copy they are willing to loan outside their library system. So I had to read this book on a deadline and handle the book with kid gloves over the holidays.

Some technical designers, pattern makers, and graders may be interested in some of the included articles. Over the next several weeks, I will post a review/discussion on some of the topics covered. My two favorite articles were on the History of sizing systems and ready-to-wear garments by Winifred Aldrich and Military Sizing. There are other really great topics about sizing and target markets, size standardization (a hot topic!), apparel production and sizing, and of course, pattern grading.

Because each chapter is written by different authors, it's hard to give a review of the book as a whole. Some articles were very well written and easy to read, such as my two favorites listed above. Others are written in a formal academic style which is very difficult to read and even more difficult to ferret out what the author is trying to say. As a collection, the articles cover nearly every angle.

Since the articles are written mostly by academics, there is a bit of a disconnect with those working on the front lines (the exception being the Military sizing article). It would be easy to characterize the writers as sitting in their academic ivory towers telling us what to do because they "know better". Embedded in many of the articles is criticism aimed at the industry for assumed sizing problems that the industry either "created" or refuse to solve. While some of the criticism is unfair in my opinion, the information they provide us is still valuable. I'll discuss some of this later in the individual reviews. Despite all of this, I'm glad there are people out there willing to think about these problems, propose solutions, and test them out.

April 18, 2006

Sizing Up Children and shopping difficulties

In the March 2006 issue of Redbook magazine, Melissa Schweiger attempts to explain the difficulty of creating women’s fashion. The disparity in body shapes, weights, and sizing is an evolving and complex task. Fashion companies each create their ideal customer and manufacture clothing based on specific sizing. But all too often women fall in between sizing or have different proportions. Many women have to try on a mountain of clothes to find something that finally fits.

Schweiger makes some interesting points about the changing shape of American women. Many of these ideas also apply to children’s fashion and sizing. Below, I highlight some key points:

Arbitrary Sizing

Each manufacturer develops their own sizing system. In women’s fashion the sizing numbers are relatively standard. For example, the sizes run 2, 4, 6, 8, 10, 12, and so on. In infant clothing, the sizing varies from label to label. One place will size 0-3, 3-6. 6-9, 9-12, 12-18, 18-24. Another will size 0-9, 9-12, 18-24. Some simply place a label with corresponding weight such as 19-26lbs. Stores like the Gap hand out info cards to help the consumer determine the right size.

After determining one size for one label, you will be out of luck at the next store. A 6-month-old baby can easily wear any size labeled 6-18mo. The added difficulty of fitting a baby is that they get fussy. If you can’t stand trying on 10 pairs of pants, imagine an infant after one pair.

Changing Shapes

According to this article, American women have changed. They are a bit taller and heavier. American women are more ethnically diverse. The challenge for manufacturers and designers is to design a product that fits a more diverse range of people. Some are making attempts, some refuse.

The general consensus among children’s fashion professionals is that children are changing along with their parents. They are taller and heavier, and more ethnically diverse. Childhood obesity and inactivity play a part in changing shapes.

The problem is children’s clothing manufacturers cling to their 30+ year old size charts. They protect their sizing information like a trade secret (not uncommon in every segment of the fashion biz). And while major studies are being done on men and women, they are not being done on children. (If I am wrong, please let me know).

Shopping for children who fall outside of the norm has tremendous difficulty. Plus sizes for children are not stocked in many stores, despite the apparent increasing demand. And if there is truly a demand for children’s plus sizes, it is hard to gauge. Children in this category move to adult sizes much more quickly.

Overall, this magazine article was an interesting review of the difficulty faced by clothing manufacturers. Well worth the read if you have wondered why you can’t find anything that fits.
Additional ideas and fitting information can be found at http://www.fashion-incubator.com.

June 11, 2007

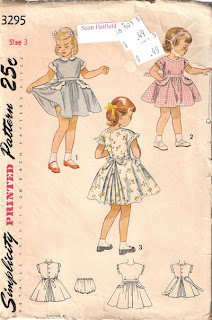
Simplicity 3295 and vintage pattern measurements

A reader asked a very interesting question

I have started sewing for my 20 month old son and some of his friends and was wondering if you have any experience with vintage patterns (1940's, 50's, 60's). Specifically I'm wondering if you have any thoughts on size variations. I'm sure you are familiar with the dramatic shifts in women's pattern sizes (the 1940's pattern size 12 is very different from the current pattern size 12)...I'm wondering if the same shifts occurred in children's sizes. Any thoughts you would be willing to pass on would be much appreciated!

This question was a little difficult for me to answer because I don't use home sewing patterns very often (not for children, anyway). They require too much work to correct. They have a lot of sloppy patternmaking. It is easier to pull out proven blocks and draft whatever style I want. I will buy a commercial pattern only when I have difficulty figuring out a more difficult design, such as a sleeper and then I only refer to it. I almost always draft my own patterns.

At one time, I thought a collection of vintage children's patterns would be pretty neat to have. I started collecting a while a go, but haven't added much to it. See, I don't actually look at the pattern pieces. Instead, I collect the patterns for design inspiration - in other words, I like the pretty pictures. I can draft patterns with the same style using my own personal blocks. This is one of the few vintage patterns I have from 1950.

Vintage Simplicity 3295 girls dress pattern

I liked this pattern because it has an unusual skirt, pleated fullness in back and a gathered front waist. The bodice has a built-in cap/kimono sleeve. Besides, it is cute!

Now the question of sizing differences between then and now is also a difficult to answer. I haven't really done the research to be able to supply a truly adequate answer. I checked the measurements on the back of this envelope against my collection of measurement charts and the 1950 measurements fall within an acceptable range of contemporary measurements. In fact, the body measurements for this pattern were a little larger than today's measurements. I found this surprising considering the extensive reporting about childhood obesity. Of course, this is one style, in one size, from one company. I don't know how other vintage patterns may measure up. The best thing, of course, is to measure your own child and compare the measurements with the pattern envelope charts.

One difference that may exist between vintage and contemporary patterns is the amount of ease, design and wearing. Styles from the 1960's may fit closer to the body versus styles from the 1980's. This may cause one to think the patterns from the 60's were made to fit smaller people versus larger people in the 80's. The reality is that the prevailing styles influenced fit. It is helpful to try and look at the patterns from the correct perspective. Unless you are striving for authenticity, it is worth the time to draft your own patterns.

I haven't really seen a "vanity" sizing shift in children's clothing that is comparable to women's clothing. US Children's sizes are based on age designations. If anything, the sizing has become more specific. The 1950's may have had one infant size and then start with toddler sizing as 1, 2, 3, etc. Now, infant sizing is broken down by age too -- 0-3M, for example. Measurements are derived from the average measurements of children in each age grouping. Some consumers become frustrated by this sizing system because their children may vary from the norm (not to mention every manufacturer sizes differently). They may have a 2 year old child that actually wears a 4T. Trying on multiple sizes of one style can cause frustration in a changing room, if parents even take the time to try clothes on.

European sizing is evolving to a more intelligent sizing system. The Europeans are basing their sizing on height and weight measurements, available on hang tags and labels. Body size measurements are broken down by age grouping too, but they are not given age designations. This concept enables the consumer to buy the most appropriate size regardless of the age of the child.

January 11, 2007

Sizing Studies for Children

A few weeks ago, a new mother complained about the variation in infant clothing sizes. She explained that her 12 month daughter wore clothes ranging in size from 6m to 18m. Some marked for 12 months were either too big or too small. Finding clothes that fit was a matter of trying things on a fussy baby.

She stated, "You can't trust what the size tag says."

Kathleen at Fashion-Incubator wrote an article about problems with sizing studies, especially for women. Children's sizing studies present some of the same difficulties. Children's sizing is complicated by the fact that children grow and at different rates. Ethnicity plays a part in proportions, weight, and growth rates. As a technical designer, I feel that I am only taking my best guess when drafting patterns. I have to synthesize about a dozen different size charts and methods to come up with something that works and fits! I firmly believe that even infant children deserve clothing that fits.

My concern with most measurement charts and sizing studies are that they are minimally useful for patternmaking for infants. Many measurement size charts either completely ignore or present limited info for infant sizing. The Armstrong book starts her charts at size 2/2T (some of her measurements are a bit funky too). The Gloria Mortimer-Dunn book is the same way. Childrenswear Design, has some basic information for infant patternmaking although the information is not complete. The best presentation of measurement info is from Winifred Aldrich in her book Metric Pattern Cutting for Children's Wear and Babywear: From Birth to 14 Years .

I have drafted basic blocks using Aldrich's charts and instructions. They turned out ok, but definitely needed refinement for style and fit. I thought the basic, fitted blocks need a little more ease and a lower neck. The flat blocks needed a better armhole shaping. Despite that, with some tweaking, you could have a nice set of infant blocks to work with. Part of my difficulty could be that the British are accustomed to a closer fitting block and the metric system. I had to wrap my head around metric conversions, which probably introduced some inaccuracies.

I haven't talked much about measurement charts available from ASTM. This is because I have not purchased a set of charts from them. I don't have the need at this point. Other government studies are interesting, but don't contain enough of the measurements needed to draft basic blocks. Growth charts and retail size charts (and a few in patternmaking books), list infant sizes by pounds and lengths. Those are interesting for comparison and not useful for drafting patterns.

I am not sure what new childrenswear designers are to do. Most companies develop their own measurement charts and some are better than others. Getting those first, good bodice block patterns are critical because every future design is based off of them. It may be easier to drape your first blocks off of dress forms rather than drafting from measurements. Or maybe a combination of both. This sizing study problem could explain why infant sizing is all over the place.

Over the years, I have settled with basic patterns that have proven to work. They continue to be modified for improvement and someday they will be what I hope is a great pattern.

June 26, 2006

Too many sizes!

I am currently in the process of rewriting this article for another project. A lot of what I wrote in 2006 is a reflection of my thinking back then. I have since refined my thoughts which will be published later. So please consider this article a bit out-of-date.

One designer asked me two fundamental questions. At the time I wasn't sure how to answer them. The first is really a grading question and the second a sizing standard. Both are related. To keep things simple, I will start with the sizing standard question.

"Why are there so many sizes for children's clothing?"

Because children grow. Ok. That is the easy way out. The truth is that children grow and manufacturers try to have a range of sizes to choose from.

The other half of the question was, "Can we have fewer sizes?"

This is a much more complicated answer. Because children's clothing can cover such a wide range, it is possible to have a lot of sizes. One company I worked for produced clothing from Preemie to a size 16 - not including the plus sizes. When you break this down it looks like this:

Preemie, NB, 3M, 6M, 9M, 12M, 18M, 24M, 2T, 3T, 4T, 4, 5, 6, 6x, 7, 8, 10, 12, 14, 16.

This is a whopping 21 sizes! This complicates bookkeeping and sales information incredibly. If you create a style in one colorway, then each size will have its own SKU (stock keeping unit). If you add a colorway, then each size in this style can have two SKU's - one for each color. The company wanted to try and reduce the number of SKU's each season. This particular company produced a new line every 4 months which consisted of dozens of new styles. Thinking about it can give anyone a headache.

To reduce the number of sizes, you have to either combine some of the sizes into ranges and eliminate some duplication. The duplication is the easiest to see first. There is very little difference between a 24M and a 2T. A 24 month old child is essentially a 2 year old. The T simply means that ease is added to the pant area for a diaper.* Most 24 month old children and 2T children are still wearing diapers, so there should little to no difference in the patterns there.

*I'm not sure where the idea that the T in the size 2T implied the size included diaper ease. I repeated this idea because it was all I knew at the time. After a lot of research, I now believe this idea is a myth that has been perpetuated around the internet. I have found no size study information that supports this idea. Rather it has become a standard custom to refer to toddler sizing in this way. As a pattern maker I always included ease for a diaper in the toddler sizes because they wear diapers! The ease is not much more than what is needed for wearing pants anyway. Diapers do not add much bulk these days. Perhaps in years gone past in the age of cloth diapering, it was more of a concern.

The other likely duplication is the 4T and 4. Again these sizes overlap with only a slight difference in the pant area for a diaper. Most four year olds are potty-trained, although it is possible that some are not. In any event, if you manufacturer girl's dresses, this is another area where sizes could be combined. Some companies have started putting out a 5T, but it would be unusual to find a five year old wearing a diaper.

The next size duplication looks like the 6 and 6x. In this case, there is a fitting difference introduced. There should be little girth difference in the patterns, but there will be a length difference. A 6x is a taller size for a 6 year old. Some retailers combine the 6x with a 7. This is where it would be important to know your customers before eliminating or combining sizes.*

 *(Please note that this paragraph has been modified. I made a big assumption that was just wrong stating that the size 6x is a plus size version of the size 6. This isn't true. It is a taller version of the size 6. In any event, the paragraph above has been edited with the correct information).

So now our sizing looks like this:

Preemie, NB, 3M, 6M, 9M, 12M, 18M, 24M/2T, 3T, 4T/4, 5, 6, 7, 8, 10, 12, 14, 16.

And this is where I have to interject. Retailers, and especially big box retailers, do differentiate the sizing of the patterns on the sizes we just combined. A 2T is just a little bit bigger than a 24M, even though it really shouldn't be. Consumers have become accustomed to this type of sizing system and so have the technical designers in the business. In other words, don't expect any big changes anytime soon. This proposal is a way to simplify things. You are more likely to find a simplified sizing standard in boutique or specialty stores.

Ok, back on track now. The next step is to create a range of sizes. This is simplest in the infant sizes and another grey area. Every major manufacturer has come up with their own size range break-down, and it really is all over the place.
I really like how JcPenney has broken down their infant size range:

Newborn, 0-3M, 6-9M, 12M, 18M, 24M/2T

The nice thing about this sizing standard is that there are no overlapping of sizes.
Some companies will create a range like this:

Newborn, 0-3M, 3-6M, 6-9M, 9-12M, 12-18M, 18-24M

As you can see, there is a lot of overlapping. This could cause confusion for a customer because it is difficult to pick just the right size range. Also, this doesn't reduce the number of sizes carried.

If we eliminate the newborn and preemie sizes and use the size range from JcPenney, we would get this:

0-3M, 6-9M, 12M, 18M, 2, 3, 4, 5, 6, 7, 8, 10, 12, 14, 16.

If you look carefully, you will see that I eliminated the 24M size and the T's on the 2, 3, and 4. This is where you have to decide how the size will appear on the care/content tag or hang tag. It would be best not to confuse customers - keep things simple and logical here.

You will also notice that there seems to be a size missing in the infant sizes. The size 6-9M is often combined because either the 6M or the 9M is considered a half size between the 3M and the 12M. This is obvious when you study measurement charts, so just take my word on it for now.

The other thing to consider when generating a size standard is the patternmaker/grader. The size 0-3M, for example can be created in one of two ways. The measurements of the Newborn and 3M could be averaged out or the patternmaker could just make the patterns a true 3M. In order to fit the most children, it is best to make the patterns fit the high-end of the range. In our example, the patterns would be made in a 3M. The clothing will fit loose on the small end of the range, but kids grow fast. The only exception might be sleepwear which needs to fit snug to the body in all of the size ranges. This is another place where you need to know your product and customer well.

By following this example, we have gone from a whopping 21 sizes to 15! While this still creates a lot of sizes, it is so much simpler and easier to understand.

0-3M, 6-9M, 12M, 18M, 2, 3, 4, 5, 6, 7, 8, 10, 12, 14, 16.

The next question to address is the grading question. And that will have to wait for tomorrow.

January 27, 2015

Creating sizing systems for clothing

This is a continuation of my review of Sizing in Clothing. The previous blog entries are History of Sizing, and the Book Review.

Vintage tape measure
By Downtowngal (Own work)
[CC BY-SA 3.0], via Wikimedia Commons
What does it take to create a sizing system? We often taken for granted a size chart on a retail website or print catalog. And when something doesn't fit, it's easy to blame the size system used by the manufacturer. And we've all been there. Shopping for blue jeans or a swimsuit causes a lot of anxiety and stress as we go through more than one size to find something that fits. A. Petrova discussed all of the variables that go into making those size charts that help you select the right size in the article Creating Sizing Systems found in the Sizing in Clothing book.

So what does it take? The first big step is to measure a population and then to divide that population into various body shapes such as Misses, Petites, Tall, Plus, etc. Each category is defined by certain control dimensions such as height, weight, waist, chest, hips, or whatever is considered the key dimensions. Usually there are 3-4 key body measurements. These kind of measurement studies are expensive and are usually undertaken by government, universities, and trade organizations.

Next, each category is subdivided into sizes contained within a size range. Each category is labelled a size designation. It could be Small-Medium-Large, or numbers such as 2, 4, 6, 8, 10. These size labels are meaningless until associated with a set of body measurements. (We could get into a discussion of vanity sizing here but it really doesn't matter what you call a size. It's the underlying body measurements that are key). In the US, we are accustomed to knowing what size to start with when shopping without knowing our body measurements. In the EU, there are similar difficulties though there has been some push to adopt the centilong system. This system identifies a size by height with some corresponding girth measurements. Not all European manufacturers have done this and some are as inconsistent in application as their American counterparts.

A. Petrova continues the article with some ideas on how to develop size systems or charts based on garment styles versus just body measurements. The biggest disadvantage to this idea is that the customer would need to know several size scales when shopping, making shopping a complicated experience. The advantage is that fit could be fine tuned, maybe.

So who is to blame when clothes don't fit? Is it the size chart? Maybe, maybe not. There are so many variables that it is hard to select just one reason. The fit model used in pattern development may match the size chart, but not be representative of the consumer. In other words there could be a mismatch between expectations and reality between the manufacturer and the customer. Grade rules may not match or equal actual body grades - which is a discussion for another article. Perhaps the size chart information was incomplete, lacked sufficient instruction, or had a typo. Poor construction or poor fabric quality play a factor. When analyzing sales information and returns, all of these things have to be considered.

January 08, 2015

The history of standardized sizes for clothing

Do you ever wonder how people came up with the idea of sizing clothes? The creation of sizes allowed for the mass production of ready-to-wear garments. It was not created at a meeting of industry professionals, but evolved over time. Great leaps in sizing occurred because of war - somebody had to quickly and efficiently outfit an army.

Winifred Aldrich traces the development of sizes and ready to wear in her article History of Sizing and Ready-to-Wear Garments found in the Sizing in Clothing book*. Aldrich is a British pattern maker, designer, and researcher. I own two of her pattern drafting manuals and consider them among the best drafting manuals available (link in the sidebar to the left for the children's drafting manual). She knows her stuff, and she presents it well.

The understanding of body proportions began slowly with tailors producing clothing for men. They used strips of paper to measure the body and transfer the measurements to cloth. In time tailors devised tape measures and drafting systems. A size was not the beginning of the drafting job, rather the completed garment represented the size of the customer. As the industrial revolution progressed, tailors began to teach and sell their drafting systems. This included some already drafted patterns, sometimes in more than one size.

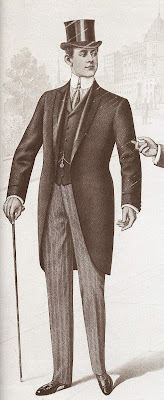
Tailor taking measurements for a suit A well tailored gentleman

The concept was revolutionary and men began to be able to purchase their clothing ready made. Women, on the other hand, still had most of their clothing custom made into the early 20th century. There were attempts at creating patterns for women with named sizes, but it still required customization. There was a lack of knowledge of women's body measurements most likely because of the Victorian ideals of the time.

Victorian women and their clothes

It is important to understand that our understanding of body measurements and proportions were not formalized until the 1940's. Ruth O'Brien, an employee of the U.S. Department of Home Economics and the Department of Agriculture, was commissioned to conduct a body measurement study of the American population. The purpose was to create a set of size standards based on reliable data that the apparel industry could use. The work involved in this study was enormous and revolutionary. O'Brien and her department created a measurement procedure that is still in existence today (only to be superseded by 3D body scanning). The data from these studies have been study and analyzed around the world.

To put this in perspective, it wasn't until the 1940s that we could finally see and understand human proportions with any clarity. It's easy to pan this early work as outdated and wrong but the 1940's was not that long ago. We still have so much to learn and understand.

A fun little factoid. Grading using the shifting or slide method, a common method still used today, can be traced back to 1908.

Aldrich's article goes into much more depth about the history of sizing. She includes pictures of early patterns and sizing systems. It is well worth a read if you can get a copy of it. This article is a combination and expansion of two previously written articles found in the journal Textile History.

*As I review individual articles from the Sizing in clothing book, I will not give a detailed discussion of each article. Rather, I will summarize and highlight a few key points along with my own thoughts on the subject.

October 27, 2008

A toddler sizing rant from a frustrated mom

This mom's blog about twins Hannah and Sophie gives another perspective on the children's sizing problem. I feel her frustration, and I can understand because as a pattern maker and designer I have difficulty getting the sizing right too. The comments on that particular entry suggest she start her own business selling clothes that fit.

If she were to start a business selling toddler slim clothes, she would discover the same difficulties as other children's fashion designers. Sizing is a big problem that falls all over the anthropometric map. Adult sizing is rather stable in the sense that adults reach a size and tend to stay there - disregarding weight gain or loss. You can categorize adults into sub-groups with similar body proportions and sizing. You can do that with children too but the sub-groups are transitional. Children grow as they age, changing from one group to the next in progression. Ideally, children's clothing allows for that transition in a smooth fashion. In reality, children will occasionally have clothes that are too short, too long, too wide, etc. It is impossible to accommodate them all because they don't all start from the same place. Genetics and individual circumstances play a big part.

Simplified growth chart for children

This not offered as an excuse for the industry. Surely some creative DE could provide clothing for Hannah and Sophie that is comfortable and fits well. I suspect that the twins were premature because of TTTS. The girls appear to be thriving and doing well. Children born prematurely are a unique sub-group that falls outside the norms. They tend to be smaller and grow differently than other children. It would be an interesting challenge for someone to come up with a product line to help them. Any one up for it?

June 27, 2006

Creating a grading standard for children's clothing

Before I can move on to the grading question, I must make a couple of comments on my previous post. The best time to determine a sizing standard is at the very begining of your company. If you have been in business for 30 years, for example, it will be very difficult to change things around. So please, please do your homework.

Another thing, you can make your sizing standard anyway you want. Even though I am suggesting a simplified sizing standard, it may not be appropriate for you. If your intended customer is a big box retailer, it may be too simple. In fact, they may not like it. They are accustomed to choosing from a lot of different sizes. If you become part of a private label program, they will tell you what the sizing standard should be anyway. If you have something similar already set-up, there will be less stress for your patternmaker. Again, the sizing standard suggested in the previous post would be more appropriate for a company targeting specialty boutiques and small retailers.

Ok. Now the grading questiong...

"Can't we use the 3mo size for our base size and grade everything up from there?"

The motivation for this question is to save some work. In essence you make your pattern only one time and let the grading take care of all of the other sizes. While the idea is good, it presents some problems.

First, it is important to know how a child grows. A very good description and diagrams are shown in the book Patternmaking for Fashion Design by Armstrong. In my second edition of the book, it is on page 674. Up to about age 3 children are cylindrical in shape. There is little differentiation between chest, waist, and hips. At about age 4-5, girls start to develop a waist. At age 8, there is more definition and curves. Boys and girls are similar in shape up to about age 8.

Because there is a change in body shape at regular intervals, a patternmaker will break-up the sizes like this:

0-3M to 24M, 2T-4T, 4-6x, 7-16

By breaking up the patterns into these size ranges, a patternmaker would then make base size patterns in a 12M, 3T, 5, and an 8 (or whatever sizes are chosen). You could sample your initial style in any size you prefer - hopefully a middle size. When the design is approved and read to go into pre-production, the patternmaker will then make patterns for your style in each of the other base sizes. Those patterns are then graded for each range.

Some manufacturers will go to the trouble of sampling their style in each range. Retailers like to look at more than one size range because they have to "see" how to merchandise their floor areas. It is possible you will end up making a lot of sales rep's samples if you plan on selling the whole range. These extra samples are called sisters or brothers.

Even with our simplified sizing standard, you would still break up your sizes like this:

0-3M to 3, 4-6, and 7-16

Now some design entrepeneur's may still insist on having only one base size and grading everything off of that. What will happen is you will introduce errors into your patterns in the extreme ends of the range. The grading will be more complicated. The fit will be off in the transitional sizes between infant to toddler, young child to older child. For organization sake, your patternmaker/grader will greatly appreciate having things broken down into simpler groups.

Also, you will be bucking industry standards and not playing by the rules. Walk into any department store and look at how the children's clothes are arranged. You will notice that the clothes are arranged together in the size ranges we talked about above - infant, toddler, young child (4-6x), and older child (7-16). Your order form should have your styles broken down similarly.

By this point you are probably thinking that it is still a lot of work to make that many patterns for each base size. If you have a CAD system with nifty pattern drafting and grading capabilities, it isn't really that big of a deal. Even if you had to do it by hand, it should only take a day or so. Your patternmaker will be just repeating the same drafting process over and over again. If you make dozens of styles every season, you may seriously consider investing in a CAD system.

July 02, 2006

How to create a care, content and sizing tag for clothing

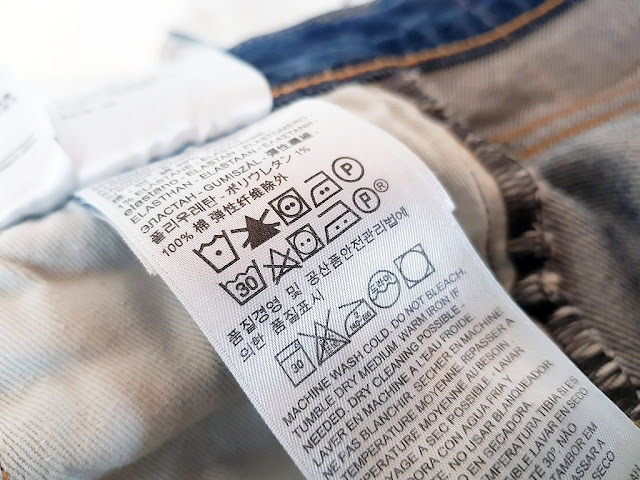
Clothing care and content label
Roland Russwurm [CC BY-SA 4.0 (https://creativecommons.org/licenses/by-sa/4.0)]*

Deciding what information to include on a hang tag or a garment's care and content tag can be frustrating. There are certain legal requirements for care and content tags of items sold in the United States and that can be found at the Federal Trade Commission website.

Let's start with the care/content tags. Let's assume that you have complied with all of the legal requirements. What else should go on your care and content tag? The answer is as little as possible. The tag has a finite amount of space, and it must be legible. But there is some critical information that will help the consumer pick just the right size.

Sizing information is one of those things that should be on the tag. For children's clothing it helps to put not only the size but also the weight. It would be nice to also include the height, but I rarely see this done in the US. I have seen the sizing information arranged different ways. For example, it could read like this: 0-3M (7-12lb).

This additional bit of information is very important to consumers. Even though we use a size system that designates an age, children come in all shapes in sizes at each stage of life. Ever hear of a newborn weighing 9lb? A newborn weighing 9lb at birth will weigh 12-15lb at about 3mo, and quickly move into 6mo clothing. Including the weight on a tag helps take out the guess work for the consumer. And don't forget every children's company breaks their sizing down differently. A 3mo outfit from one company will not be the same size as a 3mo outfit from another.

If there isn't room on a care/content tag for additional information, then it is helpful to include it on a hangtag. BabyGap has sizing information available on a card that is the size of a business card and it can be stuck in a wallet. What a great service for the customer! Not to mention, it probably helps reduce returns.

Most moms know the height and weight of their baby. They are given this information when they visit their pediatrician. The doctor will compare the baby's height and weight with a growth chart to make sure the baby is growing properly

If you have an online store, a size chart that includes basic height and weight information will greatly help your customers.

*Photo Credit

April 09, 2015

Grading from body measurements pt. 1

Pattern grading is the process by which new sizes are developed from an existing pattern. There are various methods or processes used to grade a pattern. These methods include slash-and-spread, shifting, and CAD. At the end of the day, each method accomplishes the same thing, a new size.

The apparel industry has received a lot of criticism for their sizing, especially of women's clothing. At it's core, sizing goes hand-in-hand with pattern grading. You have to define your sizes in order to grade a pattern. In order to grade a pattern you have to know body measurements for each size. The common grade rules for women's apparel is the 1", 1.5" and 2" grade rules used in the United States. Similar grade rules are found in Europe and the UK. The primary criticism is that these grade rules are not based on anthropometric data, or actual body measurements. Instead these grade rules are just pulled out of a hat without regard to women or their fitting needs. These arbitrary grade rules are merely for the convenience of industry.

This is the point of view taken by N. A. Schofield in her article Pattern Grading found in the Sizing in Clothing book. The goal of her research was to test the idea of creating grade rules based on actual body measurements rather than an arbitrary grade rule. There has been a lot of criticism of the industry over sizing and it is a worthy goal to research alternatives. Asking the why questions. Why does the apparel industry do things the way they do? Why do we grade women's clothing this way? Can we do it differently? I've asked a lot of these same questions as I've looked at children's clothing. When I started out, I didn't understand the why and sometimes the answer was not satisfying. I can totally get behind Schofield's motivation to try and find an answer.

And yet, I feel like I am setting up to be very critical of Schofield's research and I don't want to give the impression, as an industry professional, that even asking the questions were wrong. She was right to ask the question and to test an alternative. The results of her research are interesting and ironically (and indirectly) add support to current practices.

So here are some of Schofield's main arguments:

1. 1", 1.5", and 2" grade rules are not based on anthropometric data. Meaning it is not based on body measurements or the proportional relationships between body parts/areas. These grade rules were intended for the convenience and ease of hand grading.

2. Grade rules should be derived from body measurements. This means that grade breaks between bust, waist, and hips should not be consistent. Instead of a 34-36-38 chest measurement, we should be seeing a 34-35.5-38 (just as an example), chest measurement.

3. Size prediction and also body measurement prediction needs refinement. This idea is rather complex. Body measurement studies create a lot of raw data. In order to make sense of it, statisticians will test size prediction by using one or two body measurements. So can you predict the overall body size by using just the height or chest measurement? And if you do that, what influence does that have on other body measurements? If a person gets taller, do they also get wider? It is a complex question and not easily answered because there are so many variables. Statisticians bring order to raw measurement data so that we can organize the body measurements into sizes. They do this by averaging and, in some cases, normalizing the data so we can work with it easily. Schofield implies that we should just rely on the raw measurement data.

The ultimate goal of this study was to improve overall fit of women's apparel by basing grade rules on actual body measurements. I'll have to break up my review of this study into multiple blog entries because I have a lot to say about it. So stay tuned.

April 17, 2007

Troubleshooting a stitching problem on a Singer Hemstitcher 72w-19

I have previously blogged about my hemstitcher and how temperamental it can be. I would blame most of its stitching problems on its "personality" and just try to deal with it. The primary problem I have experienced is skipped stitches. Skipped stitches are very bad because that extra thread can get caught around or under the piercers where they are cut. Usually, I would experience skipped stitches with either the left needle or the right needle, and occasionally both.

In the past, I would work through the most "obvious" and possible solutions to prevent skipped stitches. Most how-to guides suggest rotating the needles out ever so slightly. I would thoroughly clean, oil, and lube. I would check the threading. I would replace and reset the needles. Often, I could solve the problem enough that I would experience little thread breakage. That was until I worked on a blanket order that consisted of flannel fabric that came from H - E - double hockey-sticks L. If you heard a scream, followed by head banging 2 weeks ago, it might have been me.


The picture on the left shows the stitching along the long grain (the grain parallel to the selvedge edge, also called the warp). You can see the frequent skipped stitches. In fact it skipped so often that I was experiencing thread breaking and thread fraying every 2 inches of stitching. The picture on the right shows the stitching along the cross grain or weft. The stitching would be absolutely perfect - no skips or thread breakage.

My initial thought was there was something wrong with the fabric. It either was a blend or had too much sizing. My hemstitcher will not stitch reliably on polyester fabric blends, but a burn test confirmed it was cotton. I couldn't wash the blanket to rid it of the sizing. Some flannels do not look the greatest after washing, and usually the sizing does help with the stitching. Too much sizing is an indication that the fabric is of lesser quality, although not always. This order was a 45" x 45" blanket consisting of a panel print on the front and a coordinating print on the back. I had very little scrap left over to do any testing to see if it was indeed the fabric. Stitching on other softer flannels was easier, although I was still getting thread breakage.

It took me a while to finally figure out what the problem was. One significant clue is the stitching difference between the long and cross grains. There are distinct properties to these two grains that affect how fabric behaves and also how it behaves as it is stitched. The long grain (warp) consists of yarn that is pulled taut. The cross grain (weft) consists of yarn that interlaces with the long grain. It goes over and under the long grain yarns. If you fray out fabric, you will notice that the cross grain yarn has a wave and the long grain is straight. You can pull the cross grain yarn like a spring, but the long grain will snap. Because of this, the cross grain of a plain weave fabric has a natural, built in stretch.

While stitching, a hemstitcher inserts two needles into a pierced hole. As the needles come up, they swing out pulling the yarns of the fabric apart. The next stitch will hold the hole open. Each hole requires three stitches. The machine has to work harder along the long grain of the fabric because of the inherent nature of that grain. The machine works less hard on the cross grain because of the natural stretch built in.

Ok. So now I knew the problem, but I didn't know how to solve the problem. I have to stitch around all four sides of my blankets, so there had to be a way to adjust the machine so I could stitch and not get anymore skipped stitches. I pulled out my usual help guide in diagnosing stitching problems. The Coats & Clark pamphlet titled The Basics of Hand & Machine Sewing, published in 1995. This is a fantastic pamphlet that covers many aspects of needles, thread, proper tension, etc. I don't know if this is available anymore, as I acquired the full set of Coat & Clark pamphlets in college. The best part of this particular pamphlet is a Checklist in Case of Trouble. Every possible stitching scenario is covered.

At the top of the list for skipped stitches was Wrong size or type of needle for the fabric. But I skipped that because I assumed I had the right type and size of needle. Other solutions suggested:

Timing of machine - check
Lint - check
Threading - check
Damaged needle - check
Sewing at a steady, even pace - check
Fabric with excess finish - ? possibly
Hold fabric taut while sewing - check

Nothing seemed to make a difference. I think the excess fabric finish contributed to the problem, but was not the root cause. Stitching on other fabrics showed the problem still existed. So I finally decided to cave and try the next needle size up. It couldn't be that simple, but why not try.

In a true, head smacking moment, the machine stitched absolutely perfect on both grains. And it makes sense too. A larger size needle is stronger and can pull the yarns of the fabric apart easier. Since I have to stitch through two layers of flannel, a larger size needle is necessary. Now I have to decide what to do with 100 size 12 130x3 needles, while I wait for an order of size 14 needles.

One thing I am not sure about. I had some Singer brand size 14, 130x3's laying around loose in the table drawer, which work great. The Singer brands are known to be the best, but also the most expensive. I am ordering the Organ brand (which is what my size 12's are) in the size 14. Hopefully, there isn't too much of a quality difference.

April 19, 2006

Sizing Up Children pt. 2 : How to find size charts for children

"The problem is children’s clothing manufacturers cling to their 30+ year old size charts. They protect their sizing information like a trade secret (not uncommon in every segment of the fashion biz). And while major studies are being done on men and women, they are not being done on children. (If I am wrong, please let me know)."
After doing some more reading at fashion-incubator, I discovered I am only half right. The 30 year old study on children's measurements done in 1975/1977 is publically available here: Anthropometric Data of Children. This is the data that most manufacturers continue to use. Since it is freely available, there is not much incentive to change. I have been using size chart information based on this data for at least 10 years because this is what the companies I worked for used. To be fair, it is still fairly good information.

Another source for sizing information is available from ASTM International. Kathleen Fasanella at fashion-incubator.com lists the documents to search for at her blog: How to obtain sizing and grading info. This data set is updated about every five years or so. Even though the data information is priced fairly, you still need to buy 3 charts to cover all children infant through teenagers, a price of about $90. The other thing to consider when purchasing from ASTM is that you only license the information. Be sure to read the license agreement! You are given permission to download on one computer and print out only ONE copy of the charts. You also give permission to ASTM to come and inspect your company computer and materials at any reasonable time to ensure you are complying.

As a small company, I do not like this license agreement. What if I have two or three technical designers who need access to this chart? My costs for this information multiplies! Plus, who wants to allow some other company/organization to come in and inspect your premises at will?! I wonder if ASTM has ever tried to enforce their license?

I also don't like the propriatary nature of the data. The only way to get cooperation from businesses to standardize is to make the information available for free. I realize as an organization they need to make money to support a needed role. But they could take a hint from other opensource projects and raise money by donation or some other model.

Because of the difficulty with ASTM, I now understand why companies continue to use 30 year old data.

September 02, 2008

Comparing pattern shaping and children's sizes

As many children's wear designers know, children's clothing has a lot of sizes. It can become quite the dilemma when trying to decide which sizes to offer. Some DE's offer their styles in as many as 21 sizes. Way back in 2006 I suggested a theory to reduce the number of sizes by combining or eliminating some of them. You may want to go back and review the entry Too Many Sizes and other related entries to see how I have arrived at today.

Anyway, I have tried to put the theory into practice and I have made some progress. I only offer my styles in sizes 3M to 6x. I am still working on the grades for the 4-6x styles, so I am nearly there. My sizes break down like this:

3M, 6M, 9M*, 12M, 18M

24M/2T, 3T, 4T/4

5, 6, 6x

I don't really consider the 9M as a true size. It is a half size between the 6M and 12M and is graded by splitting the grade between the 6M and 12M. The 24M and 2T are essentially the same as are the 4T and 4 - those sizes have been combined for grading purposes. My website still delineates the combined sizes as separate sizes.

This blog entry is not a discussion on the why and wherefores of children's sizing - a surprisingly complex and controversial topic. Instead, I wanted to show a possible grading/pattern problem that shows up now and then. I have been grading and comparing my basic bodice blocks. You should do this too because someone will eventually see the problem and it will be more difficult to fix.

I have drafted my basic bodice block three times, in each of my sample sizes for each of my size ranges - 12M, 3T, 5. (BTW, you can't use the same pattern piece and grade it in all the sizes. Believe me, that is one large headache). The next step is to grade each range separately. Keep in mind that each sample size will have slightly different shaping, but the general shape and proportion should be related.

Before getting too far, the outer fringes of each size range should be compared. For example, the size 18M should be smaller than the 24M/2T and the size 4T/4 should be smaller than the 5. Originally, I had graded the size 4T and 4 separately. In other words the 4T was based off the 3T sample and the 4 was based off the 5. The reason I combined the 4T and 4 was because the shape and overall size was so similar it was a duplication in effort, and I also ran into the problem where the 4T was actually larger than the 4. If you do separate out the sizes than the 4T must be smaller than the 4. If you don't check your grades, someone will bring two dresses to you and say the patterns are wrong, size labels are switched or some other problem.

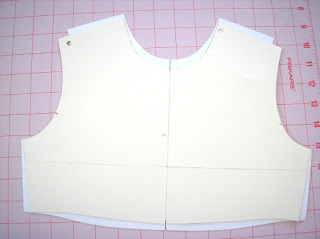
In the photos below you can see the problem more clearly. In the top picture, the size 4 is laying on top of the 4T. You can see the 4 is smaller than the 4T. In the bottom picture the 4T is on top of the 4 and it is clearly longer with a larger armhole.

Comparing pattern shaping and sizing of a bodice frontComparing pattern shaping and sizing of a bodice back
To solve this problem, I have been reworking my toddler patterns. I started by combining sizes 4T and 4 so I have one less size to grade. Next my toddler bodices were redrafted to have a shape similar to the 5 (less boxy, smaller armhole). Finally, I regraded the toddler patterns. This is still a work in progress, but the results are much better - each size is progressively larger.

I had the same problem with my size 18M and 24M/2T. In this case it wasn't a grading problem. Instead my infant patterns were proportionally too long compared to the toddler. I fixed this by shortening the bodice slightly.

Anyway, the point is that you should make sure and check the sizes on the outer fringes of each size range and make adjustments so that each size is progressively larger. You can adjust the grade rules (much easier in CAD, btw) or change the shape of the patterns.

(I am ignoring the idea that in the real world an 18M child could be larger than a 24M child. If that is the case, a parent would buy a larger size than 18M and just complain about the craziness of US sizing standards. When I did private label programs for the big box retailers their grade/POM charts progressively got larger with each size. Logically it makes sense even if reality is very different. Anyway, you can allow your sizes to overlap if you want, you'll just need to have an explanation as to why when a sewing contractor becomes confused.).

December 20, 2006

A boy's shirt pattern fix for Butterick 6030


About a year ago I was asked to make a a white shirt for an infant boy's christening. I didn't have the time to draft the pattern myself, so I turned to a ready-made pattern. Out of the big 4 pattern companies only one had a "traditional" woven shirt pattern. I could have saved myself a lot of stress by drafting the pattern anyway. I didn't really have time to fix the problems in the pattern either and I was disappointed by the results. Here is a picture of the pattern envelope. Maybe you can spot the problems too.

The first obvious problem is the collar and neck. The collar points splay apart too far. The collars don't meet at the center front neck and the front neck seems too low. On top of that the collar looks proportionally too large. Compare the drawings with the actual pictures. The drawings show a convertible collar with a stand in the back.

The problems become more obvious when you study the pattern pieces (sorry the pictures are fuzzy - tissue paper is hard to photograph).


1. On the front bodice piece the front neck is a V-shape and the neck is too low at center front. The front neck is just too big. To correct this problem the neck needs to be raised at center front and the front neck needs more curve.

2. Notice the large, built-in front facing. It is at least 2" wide, way too large for an infant shirt. This should have had a traditional built-in, double fold facing found in adult shirts. I will illustrate this later.

3. The collar is too wide. Of course, this piece has the obligatory 5/8" seam allowances. The collar has little shaping, except for a slight narrowing at the back neck. It is essentially a rectangle.

4. When I sewed the sleeves in the first time - there was too much ease. The shirt has dropped sleeves. There should be no ease in this style of sleeve at all. Also notice the strange jog on the right side seam. I have no idea why the sleeve turn back would be extended longer on one side than the other. I drew a red arrow down to indicate that the sleeve cap needs to be flatter.

5. The other major issue is the sizing used by the pattern company. The infant patterns are sized S-M-L-XL, divided up by height and weight. To me, those size labels are almost meaningless. I had to pull out my size charts to figure out what size matched up with the appropriate ages, heights, and weights. The sizing doesn't break-down very well because their height-weight measurements didn't match up with any of my industry charts. This is my best guess on Butterick's sizing:

Small=3-6M
Medium=6-9M
Large=12-18M
X-Large=24M

I have wanted a basic infant shirt pattern for a while, so I am going to take this pattern and fix it. The first step is to trace off the pattern pieces, minus the seam allowances. Normally, I do my pattern drafting with the seam allowances on - typical of the industry. In this case, I want to redo the seam allowances so they are appropriate for the seam. I will add 1/4" seam allowances for the neck and collars and 3/8" for everything else. The hem will have a 1/4" rolled hem - 1/2" hem allowance. I will fix the neckline and correct the sleeve. Finally, I will redraft the collar completely - the original is useless.

Once the pattern is fixed, I will re-sew it up. The hope is, it will look better and be easier to sew.

April 16, 2015

Grading from body measurements pt. 2

This is part two of an ongoing discussion about N. A. Schofield's article Pattern Grading found in the Sizing in Clothing book. Part one is here.

My initial reaction to the idea of grading from body measurements was, "Well, of course we should." And in fact, we do for children's clothing. It seemed rather obvious to me to look at children's clothing as a model. Children's sizing is based on the idea of growth, meaning that the measurement intervals between sizes are not always consistent.

Let's look at an example for a 4-6x size range.*

For sizes  4, 5, 6, 6x
Chest: 23, 24, 25, 25.5
Waist: 21.5, 22, 22.5, 23
Hip: 23.5, 24.5, 25.5, 26.5

The grade works out to be, choosing size 5 as the base size:
Chest: 1, 0, 1, 1.5
Waist: 0.5, 0, 0.5, 0.5
Hip: 1, 0, 1, 1

In this example, we have a 1" chest grade, except for size 6x which is 1.5". The waist is a 0.5" inch grade and the hip returns to a 1" grade for all sizes. Each body measurement area has it's own grade.

In women's clothing a 2" grade means that the interval change between the sizes will be 2" for chest, waist, and hips. Though even this isn't true across all brands, and you will find variations. (IMO, this is a good thing)

I don't know the history of women's sizing well enough to explain how this mode of practice came to be nor exactly why. It is clear that it does make grading, especially hand grading, much easier in practice. It is also unclear to me that grading is the source of our fitting woes. Nevertheless, it does make sense to me to go back and look at body measurements and devise a more precise grade rule.

The question then becomes, which body measurements do we use? In my children's example above, the numbers are still nice and easy to work with. The body measurements have been intentionally manipulated to be easy to work with. Raw measurement data was averaged, sorted, and studied to arrive at some numbers. Those numbers were not easy to work with, so a group of industry professionals sat down and made them that way. They modified certain measurements by about 1/8" to achieve consistency. Their modifications were rather minor and easily fall within a statistical margin of error. If you read their reasoning, it makes sense. This manipulation of measurement data for ease of use continues today in more modern measurement studies. It seems deceitful, but at the end of the day is infinitely practical. ASTM D4910 inherits this method of data handling from the measurement studies done in the 1940s, but does provide some updated measurements.

Looking at the Misses body measurement chart, ASTM D5585, it seems to be arranged and handled in the same way as the children's body measurement chart. IOW, the chart does not show a 1, 1.5, or 2 inch grade in the body measurements. It is a lot like the children's example above. There does seem to be a disconnect between measurement data and grading, at least on the surface. Individual companies will decide how to interpret and implement measurement data, and therefore their grade rules. (IMO, I think this is a good thing). And some will use a 2 inch grade, and some will not.

So what measurement data did Schofield use? She rejected the ASTM charts and created her own version of measurements derived from body measurement studies. This presented a problem because measurement studies do not always include the measurements needed for pattern making and grading. Schofield did not normalize the data, in other words make it easy to work with. Also she had to figure out how to deal with missing measurement data. I no longer have a copy of the article and can't look back, but Schofield selected certain measurements over others. How and why she handled those measurements puzzled me.

I believe Schofield's goal was to remove the idea of maintaining an ideal proportion or predictable pattern shape. She wanted to see what the body measurements really did between sizes.

Her results were almost predictable. More on that later.

*These measurements come from the withdrawn child measurement standard CS151-50. Measurements are in inches.

March 05, 2015

Communicating size and fit through size labels and charts

The primary way most clothing brands communicate size information is through a size label. This works in most retail settings. Online (and print catalog) clothes shopping adds the benefit of including an easy to use, sometimes interactive size chart. Additional instructions on how to measure yourself is also helpful.

Pictogram showing body dimensions for a specific size
A pictogram showing body
dimensions for a specific size.
None of these solutions are completely fool proof. First, the manufacturer interprets and adapts measurement data to meet the needs of their identified customer. This means they have created and implemented a size system in anticipation of what their customer wants. But a customer may want something to be closer/looser fitting, and shorter/longer lengths than the manufacturer. How does one balance size and fit for a diverse population with ever shifting expectations?

The current trend among new fashion companies is to design for a very narrow customer profile. By targeting a very specific customer, the manufacturers can optimize the fit of their brand to their customer. Larger big box brands have to fit a wide range of body shapes and sizes and their clothes will never fit as well as a more exclusive brand. In some cases a manufacturer will modify their sizes for an existing size system, so that they change what a size means for their target market. In other words, a size 8 for one brand will mean something entirely different for another. This is why there is so much variation in the marketplace between brands.

On the surface this sounds like vanity sizing run amok. If manufacturers change the underlying sizes to fit their version of a size, then surely they are deceiving us into believing we are a smaller size than we truly are. Truth in advertising and all that, right?

The problem with only one size standard across brands is that it does not allow for variation. Women in particular have a large variety of body shapes and sizes. Because manufacturers are free to adapt to meet the needs of their customers having multiple versions of a size will allow people to find the version that fits them best. Once they do, and if the styling is right, they will become loyal customers.

The problem comes back to how to communicate that to the customer. As I said at top, providing more information helps the customer to make a more informed choice. And that is the true challenge.

*This blog entry is part of my on going review of Sizing in Clothing, and is a discussion inspired by the article, Communication of sizing and fit by J. Chun. This article goes into a little more depth about how sizes have evolved and what they might mean.

March 19, 2015

Production Systems, Sizing, and Quality Control

Having worked in the apparel industry for a while now, I sometimes have to take a step back to see how much goes into the design, production and selling of just one item. The goal is to work out all of the bugs before an item goes into production. Still, things can and do go wrong and those things can affect the size of an item. Where can things go wrong?

1. Pattern making and grading


A poor pattern or poor grading certainly affects the size. Inadequate seam allowances, missing notches. There are a lot of little things that can go wrong, though if you read the rest of the list, you can see there are a lot of other areas that can cause problems.

2. Marking


Marking is the process of laying pieces out in preparation for cutting. Many markers are now made by computer, some automatically. There are various setting that allow the marker maker to bump pieces closer together, tilt, or rotate pieces. Each of these options can affect the final outcome, so they must be used rarely.

3. Spreading


Spreading is the process of laying fabric on a cutting table in layers. Certain fabrics stretch during this process and need a certain amount of time to relax. If the style is cut without the fabric being allowed to relax, then the pieces will relax after being cut and the item will end up too small. Layers can also shift and move.

4. Cutting


Accurate cutting is the only way to ensure the item ends up as intended.

5. Sewing


Taking too big or too small of a seam allowance affects a size. Seam allowances should allow a cut off allowance because nearly all operators trim off a little bit.

6. Finishing


Finishing includes steaming or ironing. Too hot a temperature can shrink an item.

These problems can be minimized by implementing systems and policies during each phase of development and production. One company I worked for had a quality audit system that checked each step of production. Anything that had finally made it to production had been perfected, for the most part. There was that one style that shared patterns with another style. A problem came up in production where the obvious solution was to make a new pattern for the new fabric, but that never happened. Production just had to deal with it. But those situations are rare.

In any event, systems (procedures/policies) have to be implemented for development, production, and finishing to catch problems before the item is shipped to the customer..

This blog entry was inspired by the article Production systems, garment specifications, and sizing by S. P. Ashdown, L. M. Lyman-Clark, J. Smith, and S. Loker in the book Sizing in Clothing.

April 21, 2006

A brief review of Metric Pattern Cutting for Children's Wear and Babywear


I finally received a copy of Winifred Aldrich's book on pattern cutting for children. I have never created my own blocks for children as I relied on my employer's existing pattern blocks. In college and in my first employment, I used Helen Armstrong's patternmaking book. The Armstrong book completely skips over infant sizes - at least in my edition of the book. Just about any patternmaking manual will give basic instructions on how to draft a pattern. The problem is the drafting instructions do not give you the correct measurements or proportions for an infant. Aldrich's book is an exception and starts off with basic drafts for infants. So now that I have this book, I finally feel like I can make progress on developing my own pattern blocks for children.

I am accustomed to American sizing and Imperial measurements. Aldrich is from Great Britain and she uses British fashion terms and metric measurements. I have to read things very closely and study the charts carefully to understand the things she is talking about. Despite that, the book is excellent. I can sit at the feet of a master pattern cutter and learn from her years of experience and wisdom.

I have yet to decide on making my blocks using the metric system or not. I may use her drafting methods and substitute my own imperial measurements. I have one measurement chart based off the US measurement study done in 1975 and I keep going back to it. Plus, I like the way she has broken down infant/toddler sizing to reduce redundant sizing. I will blog more about this topic later.

The book includes data from Aldrich's own measurement study on children's sizes. And surprisingly, her measurements are not dissimilar from a British government study released in 1988-1989. The British (and really the EU)  designate children's sizes based on height with age being a reference. There are many advantages to such a system. Again, more about that later.

2019 note: Links are Amazon affiliate links. When I wrote this, I referred to an earlier edition of both Winifred Aldrich and Armstrong's books. Links are to newer editions for the reader's convenience.